


“Surely the apple is the noblest of fruits” – Henry David Thoreau
American homesteaders and gardeners have a high degree of familiarity with eating and growing apples. Who hasn’t enjoyed biting into a fresh, crunchy apple on a cool fall morning? Most homesteaders plant an apple tree or two early on in the process of establishing their property. This makes sense – the apple is deeply connected to American pioneering history and culture. Johnny Appleseed traveled the Ohio River Valley and parts of Appalachia planting apple seeds. Oregon Trail settlers carried seeds and seedlings with them when they came west as they established their new homes. Yet, beyond a general familiarity, or owning a few trees, few of us have taken the time to learn how to maximize the apple’s mighty potential for survival and homesteading environments.
I grew up on a commercial apple orchard on the irrigated eastern steppe of the Cascade Mountains. While my childhood was spent working after school, weekends and summers in our Red and Golden Delicious orchards, it wasn’t until later in life after careers in the military and business worlds that I bought our homestead and began the process of applying the technical skills of successful orcharding on my own. In the intervening years, the smaller family orchards of 10-100 acres that were so prevalent in my childhood have almost entirely disappeared. Massively scaled operations have become a necessity for commercial orchards that typically exceed 1,000 acres. These are farmed by employees who specialize in their individual unique functions such as irrigation, pest control, etc. SurvivalBlog readers will not be surprised that one of the results is that individuals with an understanding of how to maximize one’s own orchard are a dying breed.
This article will provide a foundation to start learning more about maximizing your apple orchard’s benefit, develop the important skill of grafting to improve your varieties, and to think a bit differently about the overall utility of apples.
Planning the Orchard to Maximize Benefit
Readers will need to consider local climate, soil, slope, sunlight, availability of water and other factors in selecting their homestead’s orchard location and size. There is no one right solution for planning all orchards but several principles should be considered in advance of planting your first trees. First, homesteaders should think beyond simply having an individual tree or two of their favorite variety for their family’s personal consumption.
Apples require a pollinator so you will need multiple varieties to enable cross-pollination. Further, carefully evaluate the micro-climates of your retreat and try to avoid planting your trees in cold pockets where frost can kill buds and destroy your crop. Additionally, apple varieties have different fruit maturation cycles that correspond to early, mid-season or late-season harvest windows. This enables fresh apple consumption to extend for up to 4 months of the year. Your specific location will dictate the options available to you, but consider planting three or more varieties, including an early, mid-season and late-season to achieve this elongated fresh harvest window.
Today’s technology of controlled atmosphere storage and trade with the Southern Hemisphere allows us to find apples of our favorite varieties year-round in the grocery store. But in a TEOTWAWKI scenario, we’ll be on our own. A well-planned orchard, however, will enable the survivalist to utilize apples nearly year-round. If you plant multiple varieties including those that store well, apples can be enjoyed in a grid-down environment for 9+ months of the year with ease.
In my childhood, we enjoyed “summer apples (Yellow Transparent) starting in July each year. Early season (August) varieties include Gala, Jersey Mac, Gravenstein and Earligold. Mid-season (September) varieties include Empire, McIntosh, Honeycrisp, Jonathan and Golden Delicious. Some later season (October) varieties are Red Delicious, Northern Spy, Cameo, Rome, Enterprise, and Fuji.
Good storage options that are readily available include Granny Smith, Winesap, Pink Lady/Cripps Pink. In our climate, we can store these three late season varieties without refrigeration in a cool/dark location for 5-6 months with only some loss of quality. These may not work with your climate or taste preferences, so evaluate personally. Also, apples require cross pollination so research pollination options and plant pollinators near the trees they benefit to maximize fruit set.
Second, don’t forget the apple’s utility beyond simply personal eating when determining how many trees to plant. Few of us would need more than a tree or two for fresh eating, but have you considered that apples make excellent feed for livestock? People think of feeding apples to horses or pigs, but may not be aware that apples can be used as a major alternative feed for cattle as well. In our region, an inexpensive way that small scale cattle operations cut down on hay costs is to purchase tons of cull apples to feed their animals.
Apples don’t provide all the nutrients cattle need alone, but are worth considering as part of a fall/winter feed mix. Further, apples are an excellent source for beverages (ciders), food preservation (vinegar), dehydrated snacks, and (recognizing varietal differences) even pectin for jams and jellies. When you consider the full range of uses for apples, many homesteaders will understand why pioneers planted many apple trees on their properties. Some early homestead laws allowed a settler to lay claim to a piece of property if he planted 50 apple trees on it. The reasoning behind that might make you question whether you have enough apples planted on your property!
Finally, a few closing thoughts about site selection, irrigation and layout to maximize production. As you consider your property, apples (and most fruits) will need well-drained soil that has regular watering. Apples don’t do well with “wet feet” for extended periods of time, but won’t produce without plenty of water. So, don’t plant your fruit trees where it floods, but you most likely can’t only rely on rainfall. Your local county extension agent is an excellent resource if you are unsure of how your region’s rainfall will translate to fruit production. A good rule of thumb is to water your orchard just like you water your vegetable garden. While the root structure of trees are much larger than annual vegetables, you will experience increased production and fruit quality by regular watering.
Most modern orchards (apples, pears, soft fruits, etc.) orient their rows north and south to maximize the light/shade ratio needed for bud development, fruit set, and coloration. This doesn’t mean your rows won’t grow well if oriented otherwise, but simply that you can gain an advantage in light maximization which can be important if you are dealing with shade from nearby trees/etc.
Rootstock Selection and Grafting to Maximize Benefit
Perhaps you read Part 1 and realized that you want to change apple varieties or feel the need to add on to your orchard. This installment will provide guidance regarding your choice of rootstock as well as teaching you the skill of grafting.
My childhood was spent playing and working under the shady canopy of our orchard. At that time, trees were still planted on traditional, non-dwarfing rootstocks that would (if not pruned) grow 40-50 feet tall! If you can find them, older orchards still have this “classic” look – large trees spaced 20-30 feet apart that create an almost park-like setting of total shade when well cared for. While there is no denying the beauty and sentimentality of these orchards, I urge today’s homesteaders to utilize semi-dwarfing or dwarfing rootstocks.
Nurseries sell trees that are a combination of the “rootstock” and the vegetative growth of a specific variety. Generally speaking, you’ll only find trees with semi-dwarfing and dwarfing rootstocks available for sale today. The benefits of these types of rootstocks are a shorter, more efficient tree that doesn’t require as much pruning to manageably produce a crop in a smaller area. Further, modern semi-/dwarfing rootstocks bring trees into production sooner, can have resistance to certain pests/diseases, and produce higher quality fruit.
Another benefit (especially of fully dwarfing rootstocks) is having an orchard that doesn’t require climbing ladders. In our region, some commercial orchards are now combining dwarfing rootstocks and trellising to achieve an orchard where trees are no taller than 7’ or 8’ above the ground. One note: Trees on drawfing rootstock require some type of support.
For those who have apple trees on their property but aren’t happy with the varieties you originally selected – don’t pull those trees out! You can learn how to graft these “bad” trees to what you prefer with just a little bit of practice.
Grafting techniques have been around since Bible times. In fact, the beautiful biblical principle of our life in Christ is illustrated in the New Testament via grafting. As a Gentile, Romans 11:17-24 explains how I have been grafted into God’s family, draw strength from God my root, am to maintain an attitude of thankfulness for my salvation, and should pray for/rejoice at Jews who accept Christ. I’d encourage you to consider this truth as we learn the skill of grafting!
To graft an existing apple tree, you will need scion wood, saw, sharp knife (grafting knife is ideal), grafting sealant, and electrical tape. I will explain the function of each as we step through the grafting process.
First, you’ll need to access scion wood. You’ve been wanting your own Gravenstein, Honey crisp, Fuji or another kind of apple tree? Just find someone who has one and ask if you can take some scion cuttings!
Once you find your source, it’s important to time your cut and care for the scion wood carefully. Apples go dormant in winter and you need to cut your scion wood in mid-winter. Cut the scions from one-year-old wood – last year’s growth. I look for branches at least as thick as a pencil but not thicker than your pinkie finger and cut lengths about 12-24” long.
Once you get your cuttings they will need to be kept wrapped in damp towels and constantly refrigerated –without fresh fruits/vegetables nearby to avoid ethylene damage. If refrigerator space is in short supply (or if your wife kicks you out of the fridge), you can also wrap scion wood in damp towels, surround them in straw for insulation and bury them below the frost layer.
Grafting should be done in mid-spring, when the trees are actively pushing flowers and leaves. You begin by cutting down your existing tree. I typically cut it off at between 2-3 feet in height, parallel with the ground. This should be done when you are ready to graft, not beforehand. A fresh cut is one of the crucial steps to getting good “take” in your grafts.
Once the existing tree is cut down, take your scion wood out of cold storage. I cut off the ends of my wood, then cut the scion into 6” lengths. Once you have these cut, you’re ready to actually graft. Take your knife and cut through the tree’s outer bark in 2 separate cuts – each cut should be ¾” long, ½” apart, and perpendicular to the ground. The key to grafting is to slice through the outer bark to the cambium. If you’re a bit unfamiliar with where the outer bark begins and ends, YouTube has some helpful videos. You have now created the “channel” that will hold the first scion.
Now take your 6” long scion. Be careful not to touch any green wood with your fingers as the surfaces of the scion and contact point on your tree need to be contaminant-free to make a good union. On one end, carefully make one cut at about a 30 degree angle, then rotate the scion 180 degrees and make a second cut at a 60 degree angle in that same end. These two cuts create a nice “wedge” on one end that will be placed between the bark and the cambium of your tree.
Using your knife (but not your fingertips) carefully pry the outer bark away a little bit from the cambium where you made the two perpendicular cuts on your tree. You don’t need to pry it far away – just enough to get your scion “wedge” in to the area. Take your scion wood and gently push the longer edge towards the inner part of the tree and down into the “channel.” The cut needs to be fully within the channel and seated securely but be careful not to push too far down and tear away the outer bark.
Properly seated grafts should stay upright in their “channels” without you needing to keep holding them. Once you’ve completed the first graft, repeat as many times as space allows on your tree. Typically, we put 4-6 grafts on a tree, but you can put more if it has a large diameter trunk. You also can put as many different varieties of apples as you want on the same trunk.
Once all the scions are in their “channels,” we take electrical tape and wrap it repeatedly around the entire trunk, completely covering all the “channels.” This provides added stability. Alternatively, small nails can be used. After this, apply grafting seal (we only use Doc Farwell brand) or paraffin wax to cover/seal any open wound you can see. We cover the top tips of the scions, the open wound of the tree trunk, all the electrical tape and any gaps that exist. Don’t let any gaps open up – keep applying the sealant. You may need to come back several times – it is really important to seal any openings so air doesn’t cause the scion to dry out.
That’s it! In a few weeks green leaves should begin to emerge from your grafts as the life and energy from the root causes the grafted wood to begin to grow. In a few years you’ll have your first crop of the variety you want! I hope this information is useful to you. The homestead orchard plays a crucial role and should be well planned to achieve its maximum benefit.
Do you have a suggestion of early, mid and late season low chill apples for southern coastal region 8-9?
Tall Spindle Apple Trellis,
I was watching a podcast a few weeks ago, http://www.thesurvivalpodcast.com/permaculture-part-five, where they mentioned Tall Spindle Apple Trellis systems that have a high yield. I had never heard of this system before.
Have any readers used such a system and what kind of success as achieved?
Yes. I started one here after learning from members of our fruit society.
one member who does very intense management produced 60,000 lbs on 1.5 acres, but it required lots of cost input.
Beekeeper I used your query “early, mid and late season low chill apples for southern coastal region 8-9?” and found several southern homesteading webpages describing best apple trees for your area.
I done plenty of grafting but I have to say I’ve never cut my old apple trees down to do it. Never used electrical tape or any tape to do it. Wax and a proper as the article describes so well insertion incision and a wedge scion works for me.
Probability the 2 most important things I learned by trial and error (my fav school sad to say) is ensure that the young trees get a 50.00 hole for a 20 dollar tree as to say a hole big enough the root ball can be gently spread out (not crammed into a too small hole) and to start them out with a good mix of native soil and composts. Some say don’t do that the tree will not search… nonsense. As I live in the well named Granite State my hole digging is on my knees spending more time with a prybar than the shovel getting rocks out of the apple tree hole.
#2 is ENOUGH WATER. I used to water by hose and such. Found out that I was vastly over estimating the amount of water that actually got to the tree roots.
Now I use a 5 gallon plastic bucket with a 3/8 inch weep hole drilled into the bottom edge. I fill that daily (unless it rains) and it slowly leaks into the soil soaking the roots well. I have well draining soil so your area might be slightly different. When in doubt stick your finger into the soil about 3 inches. Is it wet? Don’t water. If damp or dry Water. Farmers have dirty hands and knees.
As an example I had two pre-water bucket apple trees planted three years ago between the deer and lack of enough water scarcely doubled in size. The two new apple trees I planted THIS Spring looking like bare sticks ALL 4 had the buckets this year after a friend at Agway mentioned I wasn’t watering the trees well enough. Now the NEW trees are almost tripled in size and the older trees almost doubled.
So this fall the anti-deer circle fencing goes up, the trunk guard goes on to keep voles from eating the bark and killing them.
Also I am setting up Apple Tree Guilds per the Permaculture system. I’ve planted garlic scapes around them as bug-critter deterrent as well as Block 14 Russian Comfrey as a chop and drop fertilizing accumulator. Next spring I’ll be adding native plums beside my semi-dwarf apple trees. I already have mason bee houses working for excellent pollination.
Research side dressing fertilizers. Worthwhile investment to get a solid apple tree that will produce for decades.
Good tip on using 5 gallon buckets for watering fruit trees. Several years ago my boss had me plant a bunch of apple trees for him. It did not go well as most of them died out and I’m certain it was due to a lack of water. He always schedules too much in too little time. So that was a $1,000+ mistake. I’d like to replant sometime in the near future, but with more water of course.
I’m glad you mentioned about adding amendments to the soil with apple trees. I’ve also heard “advice” on not doing it and I also consider it as nonsense. Not everything that is taught by the university is correct. I know I’m preaching to the choir so I’ll stop preaching…
Changing the variety of a tree by grafting is also called, “top-working”. I do not recommend doing this on a tree bigger than your wrist for two reasons. Such drastic cutting-back of a large tree leaves a large mass of roots without enough leaves to feed it. Many roots will die, or become susceptible to fungal infection and you are likely to lose the whole tree in a year or two. Also the huge wound is not likely to heal before rot gets in….again, in a few years your tree will break in a windstorm.
You can try grafting small branches of an established tree to another variety. Sometimes the tree will reject the grafts, preferring its “own flesh and blood”, but often the grafts will grow. You can then over a number of years prune away the original branches, always keeping enough to enure vigorous growth to heal the pruning wounds and feed the roots.
Often in once-farmed areas that have had apple orchards you can find numerous wild or “volunteer” apple saplings. These can be moved into your orchard and used as rootstocks. Best to transplant (in Fall or early Spring) a year or more before you graft, to allow the tree to become established in its new location. When ready to graft, I will prune away most of the branches and graft several of them to the same variety, to increase chances of a “take”, and guide development of a strong scaffold of branches.
The writer’s caution about not touching cut surfaces is important. My “take” rate went from 50% to 90% when I learned this.
Whenever possible I use the “whip-and-tongue” style of graft. The bark graft described by the writer does not IME work as well. I use “saran” type soft, stretchy plastic wrap to seal grafts. I cut the roll into many rolls of 1″ wide tape, and wrap two layers around the graft. I find that this is stretchy enough that it does not impede growth, and it degrades enough after a year or two to fall off naturally.
I enthusiastically second the writer’s recommendation of an apple orchard. You can also make applejack from cider that turns “hard”, which will be of great value for trading. Apples sliced 1/4″ thick will dry on a screen hung over your woodstove in two days or less, and will keep indefinitely (unless you have children)
If a neighbor has an apple tree within 100 yards, can we plant an apple tree in our yard? We live in a small town n don’t have a yard big enough for an orchard.
Yes. Not all apple species require cross pollination.
Both Red and Golden Delicious for example are self-pollinating but my Honeycrisp is not. All I do with it is take either a blossom or a small (plastic car model size) paintbrush and either take several of the blossoms from one (donor) tree (any species will work) and go to my HoneyCrisp and put flower-to-flower and gently rotate them between my fingers. One blossom will pollinate 4-6 of the HoneyCrisp blossoms. I do the same with the paintbrush… I just put the brush into the blossom of the donor tree and then gently brush the blossom of the receiving tree(s).
This takes a little while so it might not be practical in an orchard setting, but for the homesteader with a dozen or so non self-pollinating trees, it might take an hour or three. Good luck. It has worked for me for almost 20 years now…
Nice to read a down to earth uplifting write-up. The yellow transparent apples are the standard in the rainforests of SE Alaska. The Whiney crabapple was another winner. Trouble was, the bears loved visiting at harvest time. You have to share.
Your unique qualifications are rare and immensely valuable; I’ll be you have a lot of gardeners as friends.
Hi Eric, thanks for the article, you’ve encouraged me to try apples again.
For anyone interested in grafting, a good way to practice is to take some cuttings as Eric mentioned in mid winter, and then graft them back onto the same branch in the spring. Many years ago I taught a small group of about 12 people how to graft apple scions onto root stock that was only pinkie diameter. They did two plants each and we had 100% take, so it’s not super difficult and fun to play with. You can also change grape varieties over fairly easily if you find the ones you planted aren’t that great. Find a friend or relative with a better variety and graft them onto your vines.
An apple tree is also a perfect tree for a small garden – nice shape, white/pink flowers early summer and abundant fruit. Why plant any other tree?
When I was growing up in the 50s and 60s there were at least three small orchards just in our neighborhood, probably throwbacks to much harder times. Much later they were all cut down. It would be nice to see orchards make a comeback. I really enjoyed your article.
Eric K! What a great article and tutorial on grafting… We’ve never grafted a tree, although we have been the beneficiaries of this work among several of the trees that surround our home. When my husband was a child in the Pacific Northwest, his neighbors had a couple of grafted cherry trees. One of these had 7 kinds of cherries grafted to it, and he remembers that wonderful tree even now! Having read your article, we might give this a try ourselves. Thank you for sharing this with all of us!!!
To expand upon the subject of apple growing, here is a lecture given at the JC Raulston Arboretum by Dr Mike Parker PHD, titled, Apples from “Seed” to the table.
While it is well over an hour in length there is a lot of good information here. https://youtu.be/1L_n58ElnuM.
Just got back in from taking care of tomatoes. They are loaded, but it looks like we’ve got some cross pollination going on between a beefsteak and Amish Paste. There is a paste type tomato on Beefsteak bushes and beefsteak types on Amish Paste. It is a noob mistake, but I’ll dub it Amish Beefsteak, or Beefy Paste? I’ll also have to settle for trading tomatoes for apples. I do not know the kind of apple they grow around here in NW Montana, but it is fantastic as it has the sweet and strongest taste of apple I’ve ever experienced.
Just a quick note here about tomato cross pollination: A cross only affects the germ (the inside) of the seed the first year or in plain English it’s invisible until you grow out the seed the second year and then the cross will be noticed. The fruits on a crossed plant will all have the traits of the female parent. The next year they will have traits of both parent expressed. So don’t be too hard on your self and say that it’s a “boob mistake” as it’s most likely, based on your description, a “mistake” at the seed production level. I have worked in that type of horticulture before so I’ve seen it before.
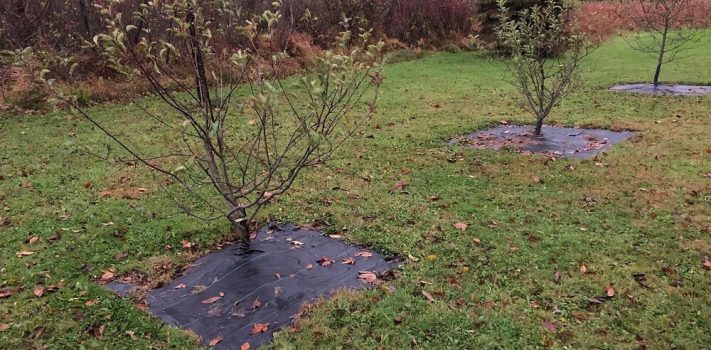
Just something I noticed in the photo; if you live in a hot area as I do here in the wild, Wild West, DON’T surround your tree bases with weed plastic or stones. Doing so will ensure the roots get COOKED in the hot sun!
We have many, many wild apple trees in our area of the Northern Great Lakes and we have planted around 6+ of various types since moving here in 2002. Last year was by far the very best apple season we’ve had. No bugs / worms, perfect size / color(s), great juice and flavor with good crisp bite, little dropping of fruit, so this spring before leaves or blossoms sprouted, we trimmed back the wild trees and production has been poor, possible shock? anyways, we’ll see what next season brings.
We have one Transparent tree that produces every year and may be close to 100 years old. It went wild many decades ago, I will trim it way back this fall.
We planted both Red & Golden Delicious variety along with a Dwarf Honeycrisp which is very good but a short keeper so, eat’em when they’re fresh! (before CHRISTmas for sure, if they last in the fruit bowl that long…)
Great article! I have several crabapple trees in my yard.
The first is a semidwarf Dolgo crabapple tree that I bought from a commercial grower. It had a heavy crop (for its size) this year. These are good to eat and make great apple wine. I grind up the whole apples including the seeds, which give the wine a somewhat nutty flavor that is really good.
The second is a Chestnut crabapple that I bought from a commercial grower. It bloomed this year but hasn’t produced any apples yet (it is still a young tree).
The third is a young tree that I grew from the seed of an Evereste crabapple tree. This is a very late Siberian crabapple variety. It has a few apples on it for the first time this year but they are a lot smaller than the tree that the seed came from. I might try to graft another variety on this tree since the apples are so small.
In addition I have two small trees that I grew from the seeds of a Callaway crabapple tree. They are several years away from bearing fruit.
My grandmother had a big old yellow transparent apple tree in her yard when I was a child in the 1960s. They are not very good eating apples but make great apple pies.
Ask your neighbors and non-box store nurseries what works in your area. Some varieties will grow but only produce a little fruit if they are not heavily sprayed. You don’t want to have to rely on a battery of sprays under current circumstances, much less post SHTF.
Get multiple varieties. I have apples ripening between now and November. Also this protects you from unexpected weather or other surprises.
Chickens also love apples and will eat the entire fruit. I feed mine the ones not really suitable to eat. You can also make apple cider vinegar which has many useful applications. I consider apples to be the best fruit to have in the prepper’s orchard.
Thank you so much for your article. It was timely for us. We live in Colorado at 9000+ ft. Our growing zone is 4b. The microclimate of our property is warmer by 5 degrees from our neighbors less than a mile away. We live on a decomposed granite mountaintop and had the southern slopes terraced. Our Honey Crisp lost its pollinator a few years ago, but it is still alive and thriving. We just planted 3 more varieties on Terrace one facing southeast with a hill to the west shading them in the late afternoon.
My question to any of you who know more than we do about apple trees (which I imagine is most of you) is this: We built a huge hoop house infrastructure over the trees using cattle panels (to keep deer and elk out). We plan to greenhouse skin it for winter to allow an extra layer of protection from the cold winters we have here. Then in Spring, roll the fabric back (after all danger of frost…about June!) so as not to over heat the trees. Is this a good idea? Any other advice?
Thanks for taking the time to write this article.