


One of the pillars of homestead food production is growing small grains such as wheat, barley, oats, etc. The classic text for homestead grain production is Small-Scale Grain Raising, by Gene Logsdon (1977). His focus is on using small-scale or appropriate technology, usually human powered. For example, harvesting small grains would entail the use of a scythe for cutting the grain, a flail for threshing the grain followed by tossing the grain into the air to winnow or separate the grain from the chaff.
I was raised on a traditional farm in the 1960s and 1970s where we used farm-scale equipment and I understand the process of raising small grains. However, the scale of homestead grain raising doesn’t justify the purchase or operation of the traditional farm equipment used for grain production. If only a few acres or less is dedicated to wheat for personal use on a homestead, buying an expensive combine which is only used once a year is not a prudent use of financial resources.
Logsdon recommends the purchase of small threshers which were usually sold to seed companies as a substitute for large combines. A check of the internet shows that small threshers are still available but cost hundreds of dollars and are built in China or India. With the current pandemic and the decrease in imports from those Asian countries this equipment may not be available in the near future.
For those who want to raise their own homestead grains and process them at home, one part of that process – winnowing – can be made easier by building and using a homestead-scale grain winnower. I recently built and modified a grain winnower from plans available on the internet. These plans, “Small Electric Winnower“, were designed by Allen Dong and Roger Edberg and are in the public domain. The plans are a bit dated (circa 1998) and somewhat rudimentary. But I found that the basic unit could be easily assembled from commonly available materials using hand/power tools, hacksaw, jig saw, etc. for about $100. (Not including the Black and Decker Workmate stand, where I mounted it.) This was a pleasant project to work on and required me to improvise and make adaptations to the original plans in order to complete the final construction.
Gathering the Components
I will refer to the various components (A-E, G) as labeled in the on-line diagram at the website listed above.
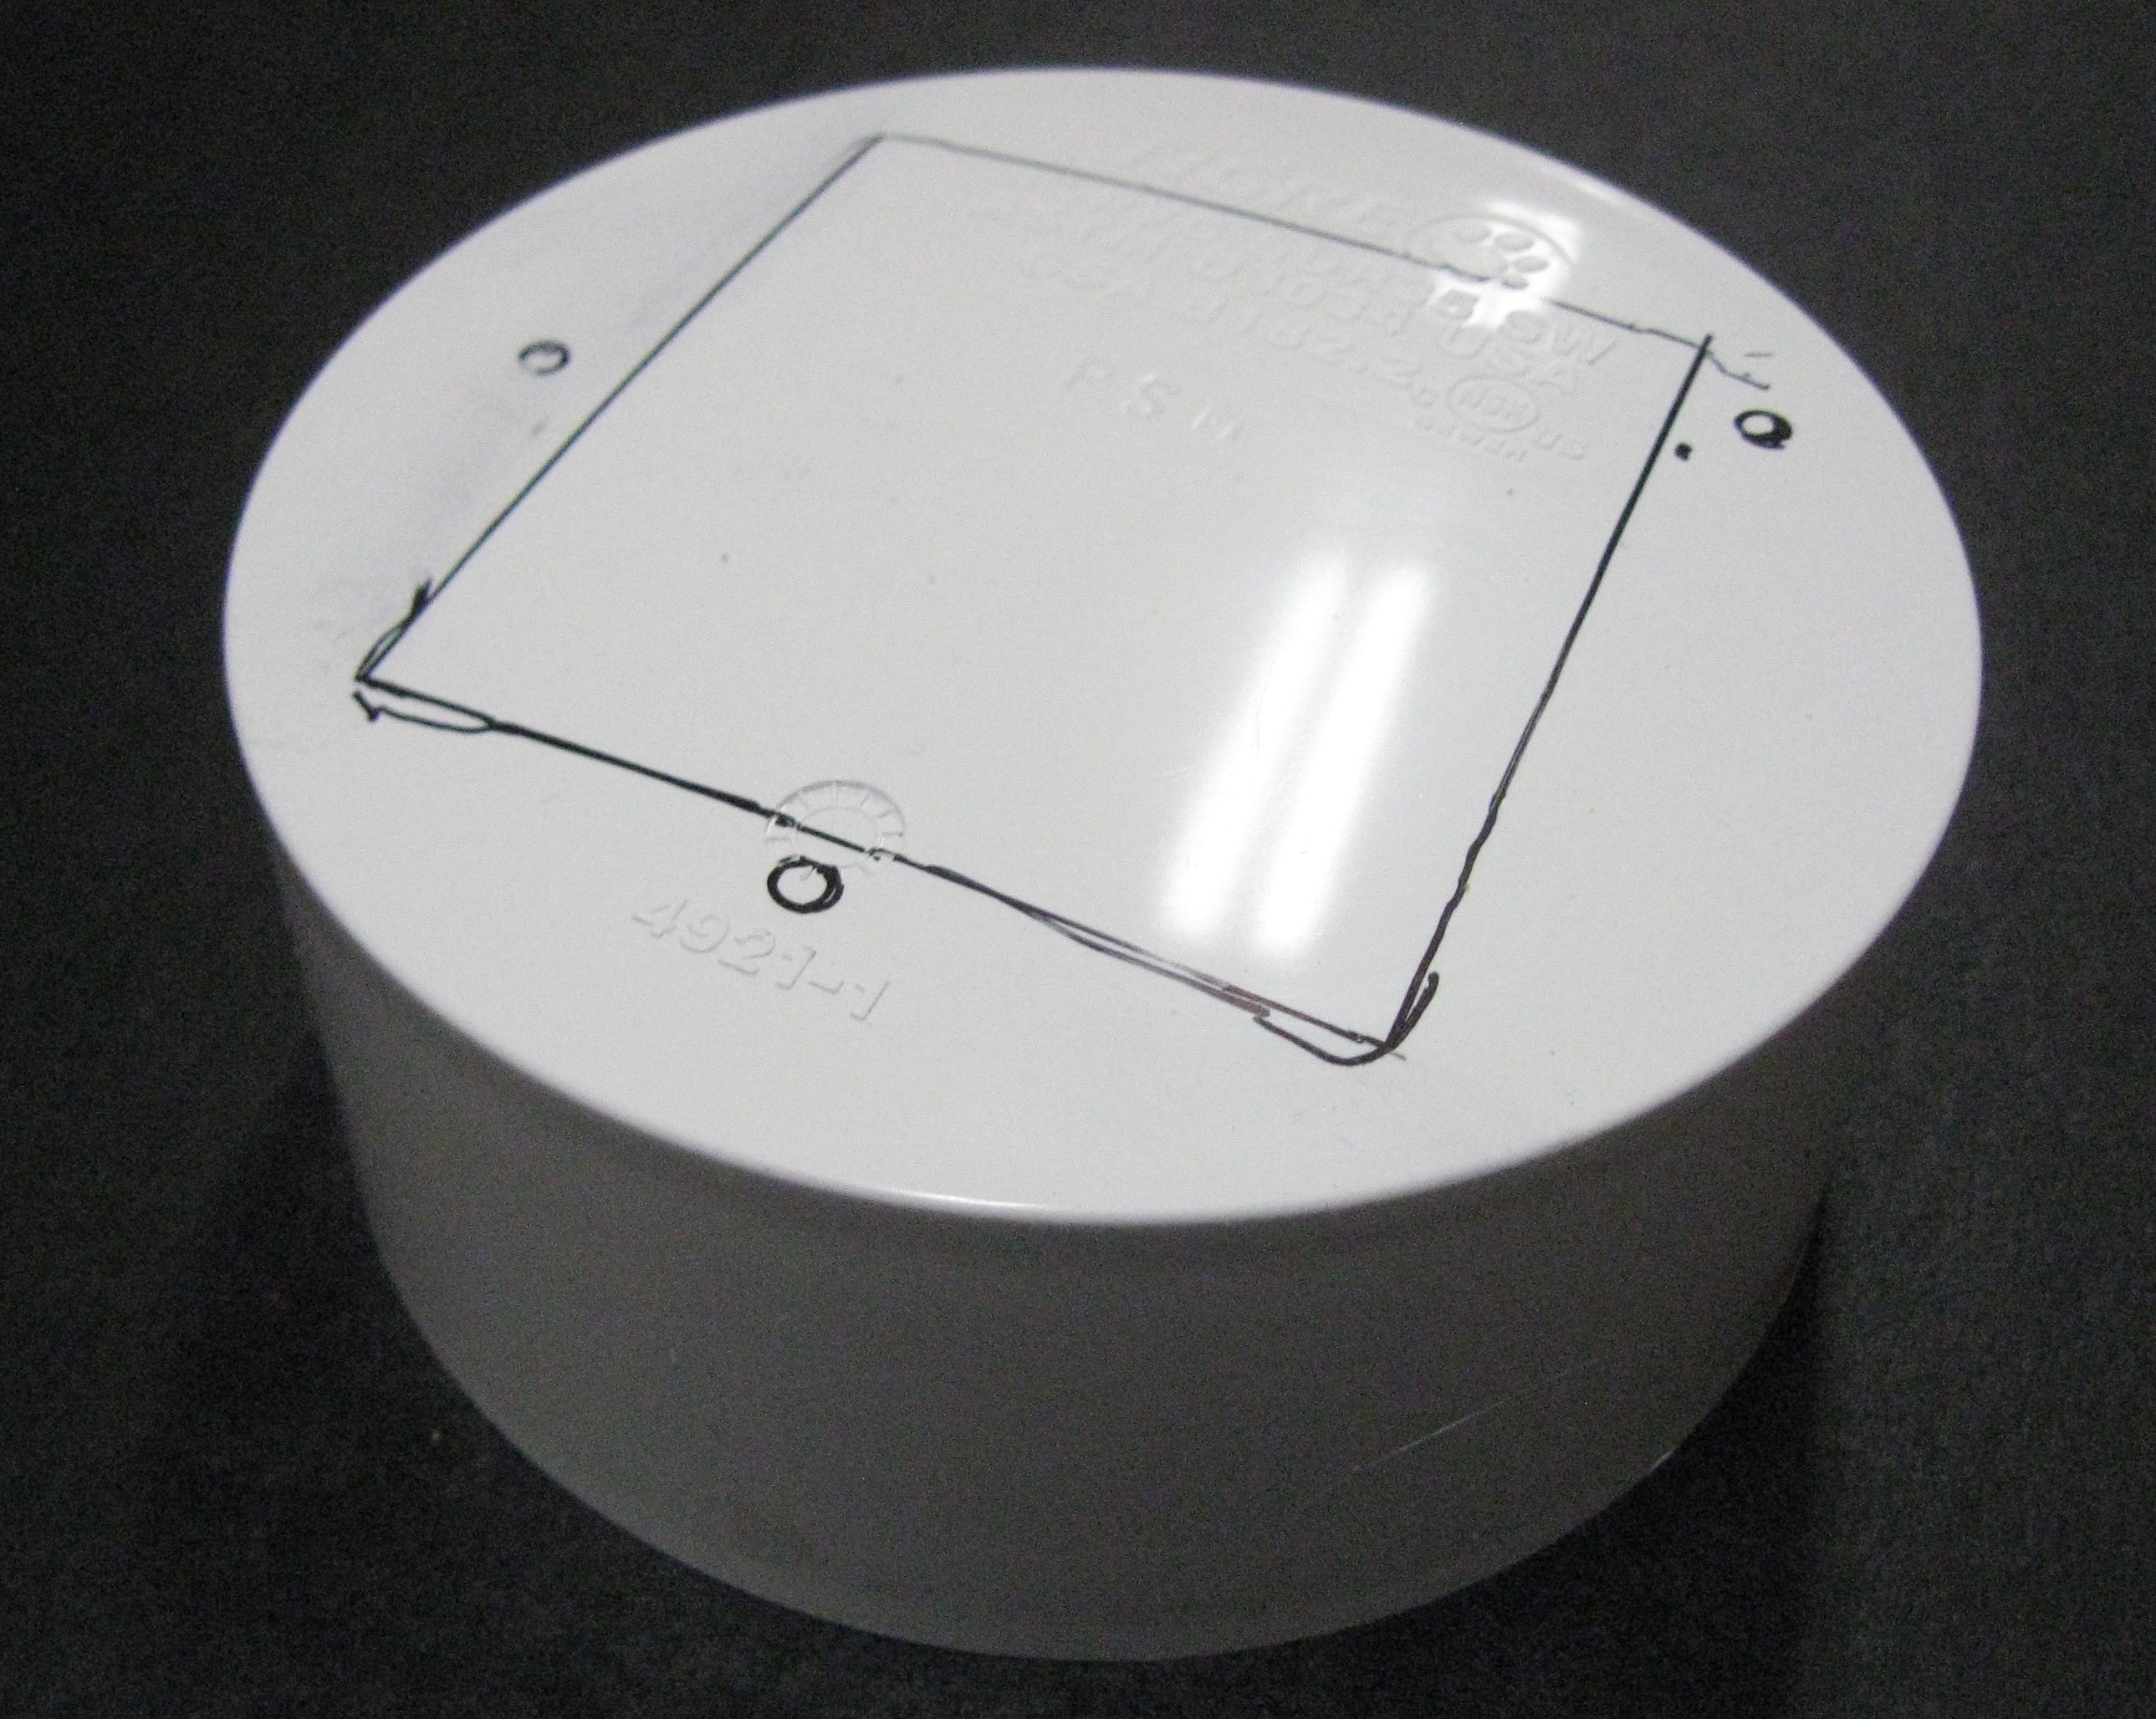
The two main components of the winnower are an electric blower (component G) and polyvinyl chloride (PVC), Schedule 40, thick-wall plumbing pipe and fittings. For final assembly, PVC cleaner and PVC cement need to be used to hold the components together. The PVC plumbing components listed in the plans were readily available at the local big box home supply store and I got 11% off the purchase as well. Initially I only purchased components A thru E. These retail for about $25. I did not purchase component F since I didn’t see how it could adequately connect my existing blower to the assembled winnower.
This project doesn’t require using thick-wall PVC pipe. You can use the thin-wall type but when purchasing PVC fittings ensure you are dealing with either the thick-wall PVC fittings or the thin-wall type and that you can get all the required fittings of either type you need. Sometimes these fittings get mixed up in the bins at the home supply store. (Ask me how I know.)
 The blower (component G) is essentially a small squirrel cage fan. The plans list the Dayton 4C443 blower which is the AC version. I checked on-line and this particular blower is no longer available from Grainger. An alternate is listed as part number 1TDP3 for about $76 from Grainger and $65 from Amazon (free shipping if you have Amazon Prime) and is rated at 75 CFM (cubic feet per minute). The DC version, Dayton 2C646 is available from Grainger for $72 and from Amazon for $80 and has an output of 176 CFM. Of course you may find other blowers on The $100 Homestead Grain Winnower — easily assembled and can be completed by anyone with basic skills using common tools and supplies. listed. I just listed the above models as those are the ones identified in the plans.
Fortunately, I already had a small AC blower on hand close to what is specified in the plans. I don’t know what the CFM output for my blower is but it appeared to be adequate. Having this component was key in my decision to build this project. A suitable blower could be salvaged from a car or truck heater blower. If possible the heater speed control could also be salvaged to control the blower speed. A 12 volt, DC setup could be run from a battery recharged by a solar panel which allows operations at off-grid homesteads.
You will also need some miscellaneous nuts, bolts, screws and wood of various dimensions. These miscellaneous components are not listed in the original plans. They must be adapted to the components you use in your own specific build. Note: the dimensions listed below for wooden parts are from my particular build and will need to be modified for your individual circumstances.
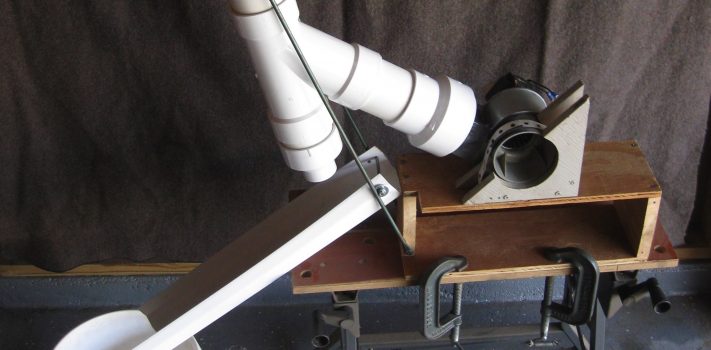
This project was broken down into three steps – assembling the winnower body from PVC pipe and PVC fittings, building an adapter to connect the blower to the winnower body, and constructing a blower “cradle” and a platform to hold all of the components together.
Assembling the Winnower Body
I’ve had previous experience working with PVC pipe and fittings while constructing downspouts for my rain barrels. It is relatively easy for anyone to assemble PVC into useful configurations.
The first task is to cut the 2″ and 3″ diameter pipe to the appropriate lengths. The 2″ and 3″ diameter PVC pipe was initally purchased in 2 foot lengths. The main body of the winnower (component D) is a piece of 3″ diameter pipe cut to 12 inches in length. A 3″ long piece of the 2″ diameter pipe (component B) is also cut for the grain inlet.
It is easy to achieve a relatively square cut on the PVC pipe. Mark the length of the piece to be cut at 3 or 4 places around the pipe, take a sheet of paper and wrap around the pipe connecting the marked spots. Then, with a sharpie, trace a line along the edge of the paper around the circumference of the pipe. The pipe can then be easily cut with a hacksaw. I then take an ordinary file to remove any burrs around the inside and outside of the cut ends. You will have a 1 foot piece of 3″ diameter pipe left over from which to cut a 3 to 5 inch piece later to connect the winnower body to the blower adapter.
Components A through E are then assembled as shown in the diagram. I only dry-fitted the pieces together until I had a final configuration and tested the unit to ensure that it worked properly. This allowed me to make changes or modifications. With all the components in hand the winnower body is easily put together in less than an hour.
Building the Blower Adapter
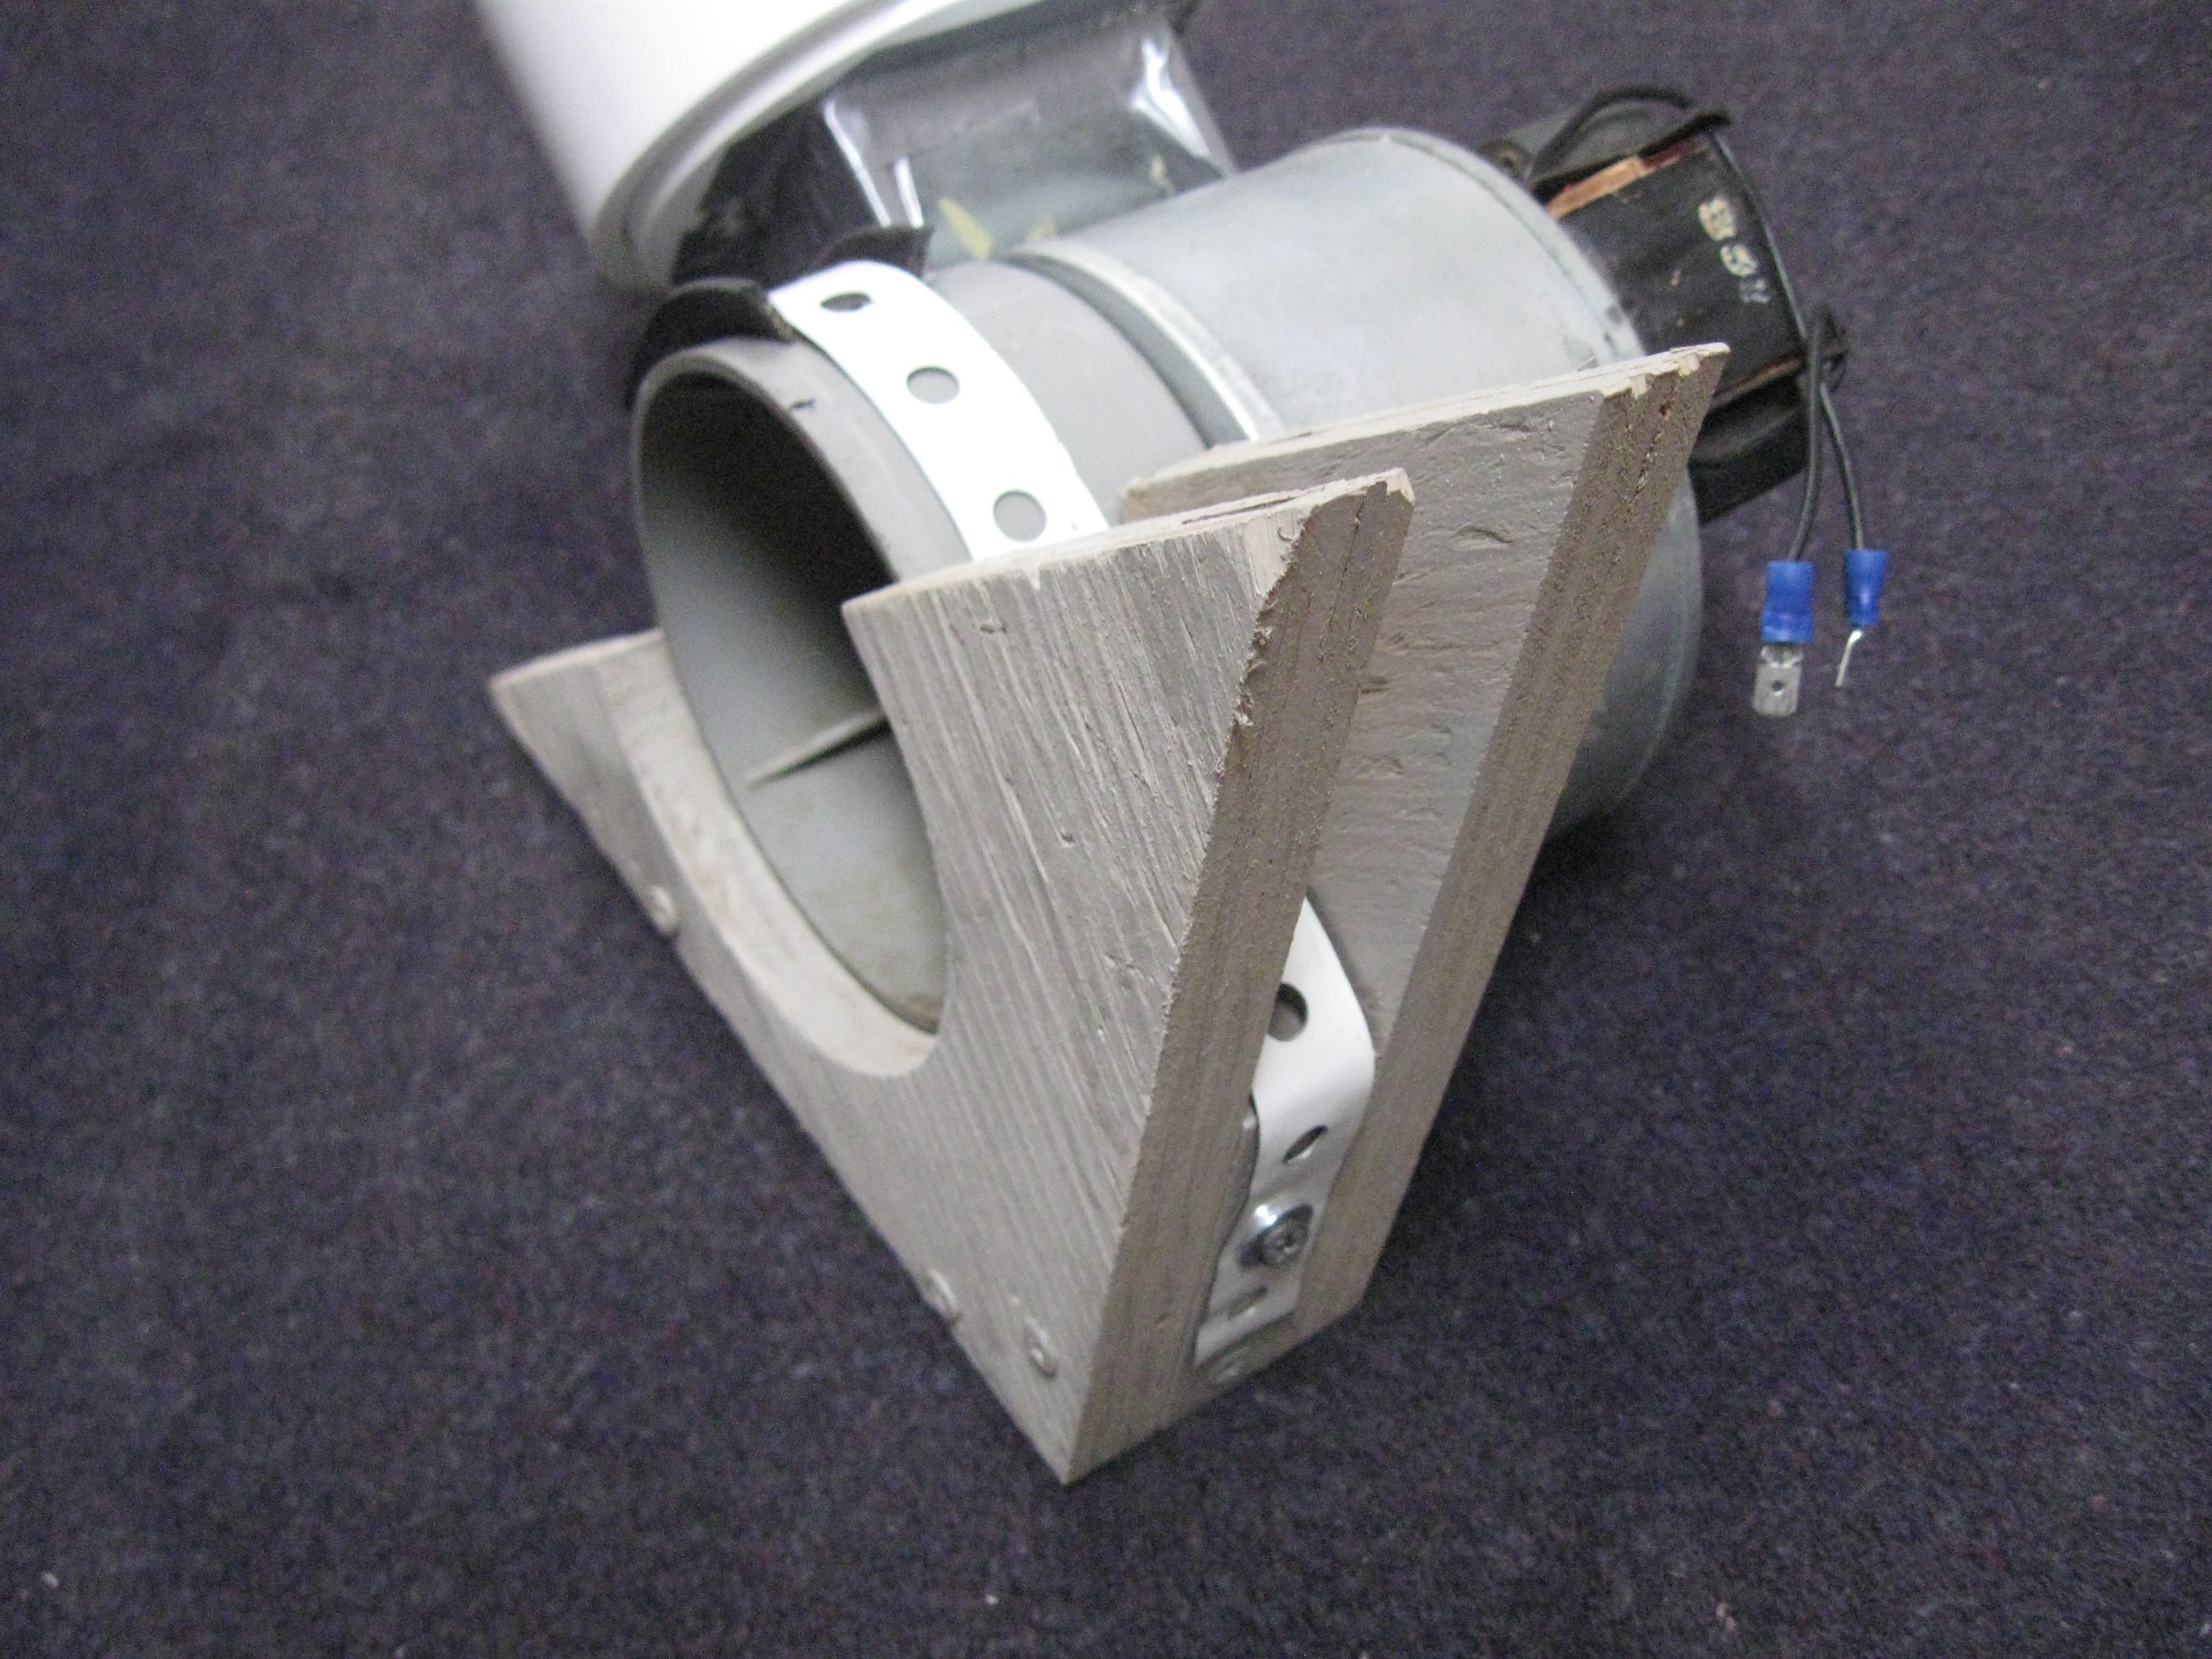
The plans don’t show any details on how to attach the blower housing to the PVC winnower body. My blower housing has an outlet about 2-1/2 inches square and somehow has to match up with the round 3″ opening of the bottom PVC wye (component E) of the winnower. The plans call for a 3″ x 2″ bushing (component F) to connect the blower to the winnower. Connecting my blower to the winnower using this component wouldn’t work for my particular blower so I did not purchase this item.
 Returning to the home supply store I found a 4″ PVC cap. The cap has an essentially flat surface to which I could attach my blower outlet. I also found a 4″ to 3″ reducing fitting. Serendipitously, the 4″ cap will just slide into the 4″ opening of the reducing fitting. The 3″ opening of the reducing fitting can then be connected by a short piece of 3″ diameter PVC pipe to the opening on the lower wye (component E) of the winnower body. I placed the outlet of the blower on top of the 4″ cap and traced the outline of the blower outlet and the 3 holes for attaching the blower to the cap.
To cut out the marked square I first drilled a 1/2″ hole in each corner of the square and then cut out the rest with a jig saw. The 3 mounting holes were drilled and the blower housing mated to the PVC cap using small bolts with washers and a lock washer on each bolt. Finally, the small gap between the blower and cap was sealed with duct tape.
Constructing the Blower “Cradle”
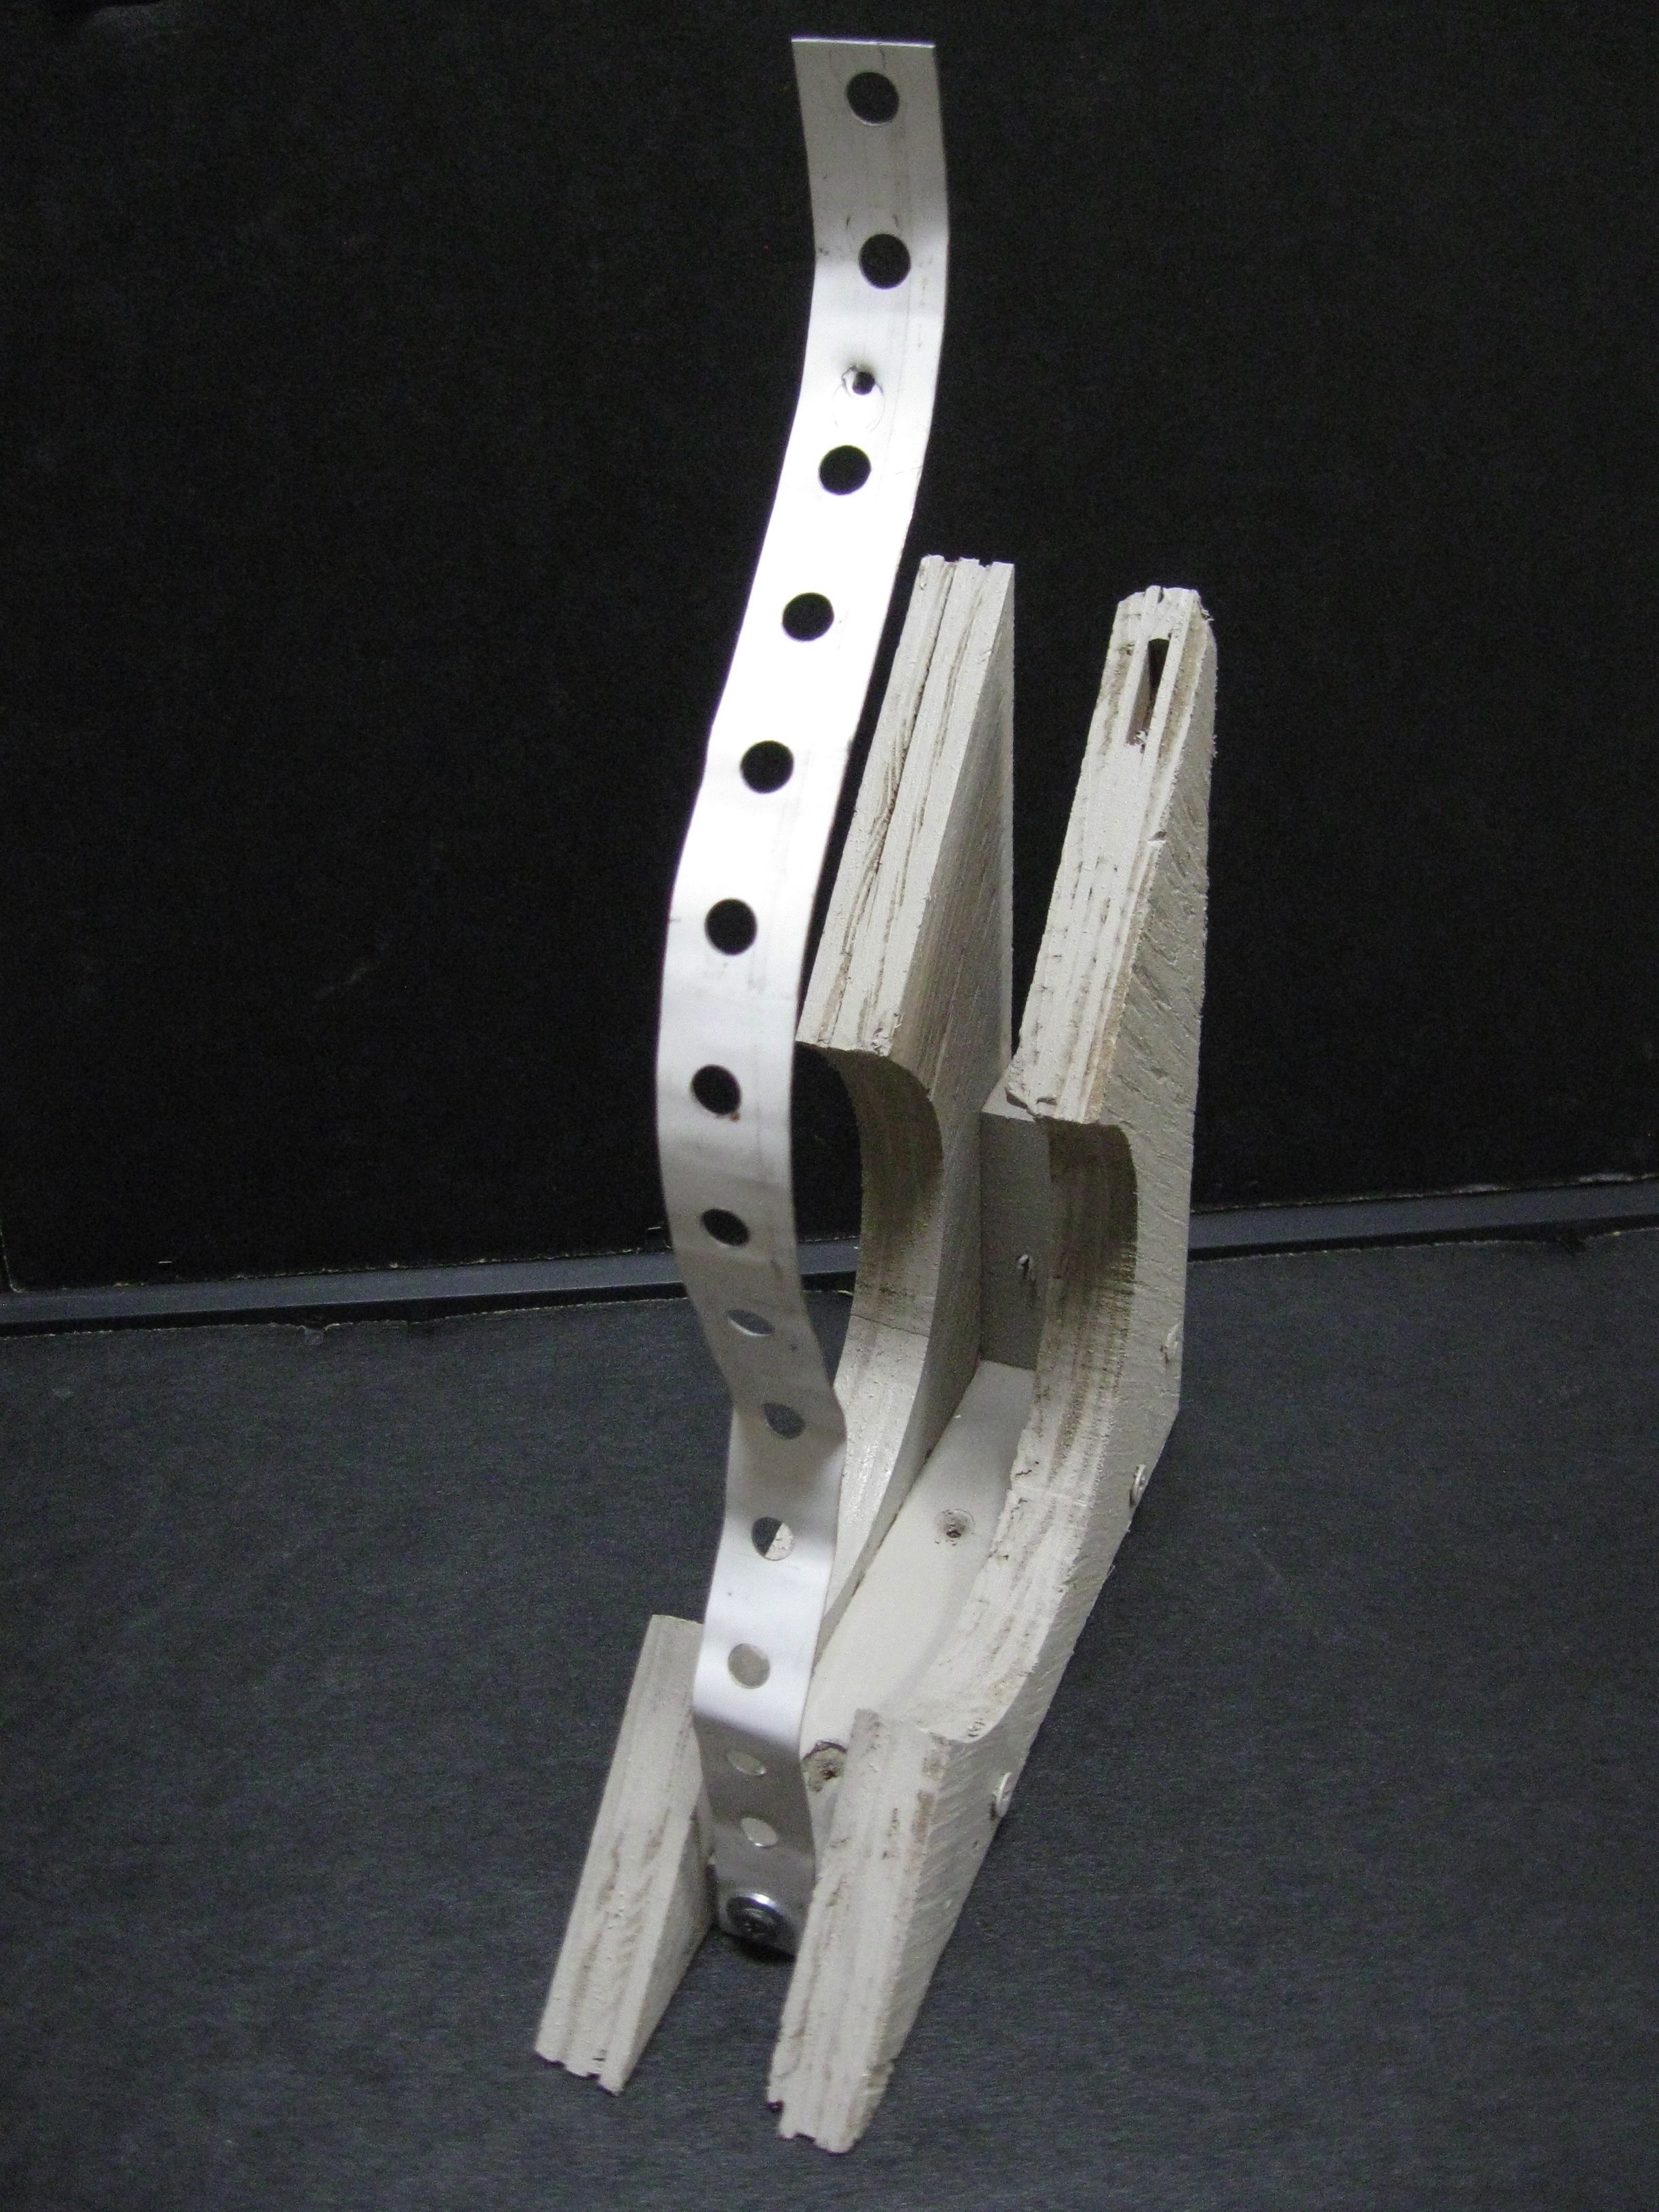 As the plans also don’t show how the blower is secured to a base, I built what I call a “cradle” for my particular blower. My blower has a plastic inlet that extends 2 inches from the metal blower housing to which it is attached. The diameter of the plastic inlet is 2 1/4 inches in diameter. I decided to use 2 triangular pieces of plywood separated by a 7/8th inch wide, “L” shaped piece of 1 inch thick pine. The cradle is a “sandwich” of the two pieces of plywood with the “L” shaped pine in between.
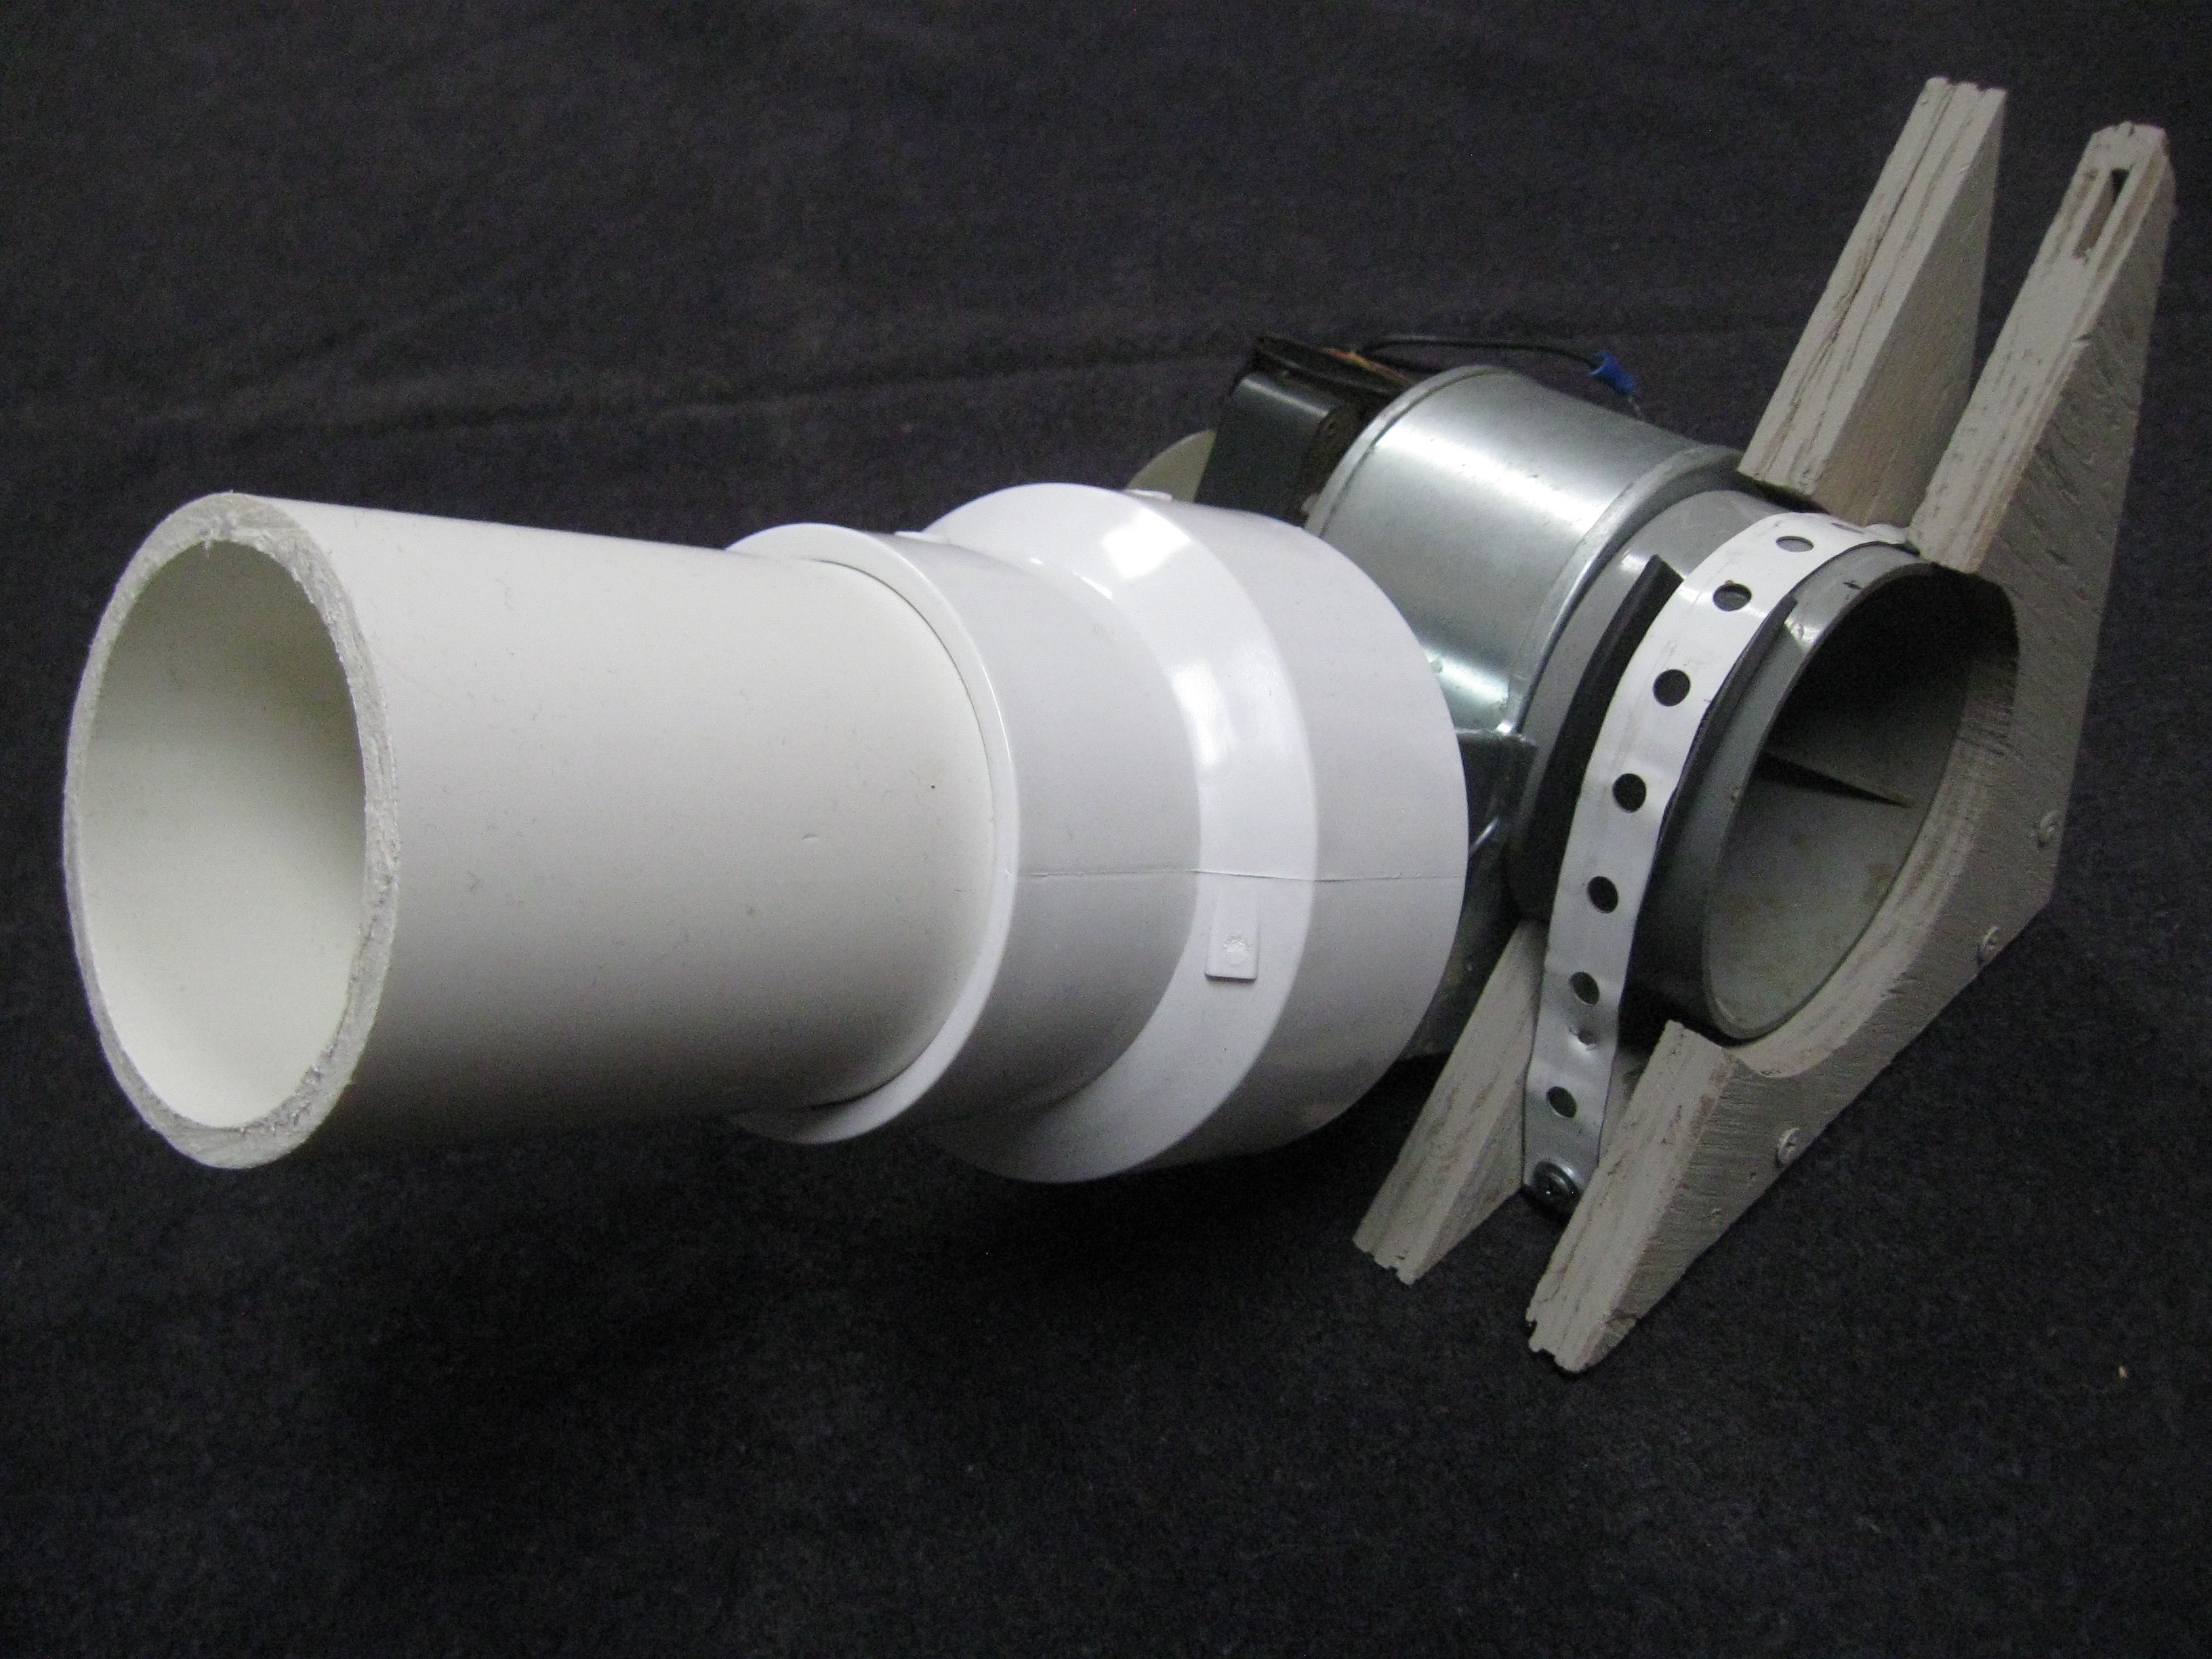 To create the sides of the cradle I took a square piece of 5/8 inch plywood that was 8 inches on each side and cut it diagonally to form two triangles. I used the blower inlet as a template to draw a semi-circle on the long side of each of the two plywood pieces. A jig saw was used to cut out the marked area. If you have a 2 1/4″ hole saw you can cut out these pieces more precisely. The plastic housing of the blower will rest in these cut-outs.
(To be concluded tomorrow, in Part 2.)