We are continuing on with this article about my wife’s and my journey in mid-scale grain gardening. Yesterday, I explained our reasons for believing it was time to build self-sufficiency, and now let’s move on to the food production part, specifically our grain gardening efforts.
Definition of Mid-Scale Grain Gardening
Grain plots may vary in size, ranging from, at the minimum, a small plot using a rototiller or shovel and rake for soil preparation, hand sowing the grain, reaping with a scythe or sickle, threshing with a flail, and winnowing with a kitchen fan or a windy day. The small-scale plot is very labor and time-intensive per unit of grain harvested, and the total quantity of grain harvested may not meet the needs of a large family. By contrast a commercial operation may utilize hundreds of acres and a heavy investment in machinery (or utilize the services of a commercial harvesting crew). What I wanted was something in-between the minimum and the commercial operation.
Plot Size
I was seeking a grain plot size and the necessary equipment sufficient to, with a large safety margin, produce enough grain for one or more families every year. My grain garden has been about 15,000 plus square feet (roughly ⅓ acre). Normally, this area will produce enough grain each year to provide us with several years of consumption. This mid-scale grain gardening requires more mechanical equipment than the minimum, but it provides the advantages of much larger grain production and a large reduction in physical labor and time per unit of grain harvested, as compared to the minimum.
Using additional land and labor, these mid-scale techniques and equipment can be easily scaled up to produce sufficient grain to support the needs of ten or more families each year. (I have more about this later.)
Crop Operations
Modern grain production techniques using a grain drill, or broadcasting, are well-established. Gene Logsdon, in his book entitled Small Scale Grain Raising described an alternate method using a planter (such as the Cole planter) whereby seed grain could be precisely seeded at specific intervals, covered, packed, and band-fertilized, yielding a crop as large as conventional broadcasting techniques, largely due to tillering (defined as shoots growing off the main stem). The theoretical advantages of this system captured my efforts for two years.
Comparing Tillering Plot v. Broadcast Plot
During my second year, I broadcast grain in one small plot. Then I used a planter to plant two rows 14 inches apart in each row cluster in a similar sized plot to compare yields. Oats seeded with the planter yielded 6 gallons of grain; the plot seeded by broadcasting yielded 22 gallons. Tillering, while certainly evident, couldn’t compensate for the additional plants in broadcast plots. (For garden-sized plots, measuring production in gallons is much more meaningful to me than measuring yields in bushels.)
Soil
When I first started, the soil that I was using was so poor that it would hardly support anything, even weeds. Soil tests showed adequate phosphorus and potash, and suboptimal nitrogen. Subsequent trial and error experiences showed that the soil lacked humus, was underlain by hard-packed ground, and responded well to 22-11-11 fertilizer. Each year, crop production improved with my evolving soil preparation efforts and the build-up of fertilizer in the ground. My current production techniques follow.
Preparing Soil
Soil preparation begins the previous fall after harvesting. Debris from threshing and winnowing is brought back and scattered over the production plot. I use a heavily weighted tandem disc to cut up and partially bury the stubble after reaping, as well as the threshing/winnowing debris. I then use a chisel set as deep as possible (one foot or more) to break up the hard-packed sub-surface. The ground after the initial chiseling in places looked like a broken plate.
In the Spring, after melting of winter snow cover, water puddles used to stand in low spots over the still frozen ground, delaying spring planting. Chiseling the previous fall allows melt water to permeate the top one foot of ground, and this allows spring planting up to two weeks earlier than in unchiseled ground. Another hoped for change is the gradual incorporation of humus throughout the top one foot of soil. We hope it will prevent soil compaction, help the soil retain moisture, and allow deeper root penetration.
Planting Sequence
The spring planting sequence begins with broadcasting fertilizer at the rate of 10 lbs of 22-11-11 per 1000 sq. ft., then using a tractor-mounted rototiller set deep to incorporate fertilizer into the top several inches of soil, then broadcasting cereal seed, followed by rototilling as shallow as possible to bury the seed (in practice, one to two inches deep), followed by rolling the ground with a 4-foot wide lawn roller filled with water.
Lawn Roller To Pack Soil
Germination in broadcast plots was enhanced by using the lawn roller to pack the soil around each seed, and also to decrease surface soil moisture evaporation by compacting the surface soil and increasing soil capillarity. In our locale, spring weather is frequently sunny, day-after-day. It’s beautiful weather but tends to dry out the top 1.5 inches of soil, causing germination difficulty with all shallow-planted seeds.
Crowding Out Weeds and Producing Green Manure
During the growing season, the closely spaced grain plants crowded out most weeds. Still, the need remained to control some very competitive weeds either by alternating vegetable and cereal crops each year or by letting the cereal plots remain fallow on alternate years while tandem disking several times during the growing season before weeds produced seeds. I am gradually evolving towards planting peas and ryegrass together one or more times on the alternate years, to incorporate green manure as well as to disc under weeds before their seeds mature; my learning process is ongoing. The combination of rye grass and peas produces a dense green canopy above ground, and I can imagine a dense mass of roots below ground for lots of green manure.
After planting, there is little to do with a grain crop until harvest time.
Reaping and Drying
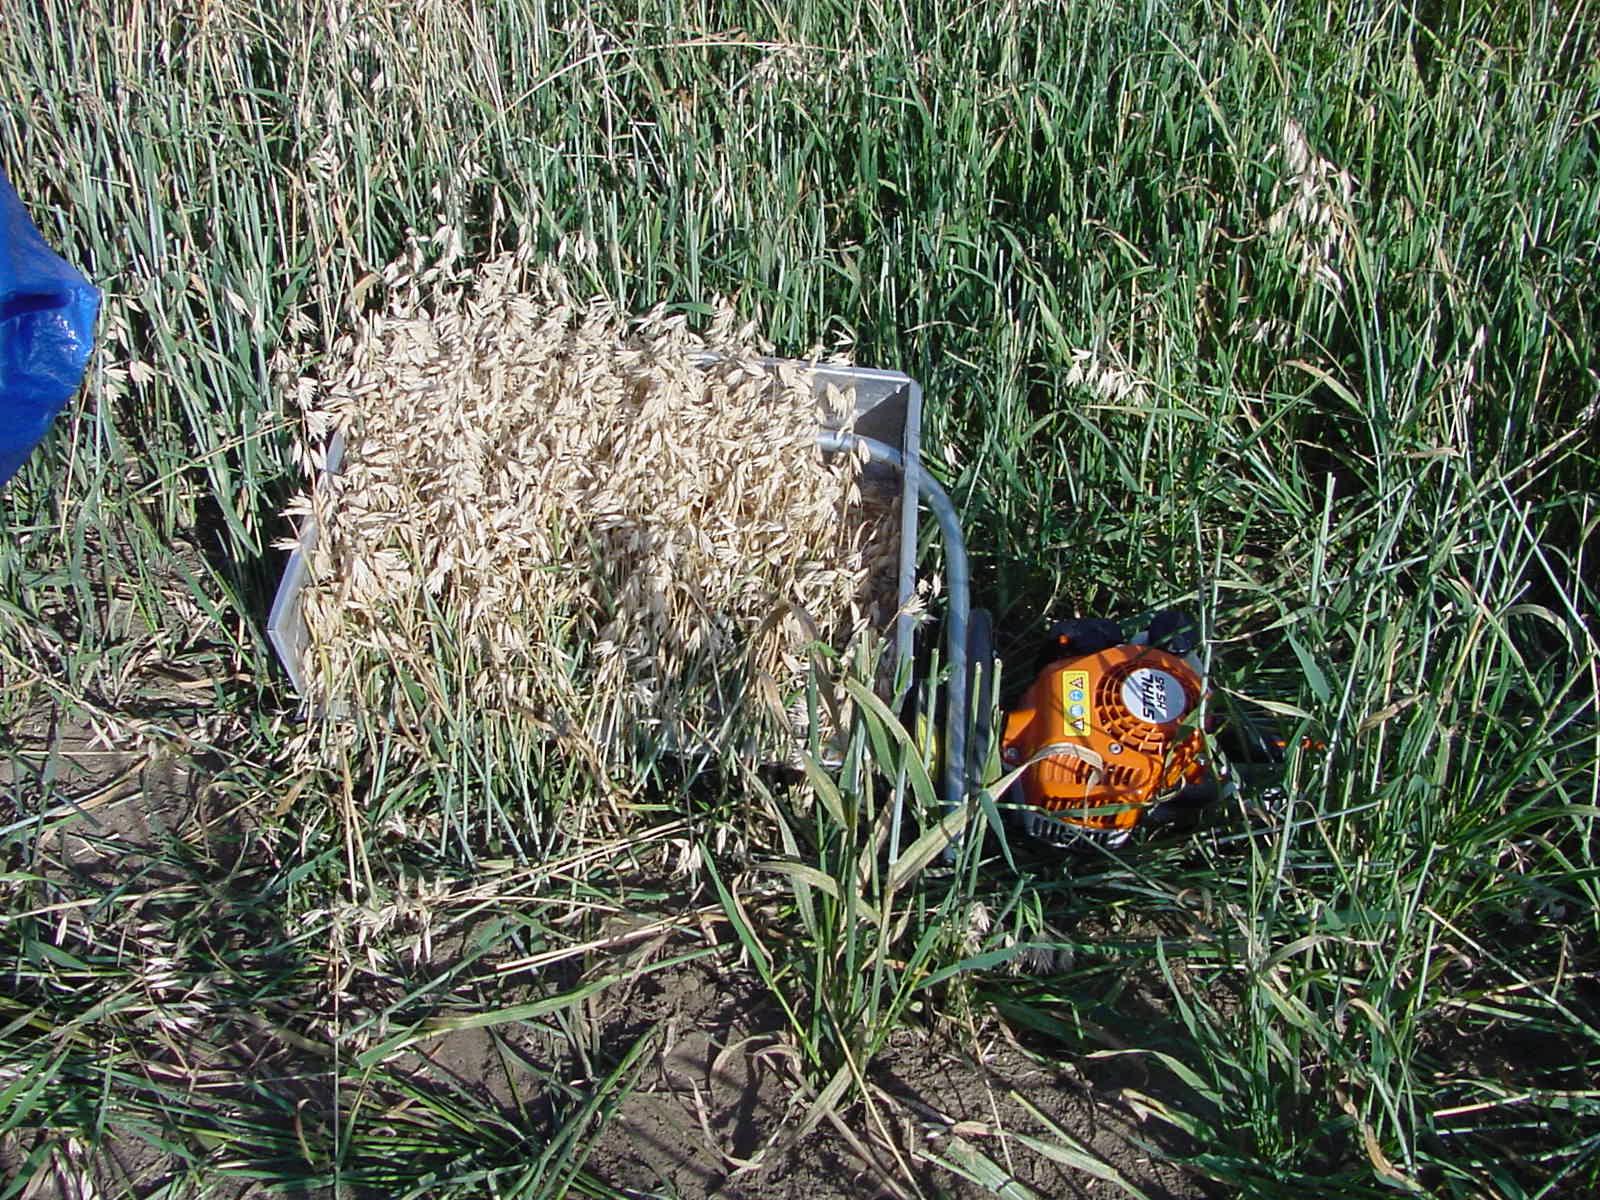
Cutting the grain stalks just below the grain heads and transferring these cuttings to a trailer is what I term reaping. The reaper is shown in Figure 1.
Figure 1: The reaper, a hedge trimmer attached to an aluminum basket.
The Reaper
The reaper is constructed with modified components. This Stihl hedge trimmer had a flexible blade, and I stiffened the blade with a shallow “C-channel” steel bar attached to the top of the blade. The first aluminum strip was cut to length, bent over the C-channel bar, and attached with machine screws to the C-channel, using a thread-locking compound because of the vibration. The remainder of the basket was attached piece-by-piece with pop rivets. Note that the basket is deeper in back than in front, to better retain its contents.
The basket was subsequently reinforced by passing 1-inch electrical conduit through the rear of the basket, bending the conduit 90 degrees, and then bolting it to both sides of the hedge trimmer’s front bar. This reaper was constructed based on my memory of a similar reaper seen on the Internet that was used to collect wild bird seed. I would like to give credit to the originator, but I can no longer find the source.
Reaping Process
In operation, I walk along the perimeter of the grain plot, sweeping the reaper in a long arc, tilting the reaper up at the end of each swing. Each swing with the reaper usually fills the basket, as shown in Figure 2. This reaper works well with oats but works less well with barley. Protruding awns on the barley head catch everything possible, and they catch wind. This year, with 15 knot winds during reaping, I felt fortunate to get half of the reaped contents into the trailer. We, therefore, followed the reaping operation with 5-gallon buckets picking up the wayward heads.
Figure 2: The reaper basket with oats.
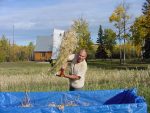
My wife, who was on the tractor, pulled a trailer positioned behind me. I can swing the reaper up, overhead, and dump the contents. Just where she feels is needed, as shown in Figure 3. I’ve considered a few improvements to the basket to better funnel the grain. But heaving the grain-filled basket overhead becomes major work. Any improvement that increases weight has given me pause, actually paralysis, so far.
Figure 3: Dumping the reaper contents into the trailer
Tomorrow, I will continue by sharing our drying process and move into threshing and winnowing.
See Also:
- 1 – Mid-Scale Grain Gardening in Alaska- Part 1, By Alaskan Gardeners
- 3 – Mid-Scale Grain Gardening in Alaska- Part 3, By Alaskan Gardeners
- 4 – Mid-Scale Grain Gardening in Alaska- Part 4, By Alaskan Gardeners
SurvivalBlog Writing Contest
This has been part two of a four part entry for Round 74 of the SurvivalBlog non-fiction writing contest. The nearly $11,000 worth of prizes for this round include:
First Prize:
- A $3000 gift certificate towards a Sol-Ark Solar Generator from Veteran owned Portable Solar LLC. The only EMP Hardened Solar Generator System available to the public.
- A Gunsite Academy Three Day Course Certificate. This can be used for any one, two, or three day course (a $1,095 value),
- A course certificate from onPoint Tactical for the prize winner’s choice of three-day civilian courses, excluding those restricted for military or government teams. Three day onPoint courses normally cost $795,
- DRD Tactical is providing a 5.56 NATO QD Billet upper. These have hammer forged, chrome-lined barrels and a hard case, to go with your own AR lower. It will allow any standard AR-type rifle to have a quick change barrel. This can be assembled in less than one minute without the use of any tools. It also provides a compact carry capability in a hard case or in 3-day pack (an $1,100 value),
- Two cases of Mountain House freeze-dried assorted entrees in #10 cans, courtesy of Ready Made Resources (a $350 value),
- A $250 gift certificate good for any product from Sunflower Ammo,
- Two cases of Meals, Ready to Eat (MREs), courtesy of CampingSurvival.com (a $180 value), and
- American Gunsmithing Institute (AGI) is providing a $300 certificate good towards any of their DVD training courses.
Second Prize:
- A Model 175 Series Solar Generator provided by Quantum Harvest LLC (a $439 value),
- A Glock form factor SIRT laser training pistol and a SIRT AR-15/M4 Laser Training Bolt, courtesy of Next Level Training, which have a combined retail value of $589,
- A gift certificate for any two or three-day class from Max Velocity Tactical (a $600 value),
- A transferable certificate for a two-day Ultimate Bug Out Course from Florida Firearms Training (a $400 value),
- A Trekker IV™ Four-Person Emergency Kit from Emergency Essentials (a $250 value),
- A $200 gift certificate good towards any books published by PrepperPress.com,
- RepackBox is providing a $300 gift certificate to their site.
Third Prize:
- A Royal Berkey water filter, courtesy of Directive 21 (a $275 value),
- A large handmade clothes drying rack, a washboard, and a Homesteading for Beginners DVD, all courtesy of The Homestead Store, with a combined value of $206,
- Expanded sets of both washable feminine pads and liners, donated by Naturally Cozy (a $185 retail value),
- Two Super Survival Pack seed collections, a $150 value, courtesy of Seed for Security, LLC,
- Mayflower Trading is donating a $200 gift certificate for homesteading appliances, and
- Two 1,000-foot spools of full mil-spec U.S.-made 750 paracord (in-stock colors only) from www.TOUGHGRID.com (a $240 value).
Round 74 ends on January 31st, so get busy writing and e-mail us your entry. Remember that there is a 1,500-word minimum, and that articles on practical “how to” skills for survival have an advantage in the judging.


So based on my previous calculation, 1/3 of an acre in either barley or oats will yield approximately 885,000 calories. Comparatively, 1/3 of an acre of potatoes will yield approximately 2,635,000 calories. To produce the same calorie content as grain, you’d only need a little over 1/10th of an acre, or about 4,000 square feet, or a plot about 63 feet by 63 feet. My back yard is 1/4 acre. I’d only need half of that for a garden to grow enough food to accommodate that potato crop and all the other food I’d care to grow, and still have a sizeable lawn to play on when I am not tending the garden area. I’ve grown gardens that size since I was a kid. The only expensive tool I would consider is a rear tine rototiller twice a year. The rest I can do with regular old garden tools, like a shovel, a hoe, a wheelbarrow, etc. Seems to me a much better investment of my time and money for the expected results.
However, if you must have barley and oats in your diet, then it is entirely feasible to grow them in parts of Alaska. You will pay a lot extra for it, but it can be done. For me, I have better things to spend my time and money on.
Barley and oats will store for a much longer time than potatoes. They will also provide for a better variety in diet. One of the problems with potatoes is that they are threatened by too much rain during final maturity and harvesting time. Excessive rain will destroy the potato crop both before and after harvest if they are super saturated. Potatoes from excessive rain will spoil rapidly after harvest.
1/3 acre of grains, even under modern agricultural practices and yields, will not provide enough calories for a family of 4 (you need ~ 2-3 million cals/yr minimum). You need 1/2 to 1 acre depending on the grain at these modern yields. Under pre-modern agriculture yields (pre-1940 which would be the best case scenario in a grid-down situation) the number of acres needed for this same yield would be closer to 3 for grains. Potatoes would require less acreage for the same caloric yield but have their own problems with regard to storage (just ask the Irish).
Converting your gallons to bushels shows that your yields were 2/3 – 2 1/2 bushels for planted versus broadcast. Under the best of conditions (broadcast) you have grown ~100,000-150,000 calories depending on which grain. Not bad but a long way from the 730,000 cals per person per year needed.
For me, the whole point of this effort would be learning to plant, harvest and process grains with the least amount of effort. When the SHTF and food becomes difficult to obtain, I know I would be able to produce it—along with other vegetables to feed my family and for barter. For now, we would use the grains mostly for animal food; but just knowing we could do it brings peace of mind and security.
Maybe it’s just me, but I would not be depending on just grain or just potatoes for my diet. If that is the sum total of what you eat, you ain’t gonna live very long anyway.
For as little grain and potatoes that my wife and I eat, maybe a 10’X10′ plot for potatoes and maybe a 20’x20′ plot for the grain (wheat, rye, barley) and maybe another 20’X20′ plot for oats. So, for far less than a quarter acre, that part of our diet would be more that covered. It’s the fruit and veggies and of course the protein that make a diet you can live on.
Without the total package, life is very short and very unpleasant.
Don’t forget herbs both for flavor and medicinal
I thinkallot of people need to look at this through the above commenter Charles k.’s eyes. A strict diet of potatoes would get very old quickly. Even now I sometimes ties of them only eating potatos 3 times peeach week. Part of being prepared is knowing how ando having other options. I bet the Irish would have loved to have some oats planted during the potatoe famine.