We spend a lot of time talking about off-grid living, so I try to balance the endless chatter with gear tests. It’s better to learn now whether a clever scheme actually works when there is no consequence for failure.
Cooking is a big deal and one that I’ve given much thought to, both here in my city house (bug in location) and at our secret lair in the base of an inactive volcano (bug out location). Solar cookers are fun but of limited OPSEC, and they only operate when the sun is out. I had it in my mind to see where I could go with electric cooking, like an upgraded Easy-Bake Oven. Fortunately, much of this leg work has been done and is conveniently for sale at truck stops all over the country: 12V portable cooking systems.
I started with a Crock-Pot for a couple of reasons. First, its pot-like structure contains the food, minimizing mess. Second, it is ceramic, which makes cleanup much easier. (Don’t forget that is a boon when you’re in grid-down land.) Third, it exudes the “fire and forget” ease that I was after.
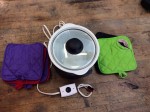
I started with a 1.5 quart slow cooker, the RoadPro RPSL-350. It’s about $32 on Amazon.com. The helpful user reviews suggested that the cigarette plug tended to melt, so the first thing I did was cut that sucker off and replace it with a couple of Anderson PowerPole connectors. That’s what my 12V gear runs on anyway.
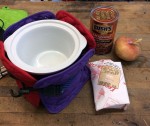
I also stopped by the local Dollar Store and picked up a bunch of potholders. My goal was to form a “thermal cozy” around the unit to increase the temperature inside. Since there is no thermostat on this unit– just on and off– the maximum temperature inside will be based on the ambient temperature outside, the amount of power put into it, and how much heat escapes. I could really only control the last component.
Now that the outside of the pot was more insulated, it was time to get down to some cooking. This recipe came from my buddy’s mom in Missouri, and it sure tasted fine over the campfire a few weeks earlier. It’s scaled down for the size of this pot.
Ingredients:
- Lean ground beef,
- ½ lb. sweet onion, or what you desire (I love onion so it all went in)
- 1 can of baked beans (with bacon and brown sugar)
- chili powder, to suit taste
- black pepper, to suit taste
- paprika, to suit taste (I suggest a lot of paprika)
Directions:
-
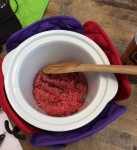
- Add the hamburger, plug it in, and start the clock!The initial current draw of the unit was 6.3 amps with 12.7 volts sourced by my battery. The ambient temperature in my garage was 88°F. This is a big deal with the small amount of insulation I have on the cooking environment and the low power input.
T+ 0:40 – The meat is browning. This is a good sign of the utility of the unit.
- Add the hamburger, plug it in, and start the clock!The initial current draw of the unit was 6.3 amps with 12.7 volts sourced by my battery. The ambient temperature in my garage was 88°F. This is a big deal with the small amount of insulation I have on the cooking environment and the low power input.
- Add beans and seasonings; recover.
 T+ 1:35 – The meat and onion are sizzling! Time to dump in the can of beans and seasonings.
Now re-cover and go do some chores.
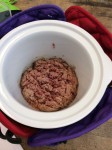
T+ 2:40 – The entire contents are bubbling. Current draw is still at 6.3A with Tamb = 95°F. A thermocouple probe into the chili reads 191°F.
T+ 3:20 – Enough simmering, time to eat! It was more than enough dinner for my girlfriend and I, adding in a few tortillas to round it out.
Conclusion and notes:
- The power demand was around 80 watts. That’s about the same as two off-road headlights on your 4×4. So, you could cook this on a 3½ hour trip on the way to somewhere.
- I should have pre-heated the can of beans in the sun to cut down the simmering time and drained some water off before adding to the pot; there isn’t an overabundance of heat to boil it off like atop a gas stove. When using battery power, every watt counts.
- You can of course use an 8oz tin of beef and rehydrated onion from your food stores (see below).
- This was yummy! It’s easy to cook at night, during a storm, or other time, and is ideal OPSEC.
If you would like to repeat this exercise from dehydrated/freeze-dried ingredients, here are the suppliers and their product numbers from my friend:
- Mountain House 30227 Ground Beef
- Augason Farms 00946-02011 Dark Red Kidney Beans
- Augason Farms 78716-12000 Dehydrated Chopped Onions
- Provident Pantry FH-C020 Chili Powder
- Provident Pantry FH-P010 Whole Black Pepper
Total project success!
o o o
Do you have a favorite recipe that would be of interest to SurvivalBlog readers? Please send it via e-mail. Thanks!


