


(Continued from Part 1.)
In the lead-up to our move, I had taken a soils class as part of my degree program. The professor opened my eyes to soil biology, nutrient cycles, and the damage done by repeated deep tillage. Plow, harrow then rototill was the only system I had ever seen for large home gardens, not to mention most row crop farming. I didn’t fall down the rabbit hole of no till gardening, I charged down it. My exploration coincided with the final two years prior to our move and the two years we rented prior to finding our homestead. I studied cover crops, green manures, benefits of rotational grazing, composting, double dig, lasagna gardening, swales, hügelkultur……..and better options for irrigation. Now that we had land, it became the laboratory to begin trying out all the theories I had collected (and ad nauseum shared with my wife and our extended family). We’ve spent the last ten years building soil, expanding our gardens, starting an orchard, hosting tours and refining our irrigation system.
As we planned the layout for our first garden on the homestead, we chose a typical row layout for beans, corn and potatoes that would allow us to use the “new to me” brown drip tube. This product has integrated pressure compensating emitters evenly spaced and each rated for a specified output. Specifically, we purchased rolls that have emitters rated for 0.9 gallons per hour spaced every twelve inches. The tubing can be branched or joined to other lines using barbed fittings and is best used in conjunction with a pressure reducer in the range of 15 psi to prevent the barbed fittings from slipping loose after exposure to a days’ worth of summer sun. The emitters themselves had no problem withstanding our wells maximum pressure of 50 psi.
For our hilled vegetables such as zucchini, squash, pumpkins and cucumbers we stayed with a modified Arizona method where we ran the half inch black blank tubing beside each plant and installed a piece of one-quarter-inch drip tube with a dripper on the free end at each plant. For tomatoes and peppers, we followed the same pattern as for squash, only these plants were staked or caged in rows instead of clusters of hills and the quarter-inch drip lines were left open, ie no dripper for each plant. For the first year, we ran garden hoses from our house as the supply and installed hose ends using barb x NPT paired with NPT x FGHT (female garden hose thread) fittings to connect to the drip and blank tubing runs.
For the beans and corn, the drip tube was a success. Burying the drip tube as I hilled potatoes was less successful. Very few of the emitters clogged, but trying to dig potatoes without destroying the irrigation line was a challenge. The tuber roots and soil prevented me from pulling the tubing out prior to digging because hard crimps/kinks would form if I tried pulling up on the line and friction plus the circular link to the subsequent row kept me from pulling the hose out linearly. The tomatoes and peppers did well with open ended quarter inch drip line at each plant. The biggest issue was keeping the quarter-inch line anchored in the root zone. We tried several different methods including irrigation stakes and staples, zip ties and weights near the end of the line. None of these methods worked especially well and most weeks we would turn on the water supply and shortly thereafter see water shooting several feet above the plant indicating that one of the 1/4″ lines was free of its mounting.
The second issue we experienced with the open ¼” lines were clogging-related. Being so close to the ground and sitting in a puddle as the ground absorbed the water, soil occasionally worked its way into the lines after the irrigation session or after hard rains. On a few occasions, insects also nested in the lines and caused blockages. Keeping the 1/4” lines in place was a challenge at the hilled vegetables also, but this time it wasn’t because of the water pressure but because the plant roots pushed the lightly secured lines out of the root zone. The drippers also performed inconsistently with some plants getting too much water and other plants getting none. In later years we overcame the imbalance by looping the 5/8” blank tube back into itself using a tee fitting. Doing so equalized the pressure along the supply path.
If I had to give this irrigation system a score then I would call it a 4 out of 10. We learned more about what not to do in the future than about what we got right. Our biggest failure with this system was our own attentiveness. With the two earlier suburbia systems electrical timers controlled the process and the default state was closed valves. Our new system relied on us to remember to switch zones and more importantly to shut of the spigots. Many were the nights that one of us would ask the other, “did you turn off the irrigation?” which would lead to a quick trip via flashlight to verify it had been done or worse to turn off the water and lament the unnecessary drain on our well.
By the second year on our property, we had installed yard hydrants in the garden, near the garden, and at the chicken coop. A friend from church also solved our wasted water problem by showing us inexpensive mechanical timers made to be placed between water spigots and garden hoses, the Orbit 62034 is an example of these devices. We still had to manually turn the water on, but these timers shut off the flow after a specified period. Each one we have tried leaks to some extent, but at least we are not pumping out a full hose worth of water to waste or drown plants because our memories lapse or we become distracted.
In addition to a garden, we began planting fruit trees and berry bushes the year after purchasing our place. The cleared portion of our property consists of two and a half-ish acres of flat land with the balance being a gentle incline of three acres. From top to near bottom there is a thirty-five-foot elevation change along a central length of 650 feet. We chose to plant our fruit trees in rows along the east to south contours of our “hill” with a spacing of 30-ish feet. Initially we ran 5/8” blank tube along each contour row and used two quarter inch drip lines as the supply at each trunk.
For ease of connection to a hydrant, we installed aluminum garden hose quick couplers at the end of each line. I strongly encourage anyone who has never tried these devices to do so especially if you find yourself connecting garden hoses frequently (picture air hose quick couplings for garden hoses). Initially there were four rows of trees and two zones for blueberries so threading garden hoses time after time was a hassle. We were naively happy with this setup for the first few years, but once the trees began to grow – needing more water we experienced a nasty dry summer with triple-digit heat for weeks and no rain for months. It wasn’t possible to keep enough water on the trees and gardens while not pushing our well to a worrying extent. The loss of $600 of new trees prompted me to start developing the springs for irrigation use.
As mentioned earlier, we are blessed to have two springs. They share a channel that is about eight feet wide and the soil in the base of the channel is predominately sand. Through trial and error, I have been able to build a standing head of eighteen inches maximum before the pressure drives the water column through the sand beneath the dam or tile and returns to ground level. As a result of the inability to “dam” the flow, I ended up digging a cistern in the channel to serve as my collection reservoir. In a location fifty feed downstream from the spring heads, I built a sandbag coffer dam and used four-inch non-perforated drainage tile/pipe to route most of the spring flow around my working area.
Over several afternoons, I dug a pit chest deep and approximately six feet wide and nine feet long. An electric sump pump with a 1.25-inch discharge was used to pump the hole “dry” before each excavation session and to remove the groundwater that seeped in during digging. Once at depth, double layers of heavy geotextile were lain on the bottom of the pit and eight-foot-long pressure treated 2×10’s were placed to serve as the reservoir bottom. I dry stacked 8-inch concrete block three units wide and five long to form the perimeter, alternating the layout by one cell each course.
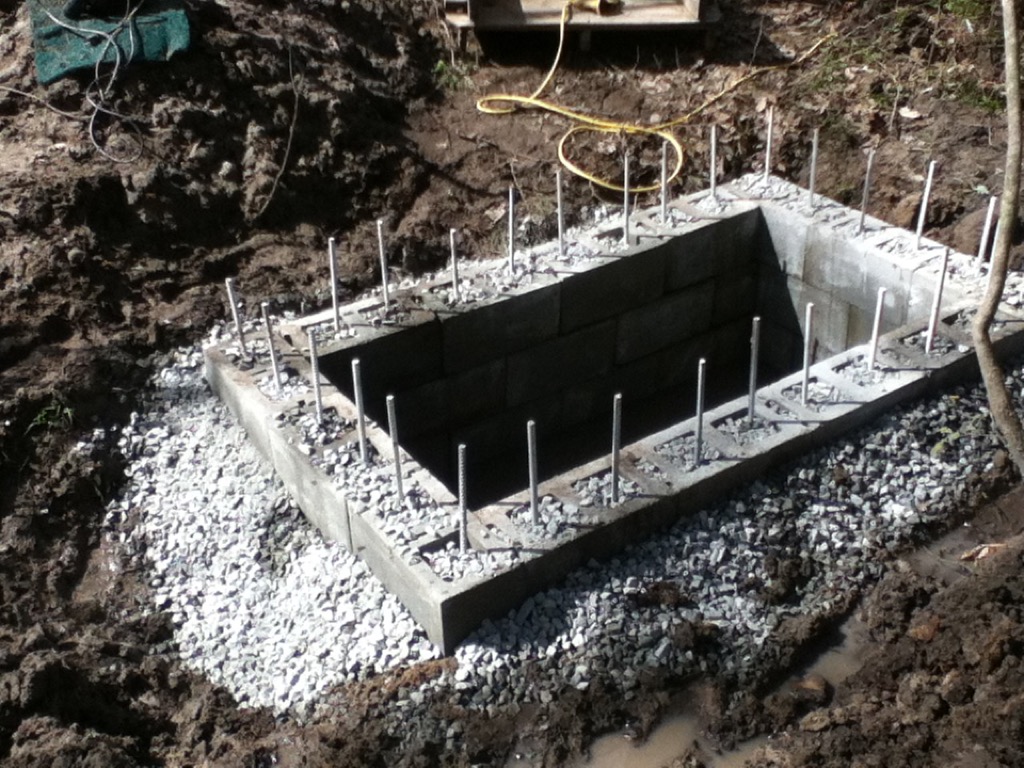 Each cell of the perimeter received a piece of #4 rebar that was coated with a waterproof rubber membrane then the cells were filled with ¾ minus washed stone to lock the courses together. As a screening aid, all of the space outside of the cistern was simultaneously filled in with washed stone also. The reservoir extends one course above the channel elevation and is covered with a piece of metal roofing to keep out leaf and limb debris. The combination of dry stacking and exterior washed stone baffling has worked very well at allowing water to infiltrate while minimizing soil intrusion. In the eight years since digging the cistern, I have cleaned out the interior twice and only collected half of a five-gallon bucket of solids each time.
(To be concluded tomorrow, in Part 3.)