Obsoleting Sodium Hypochlorite – The MSR SE200, by Hugh Latimer

In 2004, the devastating Southeast Asia Tsunami stimulated charity from all over the world. Fresh drinking water was one of the prime concerns in this disaster and MSR (Cascade Designs) had been specializing in back country water purification for years. They lept into action, delivering many of their water purification devices to the area. Unfortunately, they learned some hard lessons along the way. In their own words, they admitted that the philanthropic effort, though well intended, was humbling. The logistics were complicated, so delivery of the devices was hindered, and once there they discovered that the size of the devices, intended for backcountry users, were impractical in the face of the enormous demand for clean water. Entire families and communities could not depend on individual devices. MSR took those humbling lessons to heart and developed a new division called MSR Global Health.

2015112203160500

The SE200 Community Chlorine Maker is the first product released by this division and is intended to support the fresh water needs of families and small communities in developing nations or disaster struck areas. I was immediately intrigued by this product when it was brought to our attention by a loyal SurvivalBlog reader and I ordered two of the units direct from Cascade Designs. According to the specifications, one unit will produce more than enough drinkable water, but I always try to operate under the principle of “two is one and one is none”. You never know when a failure of a critical system will take place, and if this unit delivered on its promises then it would become part of the critical hardware in our preps. I intentionally did not notify MSR that the purpose of the purchase was to evaluate the unit for SurvivalBlog, as I wanted to experience the whole supply chain as one of our readers would.
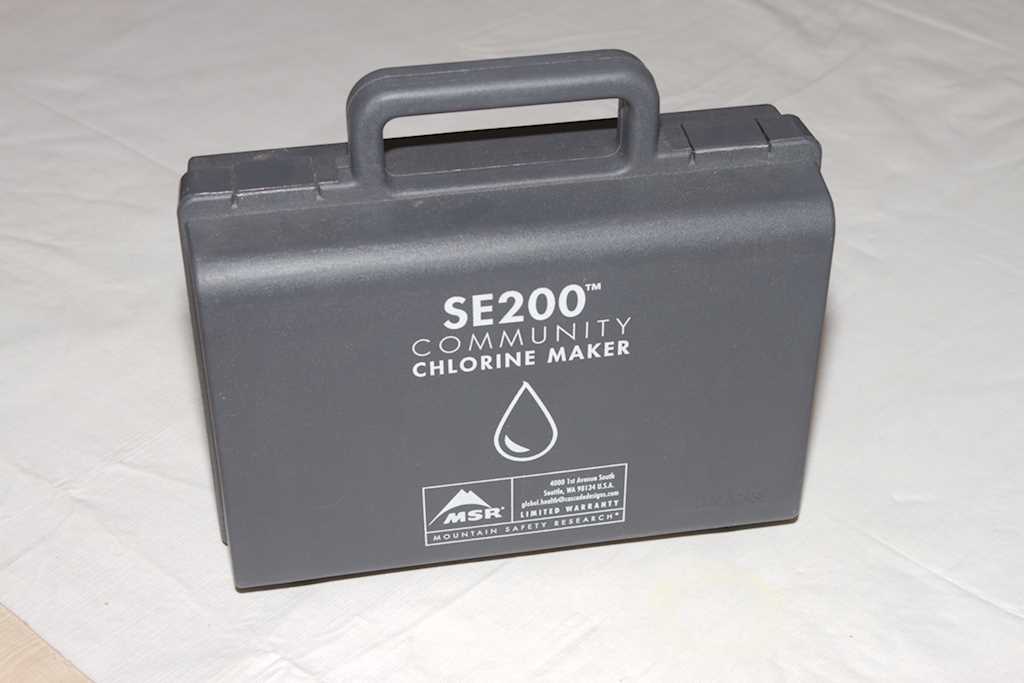
2015112203164500

First Impression

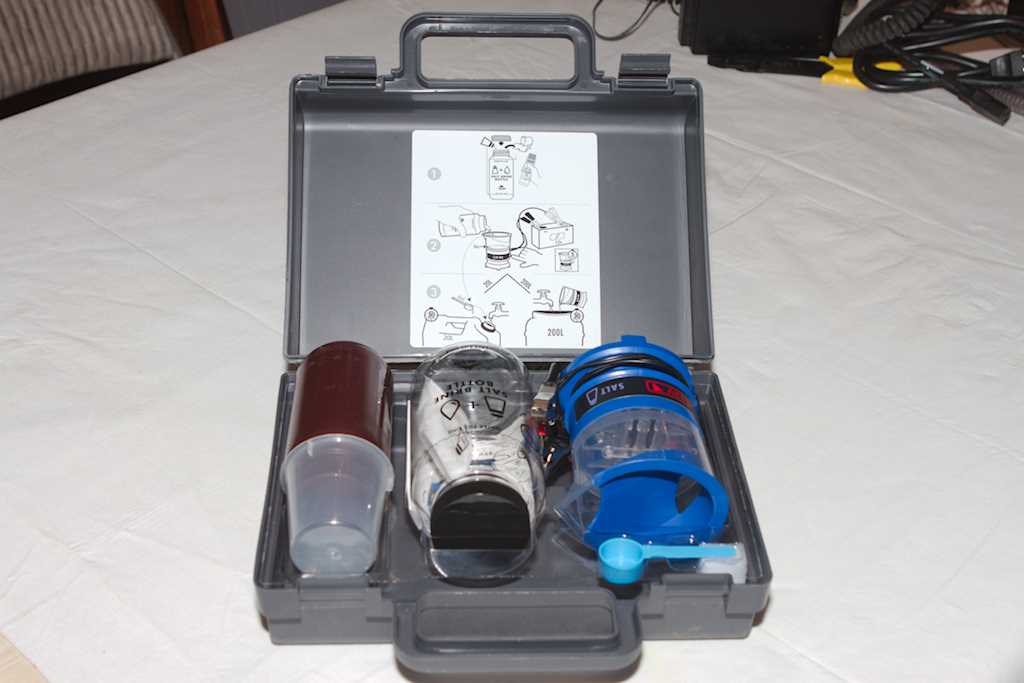
The units arrived within 10 days of ordering it. Opening the first unit to inspect the contents, I discovered that the small dosing spoon was missing. While not a big deal, the spoon aids in dosing 5-gallon or 20-liter containers, and it either showed that the unit had been previously opened or that quality control leaves a bit to be desired. I have it on my list to contact them to obtain a replacement, but if they don’t then a small 5ml syringe will work just as well. In working with this review, I only purified water in 1-gallon containers, so a small syringe actually provided more accurate dosing control. The second unit had the dosing spoon in it though. Here is a quick inventory of the contents of the case:

2015112203204100

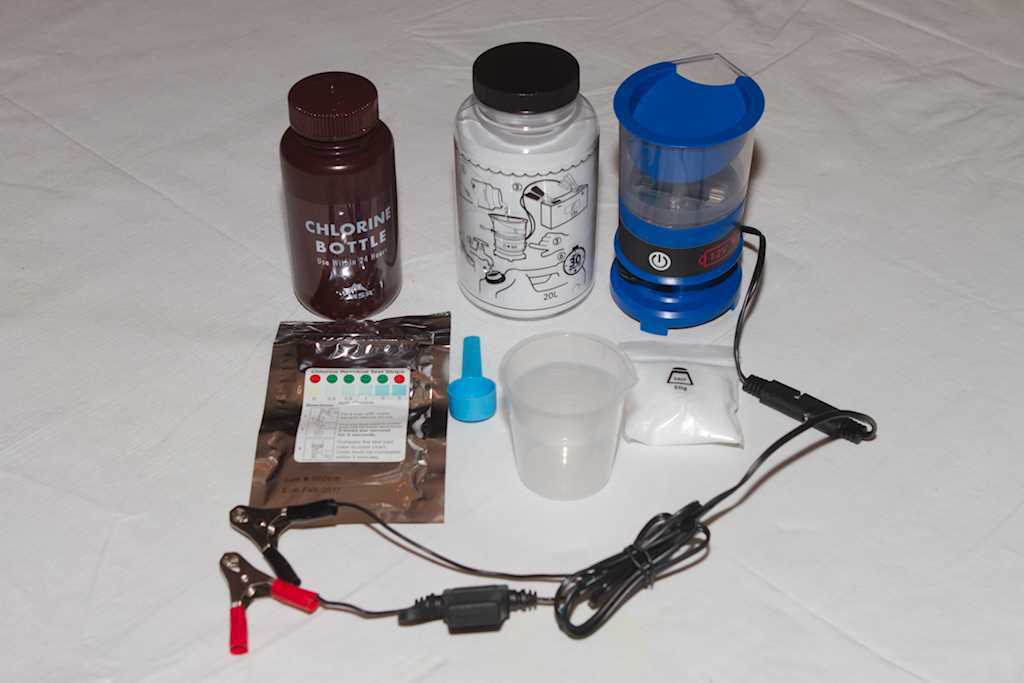
  • 1 plastic carrying case
  • 1 set of instructions
  • 1 clear plastic bottle to hold salt brine (400ml)
  • 1 opaque plastic bottle to hold the chlorine solution (250ml)
  • 1 dosing cup (100ml graduated every 5ml)
  • 1 dosing spoon (5ml)
  • 1 salt packet (50g)
  • 1 packet of chlorine test strips with indicator
  • 1 battery cable clip
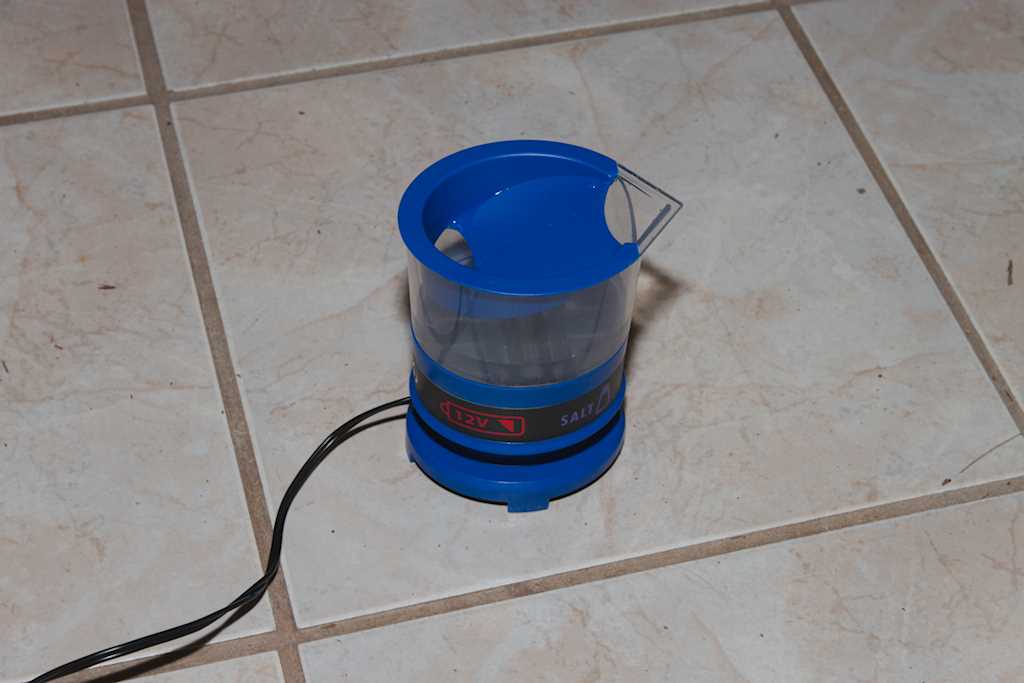
  • 1 SE200 Chlorine maker

One of the first things that strikes you is that this unit is designed for emerging countries. Rather than print instructions in 50 different languages, MSR went with a pictorial concept. The operation is simple enough that just four pictures located in the lid of the box are enough to figure out the operation.

2015112203270900

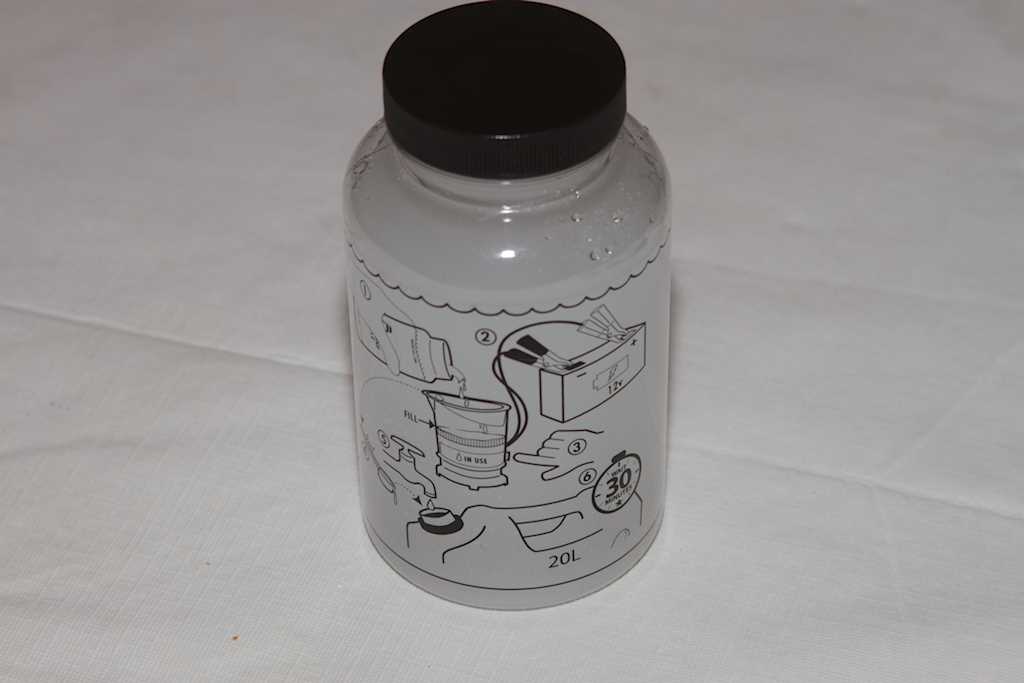
Eager to try it, I operated the unit solely from the pictures in the lid of the case and had the unit operating within 10 minutes of first opening the case and had my first batch of chlorine six minutes after that. The instructions are as simple as:

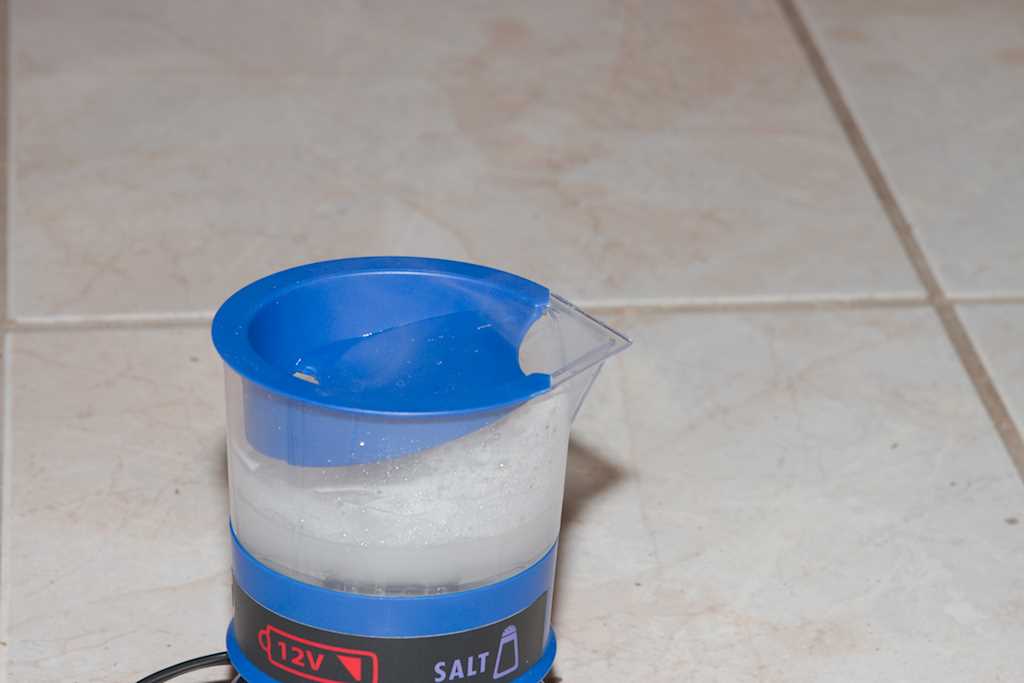
  1. dumping the salt packet in the clear bottle and filling to the water line.
  2. Shaking and waiting until the salt is dissolved.
  3. Measure out 50ml and pour that into the SE200.
  4. Connect the SE200 to the battery (observing polarity).
  5. Turn the unit on, and wait until it is finished.

2015112204340400

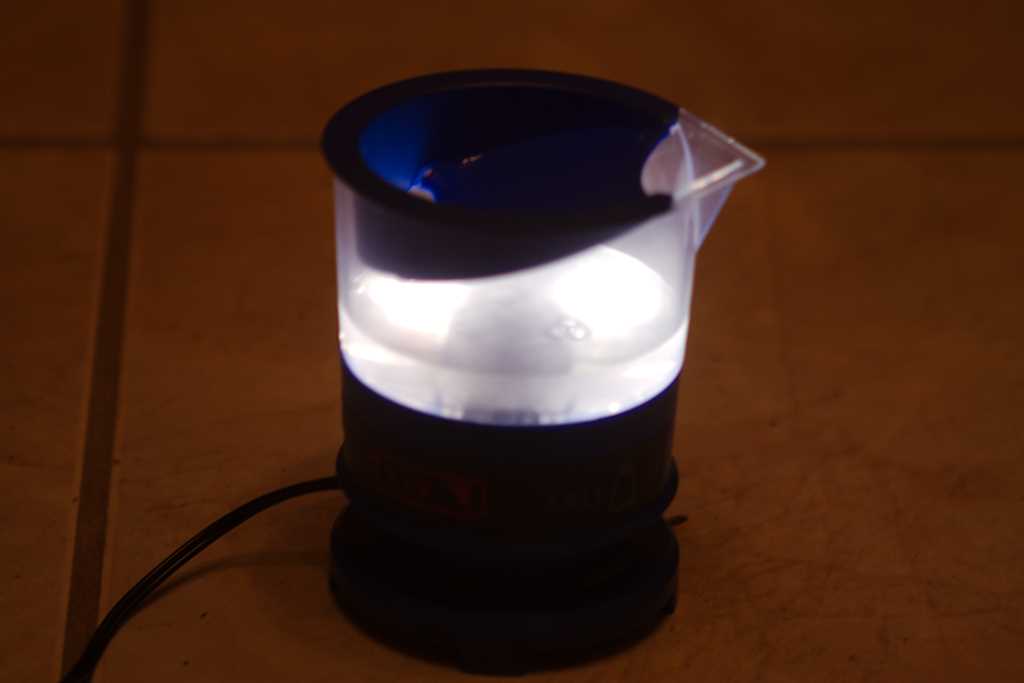
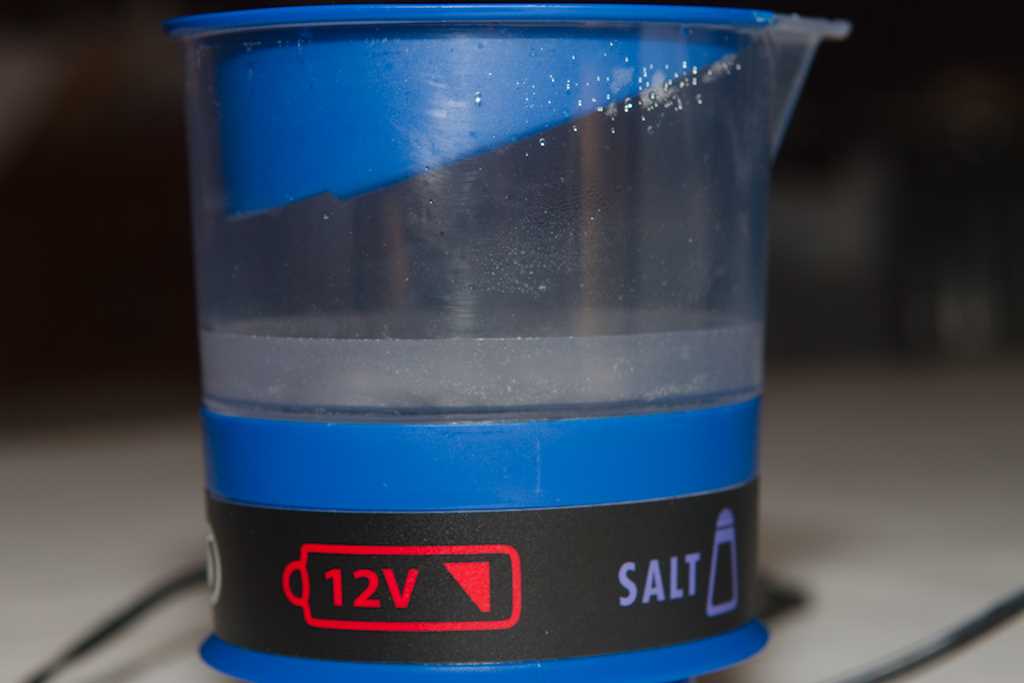
When the unit was connected to a 12V battery, it ran a self test, flashing the LEDs one at a time, purple, red, then white. After the power button was pressed, the white LEDs illuminated and stayed on during the duration of the run. During the run, the salt brine fizzed and you could see a small wisp of gas floating out of the top of the maker while the smell of chlorine (similar to that of running a pool) permeated the area around the SE200. When the unit finished, six minutes later, it beeped a quiet beep and the white LEDs began to slowly flash until the unit was disconnected from power.

Retrieving a 1-gallon container, I filled it with water from the sink faucet, which produces well water (not chlorinated, city water), added 1 ml of the SE200-manufactured chlorine solution, and tested the water mixture with the included test strip immediately. The strip indicated a chlorine concentration in the treated water of about 2 ppm, which is a bit on the high side. Considering that the chlorine was added to tap water, which is known to be clean and that in practical use the water that you will be treating is probably not as clean and you’d let it sit to work for an hour or so, I’d call it an acceptable run.

2015112206050400

Overall, the unit performed as described, was simple enough that a child can use it, and was convenient to handle.

Techie Stuff

While the SE200 produces chlorine, it also produces other byproducts as well. You can visually see this when you pour the chlorine solution into the dosing cup and observe the color. The salt brine originally starts clear to light milky white, yet the chlorine solution has a distinctive yellow/brown color to it along with some solids that can be seen floating. A quick trip to Wikipedia reveals that the electrolysis produces hydrogen gas (H2) which bubbles out, chlorine gas (Cl2) which stays mostly dissolved in the solution, and sodium hydroxide (2 NaOH) which is the yellowish solid seen floating in the water. Impurities in this salt brine solution will also obviously produce other unknown compounds, so it’s best to start with the cleanest water possible for the brine.

2015112204332600

The unit runs off of a 12-volt battery. The battery shown in these pictures is one that I had on hand (a monster 255AH unit), but the SE200 will run off of any 12-volt battery. A standard car battery (~70 to 80 AH) will run the unit for 200 batches (40,000 liters of treated water). I am considering a small 3.6AH gel cell packed in with the SE200 when I move it to a Pelican 1200 case for emergency operation. That will get me several (perhaps 10) batches of solution for 2000 liters of treated water before I need to seek alternate power. When started, the unit draws 2.8 amperes, dropping to 2.2 amperes within 90 seconds for the duration of the run. This level of power usage is easily solar powered with even the most mediocre portable solar system. Several batches will use less power than charging the typical cell phone.

The unit does dump considerable energy into the brine solution. Starting at 70°F, one run raised the brine temperature to 112°F. Out of curiosity, I ran the same brine solution through another run, which raised the temperature to 130°F and did indeed double the strength of the solution. There is, however, no need to produce double (or more) concentration levels as it only takes six minutes to produce enough to treat 200 liters of water to the 1ppm level.

2015112205000200

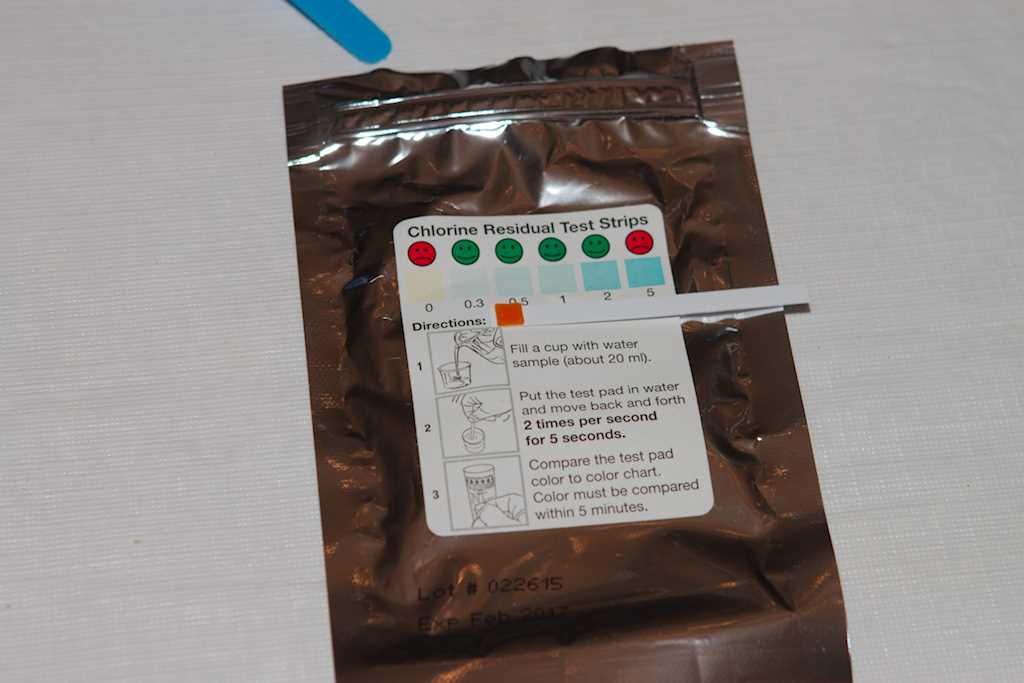
Also, when you use the test strips, make sure you are testing your treated water, not the chlorine solution from the SE200. This is a common error and you will not get a good reading on the strips (The included strips appear orange when tested this way). The point of the test is to test for residual chlorine in your drinking water to determine if you are disinfecting it enough. There is no point in testing the produced solution because you already know it contains chlorine.

A Few Warnings

2015112204382100

Warning one: The fact that you can smell chlorine (and see occasional wisps of mist floating out of the SE200) and the fact that chlorine gas is poisonous in this form should be a strong indicator that you should only use this unit in a well-ventilated area. Do Not attempt to “smell” the chlorine close up to test the concentration. There is no warning about this on the container because this is a product that is not intended for the litigious U.S. market. You have been warned!

Warning two: Free hydrogen gas is produced by this unit, albeit in small quantities. You are also tethered to the battery by a short power cord with battery clips. Attaching the battery clips may produce a small spark. Since hydrogen is highly flammable (okay, explosively so) you do not want to run this unit in an enclosed space. Again, because this unit is not intended for the litigious U.S. market, there is no warning.

Warning three: Chlorine sanitization and oxidation are good for the vast majority of water-borne “bugs”. However, cryptosporidium is highly resistant to chlorine disinfection and UV light is the easiest compliment to this process to inactivate it. Sanitizing the drinking water in storage containers is certainly acceptable, but you should let it sit in a UV transparent container in direct sunlight before consuming (or provide some other method of removing cryptosporidium, such as super fine filtering, if the water comes from a questionable source).

Warning four: Chlorination deals with organic contaminates, which is your biggest concern in an emergency situation. It does not affect chemical contamination, heavy metals, or other such contamination. While the SE200 is fine for emergency use, long-term considerations require the use of other forms of purification and filtration. You can effectively think of chlorination as equivalent to boiling the water.

Disappointments

  1. The plastic storage case is flimsy, the insert holding the components is “cheap”, and I can see where it isn’t going to survive the rough handling that emergency situations can throw at it. However, it is roughly the size of a Pelican 1200 Small Case, so I’m going to transfer the contents to one of these.
  2. The plastic bottles are not microwaveable. (Don’t ask how I know.) I guess emerging countries are not expected to have microwave ovens on hand. But that does bring up the point of what to do when the bottles eventually break. I’ll give the specific instructions in the next section below.
  3. The connector between the SE200 and the battery clips is annoying. I get it; it’s inexpensive and it works, but it took me all of about five seconds to determine that it was coming off and being replaced by Anderson Power Poles (since all of my other 12V equipment has the same connector.
  4. 2015112204333400

  5. The power wire on the SE200 is flimsy. While the unit doesn’t draw very much power and doesn’t need a heavier cord for operation, it just feels “cheap”. The addition of Anderson Power Poles will allow interchangeability with the power cords of my other equipment, so I’ll only have to deal with the short pigtail coming out of the unit itself.
  6. Why isn’t MSR marketing this unit to the prepping world!?! If you’re storing sodium hypochlorite solely for the purpose of water disinfection, this unit completely does away with the need for that chemical (and the associated complications). Storing salt is far easier and won’t deteriorate with time.

What to do when things go wrong

Eventually, the plastic bottles will break (or you will microwave it, like I did in an attempt to speed up the dissolving of salt). What then? The large salt brine bottle is 400ml and you’re adding 50gm of salt to it. You end up with a concentration just below the saturation point. In the cold, you will have trouble getting all of the salt to dissolve. You don’t actually need this bottle if you have the ability to store a clean salt brine solution elsewhere. However, if mixing the solution on-site in a replacement bottle that is not the same size, just mix the brine solution as normal. Let the solids settle to the bottom and pour off the brine from the top to use. If there isn’t enough salt in the solution, the SE200 will flash the purple light letting you know. Mix a little more salt and try again.

You are dosing 20 liters of water with 5 ml of solution to produce roughly 1 ppm chlorine. This means that the solution you produce is roughly a .1% chlorine solution (approximately 60 times weaker than household bleach), but it’s still strong enough to matter when dosing. Rather than measure in drops like you would with household bleach, you measure in milliliters. If you loose the dosing cup or spoon, a medical syringe works just fine. In most cases, I think they work better than the spoon and cup. The dosing is simple. Use 1cc per gallon, 5cc for a 5-gallon (or 20 liter) container, and a whole batch (50ml) for a 55-gallon (or 200 liter) drum. If you lose the dosing cup, the SE200 is still marked, so you know how much brine to put in it.

2015112205512600

You are producing an alkaline solution (because the hydrogen gas bubbles off), and the electrodes will eventually get a coating of scale on them. During my testing, there was no noticeable buildup on the electrodes, but if the purple light stays lit even after you verified the brine solution, it’s a simple matter to clean the SE200 by filling it with 50ml of vinegar and swishing it around. Just like your coffee pot, it’s probably easier to put it on a regular cleaning scheduled with vinegar rather than waiting for the buildup to interfere with operation.

Recommendations

  1. Use this as an emergency water source (especially when traveling). It fits in a BOV without hardly even noticing it. However, it is plastic and only intended for a life of five years. If you need water for a longer span of time, see the SurvivalBlog article An Alternative to Calcium Hypochlorite, by TLS for a long-term, permanent solution. I have two. One goes in the bugout trailer permanently, and the other moves between vehicles when we are taking road trips. It’s small enough that it isn’t even noticed. The old American Express adage certainly fits this unit: Don’t leave home without it.
  2. Carry an additional filtration unit, preferably an activated carbon unit, like the MSR MiniWorks or the Katydyn. The SE200 will not remove heavy metals, chemical contamination, or cryptosporidium. The activated charcoal filters will do a much better job at that. Our plan is to use the SE200 for all water usage and then water that is consumed will be run through an MSR MiniWorks (if vehicle bound) or a Berkey (if bugout trailer bound).
  3. Remember that the chlorine takes time to work. You need to wait at least 30 minutes (preferably an hour) after treating the water before using it. If you are in a hurry, this is not the method to use. However, if you are needing a large quantity and have an hour or more of time, this will get you what you need.
  4. Swap the case out with a Pelican 1200 Small Case. The first time your load shifts and smashes the box (or you drop the box), you’ll thank me.
  5. Remember to keep your chlorine residual test strips handy and current. They are inexpensive insurance that you are drinking water that is safe. They are not just used to verify that you produced chlorine but to verify the quality of the water you are drinking. If you dose the water and 30 minutes later there is no residual chlorine in it, you probably need to dose it again before using it. The chlorine is used up as it disinfects the water. No signs of chlorine means no disinfecting is occurring.
  6. Despite the fact that the water tests fine, try not to drink murky water. Let the sediments settle out or filter it before you drink it.
  7. Try using it before you need it. It’s simple to use, but you don’t want to discover a problem when you need it most.
  8. 50gm of salt makes eight batches (1600 liters of treated water). It’s easy enough to store salt and any salt will work, but I just buy an extra container of non-iodized salt every time or so that I’m at the store. The canisters are easy to manipulate and store on shelves.

The SE200 is so easy to use and convenient to store, it belongs in every person’s preps. Whether you are prepping for TEOTWAWKI or just for the next hurricane or wind storm, or even just traveling to another country on business, the peace of mind you get by knowing you have access to drinking water, no matter what, is well worth the price. I bought two and I’m keeping them. I’m recommending this to all of my friends as well. There are a few caveats, such as having to wait for the process to work and the need for some sort of 12V power, but I can’t think of any other product that will treat the same amount of water with the same ease. Just take the recommendations to make a few upgrades and get the battery, extra test strips, and lay up the salt supply. Goodbye sodium hypoclorite!

Where to Get it


Recipe of the Week: Quick Chili Con Carne, by T.M.

Instructions:

  • 1lb lean ground beef
  • 1 small onion, chopped
  • 1 tsp salt
  • 1 to 2 tsp chili powder
  • 1 bay leaf
  • 1 tsp Worcestershire sauce
  • 2 (8oz) cans tomato sauce
  • 2 (16oz) cans kidney beans, drained

Directions:

  1. In a skillet or slow-cooking pot with a browning unit, break up beef with a fork and cook until lightly browned
  2. Pour off excess fat.
  3. In a slow-cooking pot, combine meat with onion, salt, chili powder, bay leaf, Worcestershire sauce, tomato sauce, and kidney beans.
  4. Cover and cook on high for 2 to 3 hours.
  5. Remove bay leaf.

Makes 6 to 7 servings.

o o o

Useful Recipe and Cooking Links:

Dutch oven recipesfrom Troop 26 in Parkville (PDF). Sent in by Keeper.

Do you have a favorite recipe that would be of interest to SurvivalBlogreaders? Please send it via e-mail. Thanks!


Letter Re: An Alternative to Calcium Hypochlorite, by TLS

Gentlemen,

I just read the excellent article written on chlorine usage for water disinfection. As a long time analytical chemist, it was a pleasure to read such an articulate article on the subject. I wanted to add a caveat to the article. One must keep in mind that when using chlorine, a minimum contact time of one hour is required to kill organisms, and you should maintain a residual of chlorine in the water.

Contact time is the length of time the chlorine is allowed to work. And since the chlorine reacts with the organic molecules composing the undesirable organisms, its concentration drops over that time period. So the calculated the amount of chlorine to use to get to 1 ppm free (or residual) chlorine will vary based on the amount of organic material in the water. In laymen terms, the dirtier the water the longer the contact time and the higher the concentration of chlorine that is required. In normal times, chlorine is added, the chlorine is allowed to react, and the water is tested to determine free (residual) chlorine. If the residual is too low, more chlorine is added.

The maximum recommended residual chlorine level in drinking water is 4 ppm. Keep this in mind when using any chemical to treat drinking water: For the greatest safety margin, you must add enough to kill the organisms and leave a residual amount of chlorine in the water. Temperature will also greatly affect the amount of contact time required. The reaction of chlorine with undesirable organisms goes slower in cold water than warm. Keep up the good work. – JP in Kalamazoo

o o o

HJL,

One thing that hit me (while buying something to de-ice my walkways) was that I rarely see salt – sodium chloride – listed as something preppers need to stock up on, but it is something you need to consume to live, not to mention the other uses. The article on Calcium Hypochlorite (Chlorine generator) alternatives mentioned “adding salt” and that the chlorine generators turn salt into chlorination. Salt is something I get from the same store shelves as everything else, so it might be a good idea to get an extra bag of rock-salt and store it away.

I also should mention that there were several responses giving the shortcomings of running razor wire in the interior of your house. Yet I’m glad someone at least submitted the idea. It helped to have a new idea, and even if it wasn’t so good as presented it provoked a lot of discussion and several refinements and alternatives. I’d rather not discourage the inventiveness but instead look at all ideas as something to be evaluated and thought through. – T.Z.


Economics and Investing:

A very interesting read on the coming economic disaster: Is This How the Next Global Financial Meltdown Will Unfold?. Sent in by GJM

o o o

The Future of Money – Banking without a bank in Kenya. – C.L.

o o o

Items from Professor Preponomics:

Next Crisis in the Making: David Stockman Points to the $4.6T Leveraged Loan Market (Contra Corner)

ECB Policymaker Says Monetary Policy Risks Becoming Ineffective in a Low Growth World (Reuters)

China’s $1.2T Debt “Ponzi Scheme” Could Trigger Financial Crisis (Breitbart)

Container Freight Rates Plummet 70% in 3 Weeks (Zero Hedge)

Investors Warn of Greater Volatility from Liquidity Crunch (Reuters)

Top Fed Official Says Feds May Need Permanently Big Balance Sheet (Reuters)

Student Loans and Uncle Sam (Mises Institute)

Earnings of the Top 1% in Your State (Business Insider)

This City has the Most Concentrated Poverty in America (Business Insider)


Odds ‘n Sods:

From SurvivalBlog reader S.H. – While I don’t make a habit of watching PBS, this caught my attention. Though the technical aspects were mostly over my head, the ramifications were not. This type of terrorism vastly widens the threat to the power grid along with other infrastructures. Cyber War Threat

o o o

Real Danger Is Violence and War-Catherine Austin Fitts This is in-line with what I have been saying for quite some time. There is a huge economic crises coming, yet TPTB will keep kicking the can down the road, watching the crises grow larger and larger until some outside force finally determines that enough is enough. Whether it is domestic violence driven by the demise of the middle class and racial tensions or an International war on the scale of World War III, sooner or later someone will break. – link submitted by B.B.

o o o

Pioneers of ‘pee-cycling’ tout urine’s value – Of course, I’m wondering how they deal with the heavy metals from massive dosing of vitamins and chemical compounds from the over-medication of the population? – G.P.

o o o

In combat, mobility is everything…Is the same true of surviving TEOTWAWKI? Potential Danger Is in Government Responses.

o o o

An interesting twist on an old problem: Gangs of New York: Sicilian mafia offers Big Apple protection from ‘psychopathic’ ISIS Sent in by D.S.


Hugh’s Quote of the Day:

“What manner of men had lived in those days…who had so eagerly surrendered their sovereignty for a lie and a delusion? Why had they been so anxious to believe that the government could solve problems for them which had been pridefully solved, many times over, by their fathers? Had their characters become so weak and debased, so craven and emasculated, that offers of government dole had become more important than their liberty and their humanity? Had they not known that power delegated to the government becomes the club of tyrants? They must have known. They had their own history to remember, and the history of five thousand years. Yet, they had willingly and knowingly, with all this knowledge, declared themselves unfit to manage their own affairs and had placed their lives, which belonged to God only, in the hands of sinister men who had long plotted to enslave them, by wars, by “directives,” by “emergencies.” In the name of the American people, the American people had been made captive.”

– Taylor Caldwell, The Devil’s Advocate


Notes for Sunday – November 22, 2015

Today is remembered as the birthday of the late Eugene M. Stoner (born 1922, died April 24, 1997.) He was the designer of the AR-7, AR-10, AR-15, AR-180, the Stoner 63, and several other firearms. (The AR-10 was the basis of the AR-15, which in turn spawned the very widely used M16 and all of its variants including the M4 Carbine). It has been estimated that as many as 3.7 million rifles from the AR-15 family are owned by civilians in the United States, and military production M16 variants well exceeds 8 million rifles.

o o o

Today, we present another entry for Round 61 of the SurvivalBlog non-fiction writing contest. The nearly $12,000 worth of prizes for this round include:

First Prize:

  1. A Tactical Self-Contained 2-Series Solar Power Generator system from Always Empowered. This compact starter power system is packaged in a wheeled O.D. green EMP-shielded Pelican hard case (a $1,700 value),
  2. A Gunsite Academy Three Day Course Certificate that is good for any one, two, or three day course (a $1,195 value),
  3. A course certificate from onPoint Tactical for the prize winner’s choice of three-day civilian courses, excluding those restricted for military or government teams. Three day onPoint courses normally cost $795,
  4. DRD Tactical is providing a 5.56 NATO QD Billet upper with a hammer forged, chromlined barrel and a hard case to go with your own AR lower. It will allow any standard AR type rifle to have quick change barrel, which can be assembled in less than one minute without the use of any tools and a compact carry capability in a hard case or 3-day pack (an $1,100 value),
  5. Gun Mag Warehouse is providing 20 Magpul pmags 30-rd Magazines (a value of $300) and a Gun Mag Warehouse T-Shirt; (an equivalent prize will be awarded for residents in states with magazine restrictions),
  6. Two cases of Mountain House freeze dried assorted entrees in #10 cans, courtesy of Ready Made Resources (a $350 value),
  7. The Ark Institute is donating a non-GMO, non-hybrid vegetable seed package (enough for two families of four) plus seed storage materials, a CD-ROM of Geri Guidetti’s book “Build Your Ark! How to Prepare for Self Reliance in Uncertain Times”, and two bottles of Potassium Iodate (a $325 retail value),
  8. A $250 gift certificate from Sunflower Ammo,
  9. KellyKettleUSA.com is donating both an AquaBrick water filtration kit and a Stainless Medium Scout Kelly Kettle Complete Kit with a combined retail value of $304, and
  10. Two cases of meals, Ready to Eat (MREs), courtesy of CampingSurvival.com (a $180 value).

Second Prize:

  1. A Glock form factor SIRT laser training pistol and a SIRT AR-15/M4 Laser Training Bolt, courtesy of Next Level Training, which have a combined retail value of $589,
  2. A FloJak EarthStraw “Code Red” 100-foot well pump system (a $500 value), courtesy of FloJak.com,
  3. A transferable certificate for a two-day Ultimate Bug Out Course from Florida Firearms Training (a $400 value),
  4. A Model 120 Series Solar Generator provided by Quantum Harvest LLC (a $340 value),
  5. A $300 gift certificate from Freeze Dry Guy,
  6. A Trekker IV™ Four-Person Emergency Kit from Emergency Essentials (a $250 value),
  7. Twenty-five books, of the winners choice, of any books published by PrepperPress.com (a $270 value),
  8. A pre-selected assortment of military surplus gear from CJL Enterprize (a $300 value),
  9. RepackBox is providing a $300 gift certificate to their site, and
  10. Safecastle is providing a package of 10 LifeStraws (a $200 value)

Third Prize:

  1. A Royal Berkey water filter, courtesy of Directive 21 (a $275 value),
  2. A $245 gift certificate from custom knifemaker Jon Kelly Designs, of Eureka, Montana,
  3. A large handmade clothes drying rack, a washboard, and a Homesteading for Beginners DVD, all courtesy of The Homestead Store, with a combined value of $206,
  4. Expanded sets of both washable feminine pads and liners, donated by Naturally Cozy (a $185 retail value),
  5. Two Super Survival Pack seed collections, a $150 value, courtesy of Seed for Security, LLC,
  6. Mayflower Trading is donating a $200 gift certificate for homesteading appliances,
  7. APEX Gun Parts is donating a $250 purchase credit,
  8. Montie Gear is donating a Precision Rest (a $249 value), and
  9. Two 1,000-foot spools of full mil-spec U.S.-made 750 paracord (in-stock colors only) from www.TOUGHGRID.com (a $240 value).

Round 61 ends on November 30th, so get busy writing and e-mail us your entry. Remember that there is a 1,500-word minimum, and that articles on practical “how to” skills for survival have an advantage in the judging.


Our Family’s Journey to Preparing For an Extended Grid Down Event- Part 1, by Old Man

To paraphrase an old saying, prepping is not a destination but a journey, or rather it’s a lifestyle. In this article I would like to share some highlights of our family’s journey to preparing for an extended grid down event, including what we found works and didn’t work for us. Hopefully, this might help some folks avoid the mistakes we made and stir some ideas for others.

When I was a youngster, I joined the Boy Scouts. It was there that I was first bit by the prepping bug. I took to the Boy Scouts motto of “Be Prepared” like a duck to water. As I was growing up, we experienced very few power outages. When the power did go out, it usually returned in under 20 minutes. During this time of my life, my uncle worked for the local utility company, and he shared with me how the local power grid worked and all of the safeguards built in to it. As a result I didn’t really give any thought to what to do in an extended grid down event. The extent of my preps for a power outage at that time consisted of a couple of flashlights, spare batteries, and a battery-operated radio. This level of preps served me well for many years.

Years later, I ended up moving to another town that was served by a different utility company. I soon learned that not all utility companies are created equal. Power outages seemed to happen quite a bit more often, and when they did the outages typically lasted for two or more hours. The longest outage I recall lasted over eight hours, when the power grid became overwhelmed one summer during a record heat wave. During this period I really didn’t make any adjustments to our preps, except to increase the amount of spare batteries I kept on hand.

Up to this point in my life, things had been good. I had gotten married, my wife and I had bought our dream home in suburbia, and power from the local utility company was plentiful and inexpensive. Power outages were still relatively rare, and when they did happen the duration was manageable.

That all changed in the year 2000. California had just deregulated the electrical utilities under the promise of reducing the rates for electricity. Little did we know at the time, but that opened the door for market manipulations in the cost and supply of electricity. During 2000 and 2001, California experienced an unprecedented electricity crisis. At one point we were notified by our local utility company that all Californians would be subjected to mandatory rolling blackouts.

Talk about a game changer. At the time, I was working from home and my work required the use of computers. If the power was down, I couldn’t work. While I had an uninterruptible power supply (UPS) system for the computers, it only had 20 minutes of battery backup. Yikes!

As I was familiar with data centers and high availability power systems, I quickly set about designing a solution that would provide power during an extended blackout, allowing me to continue working. My solution was pretty simple. It consisted of a generator that fed into a transfer switch. The transfer switch fed the power outlets that fed the computers. During grid up, the computer outlets were fed from the power grid. During a blackout, the UPS would operate the computers for 20 minutes. This gave me plenty of time to change the transfer switch to be supplied from the generator and to fire up the generator.

With the design done, the next step was to purchase all of the components and wire it up. This proved to be problematic. It seems that I wasn’t the only one spurred into action by the threat of rolling blackouts. Generators were flying off the shelves, and prices were going into the stratosphere. Prices were quickly rising out of our reach. Then one day I happened to by walking through a local big box store, and they were having a close out on some generators. I couldn’t believe my luck. I quickly purchased the last one they had in stock. Years later I would discover the reason for the fire sale. It seems the manufacturer had just been sold and the new owners were discontinuing that product line. The stores were quickly dumping their stock of the affected models.

I then set about wiring up the transfer switch. Since I had done electrical work earlier in my career, this was straight forward for me. (I should mention that installing a transfer switch involves making changes to the wiring in your home, and you should consult a professional electrician, unless you absolutely know what you are doing.)

As luck would have it, about the time I got the transfer switch installed, we received notice from our local utility company that our neighborhood would be exempt from the rolling blackouts. It turns out that our neighborhood is serviced by the same power feed that serves the hospital down the road. Who knew? So I placed the generator in a corner of the garage with six gallons of gas, just in case. We never ended up needing the generator during the crisis.

With the electricity crisis came huge spikes in electricity prices. Over the next few years we watched our monthly electric bill skyrocket from $100 a month to over $600 per month. We tried everything we could think of to conserve, but it just didn’t seem to make a dent. We embarked on an aggressive mission to cut our electric usage that we didn’t know at the time but would later feature prominently in our grid down strategy.

The crux of the problem was to understand where the electricity was going. While on a month to month basis our overall usage did not increase by very much, the cost was going up due to the never-ending price increases by the local utility company. We needed data. I purchased a “kill a watt” meter to measure the energy usage of various appliances. While somewhat helpful, it was slow and tedious, and we only got data for one device at a time. I purchased some other commercial meter solutions with data logging, et cetera. However, these proved to be only marginally better. I still wasn’t able to see the “big picture” of what was consuming all of the power. That brought me to a solution from Powerhouse Dynamics called Sitesage. I purchased a system from Smarthome.

Sitesage is a whole house monitoring solution that involves installing small current transformer (CT) sensors on each electrical circuit in the main electrical panel. These sensors are then connected to a main unit that collects the usage data in real time. The data is sent to the Sitesage servers where we can access it and view all kinds of detailed usage analysis. While I was able to install the system myself, you should seek the assistance of a professional electrician, unless you absolutely know what you are doing. (In the interest of full disclosure, I have no affiliation with any product or company mentioned, other than that I am a customer.)

Finally, we had data. One last wrinkle was that we now could see usage on individual plug and light circuits, as they were labeled in the main electrical panel, but we didn’t know where they went. I purchased a circuit tracer from the local big box store and spent the following Saturday drawing a map of the entire house with every outlet and light, then mapping out each circuit from the main panel. In the end, we had a detailed map so when we wanted to see what was on plug and light circuit #6, we knew which outlets and light were involved. Now we were ready to begin the hunt. We systematically began going circuit by circuit, with the goal of reducing the usage to 0. On each circuit, we identified what was using power and then looked at ways to reduce the usage. I won’t bore you with the details, but here are some of our major findings:

a) When we purchased our home, we bought new appliances, including a frost-free refrigerator. It turns out that the way they made it frost free was to run a 200-watt heater coil 24×7. While the refrigerator still ran great, we decided to replace it with a more modern energy-efficient model.

b) We had an older Sony LCD big screen TV that, while it played great, consumed over 250 watts when it was on. We replaced it with a more modern, power-efficient model.

c) The pool pump was another place where we replaced the pump with a more modern variable speed, energy-efficient model.

d) We replaced our HVAC system with a more modern energy-efficient model.

We continued to hammer each and every circuit, eliminating wall warts (small power adapters) and replacing or finding alternatives to each and every device that was drawing utility power. In the end, we were able to reduce our power bill to the $100 per month range again.

Life was good again…until Katrina happened. Katrina was another game changer, both professionally and personally (more on the professional later). Up until Katrina, the most we worried about was having to do without power for half a day. Was it inconvenient? Yes, but it hadn’t been catastrophic. However, after Katrina, we realized this was a real possibility. With no power for days, we now had to deal with the loss of refrigeration, spoiled food, no stove (ours was electric), and (gasp) no coffee in the morning. PANIC!!


Letter Re: A Solid Solution On Securing Home Defense During A TEOTWAWKI Situation, by B.M.

Good morning, Hugh,

I’ve been following the discussion on “indoor concertina wire” and agree wholeheartedly; it’s a poor decision.

A recent writer pointed out that concertina wire, barbed wire, and tanglefoot should be secured to posts of some sort; I concur, and would like to elaborate on that topic.

When I build fences I install a 4 foot wide hinged walk-through gate that, on closing, latches to a removable post. There is also an 8-foot hinged gate that latches to that same removable post, allowing a 12-foot entry for equipment should it be needed. Depending on the fence, and requirements, the removable post is either a wood 4X4 or a 6X6; a 36-inch length of 1/4 inch wall thickness square steel tubing is inserted in a hole and concreted in place, with about 2 inches or so exposed above ground level. About 4-6 inches from the bottom of the square tubing four 1/2 inch holes are drilled through opposite sides allowing for a pair of 1/2 inch galvanized steel rods to go through the tubing and extend about 3 inches from each side. These rods – “post support rods” – both help secure the tubing in the concrete and form a base for piece of stainless steel as a “support plate” to support the wood post. The stainless steel can be from 1/8 to 3/16 inch thick; thicker is harder to bend, and it’s not under any stress. Use a piece about 1/2 inch narrower than the inside of the tubing and 3 times longer than the tubing’s inside dimension; bend it in a wide U shape about 1/2 inch narrower than the inside of the tubing, so the “legs” extend down about 4 inches or so. The space between the sides of the plate and the square steel tubing allows for drainage, and the shape allows dropping the “platform plate” into the tubing to rest on the 1/2 inch rods after installation without it becoming misaligned. A note: stainless is non-ferrous, so it cannot be removed with a magnet if you get it wrong. A shop vacuum with a PVC pipe extension can usually be used, however. The support plate is necessary – without it the two rods will indent the wood post and over time the post will slowly settle into the square steel tubing, requiring constant readjustment of gates and latches. If necessary, the 2-3 inches of exposed square tubing can be drilled for a lag bolt to secure the removable post. Pro tip: it’s much easier to drill that hole before the tubing goes into the ground.

A little sanding or planing will be required to get the wood post to fit easily into the square steel tubing and be easily removable, giving you the option of a 4 foot (or wider) walk-through gate, and 8-foot wide vehicle gate, or a 12-foot wide equipment opening.

As for perimeter defense, the same technique can be used elsewhere, using shorter lengths of square steel tubing. A 12 to 18-inch length can be positioned wherever you need to control movement, and set flush with ground level. Depending on the installation and intent, it may be possible to skip the concrete step. Only one 1/2 inch diameter “post support rod” is necessary for these, and since gate latches aren’t involved, don’t bother with the stainless post support plate. To avoid having an open hole that could be stepped into by people or animals, drop a length of 4X4 (or 6X6) into the square tubing, trimmed flush with the ground so you can mow right over it. Removal is accomplished by screwing a lag bolt into the end of the wood post and pulling it out.

When circumstances dictate, a wood post of suitable size can be dropped into the below ground square steel tubing and concertina or barbed wire attached to it. A 3 foot length of 6X6 1/2-inch wall thickness flush-buried square steel tubing, set in concrete, will provide enough support for an inserted 6-foot length of 5-inch, 1/2-inch wall thickness, square steel tubing to resist “dynamic removal”; I’m not aware of any readily available passenger vehicles, including pickup trucks, that are capable of driving through a couple of closely spaced steel posts of such size. The inserted post (think two square steel tubes telescoped together) can be secured with wooden wedges driven between the sections. The wedges and smooth sides of a steel square post will largely prevent pulling the post out by hand, especially true when the homesteader can provide armed overwatch of the posts.

The same technique may be used with lengths of round steel well casing and lengths of telephone pole. Utilities replace poles due to age or vehicle accidents, so they’re often available free, and while the buried portion may have some rot, the above ground portion should be fine, and since the entire pole has been treated to resist rot, the unrotted sections should provide many years of service, even when buried.

In those areas where more permanent vehicle movement prevention is desired, a 10- or 12-inch diameter pole section buried 4 feet in and extending 24-28 inches above ground, on 3-foot centers is effective. A second row, positioned a few to several feet behind the first and staggered to be spaced in the front row gaps provides an additional level of security.

A suitable type of grass or plant that can grow high enough to hide the posts, preferably a plant type that doesn’t require maintenance, can provide beautification while concealing the fortifications. Pro tip: apply copious amounts of barbed wire to the posts before planting the greenery, and note that small coils of concertina wire can be positioned between the post rows and secured to them, which will become quite unobtrusive when the plantings grow over them.

N.K.


Economics and Investing:

Caterpillar sales drop for the fourth year in a row because of China: Those good years won’t come back. sent in by RBS

o o o

Sent in by B.B. – Fed To Hold An “Expedited, Closed” Meeting On Monday
“As we are sure to be told: ‘It’s probably nothing!’ “ – Uhh, sure…

o o o

Items from Professor Preponomics:

Auto Loans and Mortgages Push Household Debt to Highest Levels Since 2010 (Bloomberg)

Baltic Dry Index Drops to Record Low (Bloomberg)

Iron Ore Price Craters (Mining)

Lifetime Cost of Refugee Settlement: $55B (Breitbart)

Resettling Middle Eastern Refugees Costs Taxpayers $64,370 (Washington Free Beacon)

The Beginning of the End of the Affordable Care Act? Largest U.S. Health Insurer May Exit Obamacare (Zero Hedge)

AMAC Says Obamacare Co-op Failures Signal More Trouble for President’s Signature Law (AMAC)

Lenders Taking Borrowers to Court Over Delinquent Student Loans (San Francisco Gate)

Help! My Short Position Just Got Crushed (Market Watch) Spoiler Alert: this is a cautionary tale.

Tyson Foods to Close Two Plants: 880 Workers Affected (Reuters)


Odds ‘n Sods:

First we are told they will disrupt the under-sea fiber communications. Now: Suspicious Russian Mission Aimed At Disrupting U.S. Submarine Monitors – D.S.

o o o

From SurvivalBlog reader A.L. – This is an excellent essay in response to a rabid gun-grabber: “Tap dancing in a minefield blindfolded.”

o o o

The hacking group “Anonymous” has released a statement claiming ISIS is planning Sunday terror attacks in U.S., worldwide – D.S.

o o o

SurvivalBlog reader T.L. sent in this little lump of coal: First Amendment under siege: Government should ban speech that offends minorities, millennials say it looks like that indoctrination is well on it’s way to becoming the new reality.

o o o

Anitibiotics, the miracle drugs, are loosing effectiveness: World on cusp of ‘post-antibiotic era’. Sent in by G.G.


Hugh’s Quote of the Day:

“And Jesus, when he was baptized, went up straightway out of the water: and, lo, the heavens were opened unto him, and he saw the Spirit of God descending like a dove, and lighting upon him: and lo a voice from heaven, saying, This is my beloved Son, in whom I am well pleased.” Matthew 3: 16-17 (KJV)


Notes for Saturday – November 21, 2015

Today, we present another entry for Round 61 of the SurvivalBlog non-fiction writing contest. The nearly $12,000 worth of prizes for this round include:

First Prize:

  1. A Tactical Self-Contained 2-Series Solar Power Generator system from Always Empowered. This compact starter power system is packaged in a wheeled O.D. green EMP-shielded Pelican hard case (a $1,700 value),
  2. A Gunsite Academy Three Day Course Certificate that is good for any one, two, or three day course (a $1,195 value),
  3. A course certificate from onPoint Tactical for the prize winner’s choice of three-day civilian courses, excluding those restricted for military or government teams. Three day onPoint courses normally cost $795,
  4. DRD Tactical is providing a 5.56 NATO QD Billet upper with a hammer forged, chromlined barrel and a hard case to go with your own AR lower. It will allow any standard AR type rifle to have quick change barrel, which can be assembled in less than one minute without the use of any tools and a compact carry capability in a hard case or 3-day pack (an $1,100 value),
  5. Gun Mag Warehouse is providing 20 Magpul pmags 30-rd Magazines (a value of $300) and a Gun Mag Warehouse T-Shirt; (an equivalent prize will be awarded for residents in states with magazine restrictions),
  6. Two cases of Mountain House freeze dried assorted entrees in #10 cans, courtesy of Ready Made Resources (a $350 value),
  7. The Ark Institute is donating a non-GMO, non-hybrid vegetable seed package (enough for two families of four) plus seed storage materials, a CD-ROM of Geri Guidetti’s book “Build Your Ark! How to Prepare for Self Reliance in Uncertain Times”, and two bottles of Potassium Iodate (a $325 retail value),
  8. A $250 gift certificate from Sunflower Ammo,
  9. KellyKettleUSA.com is donating both an AquaBrick water filtration kit and a Stainless Medium Scout Kelly Kettle Complete Kit with a combined retail value of $304, and
  10. Two cases of meals, Ready to Eat (MREs), courtesy of CampingSurvival.com (a $180 value).

Second Prize:

  1. A Glock form factor SIRT laser training pistol and a SIRT AR-15/M4 Laser Training Bolt, courtesy of Next Level Training, which have a combined retail value of $589,
  2. A FloJak EarthStraw “Code Red” 100-foot well pump system (a $500 value), courtesy of FloJak.com,
  3. A transferable certificate for a two-day Ultimate Bug Out Course from Florida Firearms Training (a $400 value),
  4. A Model 120 Series Solar Generator provided by Quantum Harvest LLC (a $340 value),
  5. A $300 gift certificate from Freeze Dry Guy,
  6. A Trekker IV™ Four-Person Emergency Kit from Emergency Essentials (a $250 value),
  7. Twenty-five books, of the winners choice, of any books published by PrepperPress.com (a $270 value),
  8. A pre-selected assortment of military surplus gear from CJL Enterprize (a $300 value),
  9. RepackBox is providing a $300 gift certificate to their site, and
  10. Safecastle is providing a package of 10 LifeStraws (a $200 value)

Third Prize:

  1. A Royal Berkey water filter, courtesy of Directive 21 (a $275 value),
  2. A $245 gift certificate from custom knifemaker Jon Kelly Designs, of Eureka, Montana,
  3. A large handmade clothes drying rack, a washboard, and a Homesteading for Beginners DVD, all courtesy of The Homestead Store, with a combined value of $206,
  4. Expanded sets of both washable feminine pads and liners, donated by Naturally Cozy (a $185 retail value),
  5. Two Super Survival Pack seed collections, a $150 value, courtesy of Seed for Security, LLC,
  6. Mayflower Trading is donating a $200 gift certificate for homesteading appliances,
  7. APEX Gun Parts is donating a $250 purchase credit,
  8. Montie Gear is donating a Precision Rest (a $249 value), and
  9. Two 1,000-foot spools of full mil-spec U.S.-made 750 paracord (in-stock colors only) from www.TOUGHGRID.com (a $240 value).

Round 61 ends on November 30th, so get busy writing and e-mail us your entry. Remember that there is a 1,500-word minimum, and that articles on practical “how to” skills for survival have an advantage in the judging.


An Alternative to Calcium Hypochlorite, by TLS

I have read articles and posts, as well as listened to preppers discuss the use of Calcium Hypochlorite (Cal-Hypo) as a water sanitizer in The-End-Of-The-World-As-We-Know-It (TEOTWAWKI) situations. I owned a swimming pool business for over 20 years, and during that time I used Cal-Hypo, Sodium Dichloro-S-Trianzinetrione (Dichlor), and Sodium Trichloro-S-Trianzinetrione (Trichlor) extensively in both commercial and residential swimming pools. I also installed and maintained many salt-chlorine generator systems. Every time I read about someone planning to use Cal-Hypo for long-term storage to provide water sanitation in TEOTWAWKI, I cringe. Cal-Hypo has many serious shortcomings. The disadvantages are:

  1. Cal-Hypo degrades and loses potency over time. It has a limited shelf life.
  2. Cal-Hypo gives off corrosive chlorine gas as it deteriorates.
  3. Cal-Hypo is a powerful oxidizer that can cause fires or worse, if used or stored improperly

I would never rely on storing Cal-Hypo long term for a disaster or survival scenario. Cal-Hypo is unable to handle long-term needs because of its short shelf life. Sure, it is very effective in normal times but only if you can always run out to buy more. As with many perishable commodities, the day will come when your stockpile will expire and become nothing more than a useless, white powder. Those that rely on Cal-Hypo to provide lifesaving sanitation, in a long-term emergency situation, will find themselves ill-prepared.

Cal-Hypo loses its potency from the moment it leaves the plant. It has a limited shelf life, and little can be done to change that. Its shelf life varies based on the quality of the product and the temperature at which it was stored. At higher temperatures, Cal-Hypo breaks down even more rapidly. When Cal-Hypo is purchased, one does not know how long it has been in the supply chain and to what temperature levels it has been exposed. The pail of HtH Cal-Hypo down at the local big box store will probably only be good for about two years. Additionally, that pail sitting on the shelf with a big discount sale sign might have been a left-over from the previous season. Repackaging Cal-Hypo will not make it last longer. At best, it is an exercise in futility.

As Cal-Hypo breaks down, it gives off gaseous chlorine. Chlorine gas is nasty stuff. It severely corrodes metals, destroys natural fibers and some plastics. I opened many old containers of Cal-Hypo and was greeted by a noxious, yellow, gas cloud. It’s not very pleasant, I assure you! Cal-Hypo is a very powerful oxidizer that can give you a really bad day, if handled improperly. Just read the label on any Cal-Hypo container.

If the disinfection of drinking water is part of your long-term preps, then I recommend that you check out the CDC website.

There is a lot of useful information, on drinking water sanitation, in the FAQ section. The subject that should be of the greatest interest to a prepper is the section on hypochlorite generators. The CDC refers to commercial-sized hypochlorite generators that cost into the six figures. However, a prepper can make his own small-scale sodium hypochlorite generator for about $2,500, if he already has an off-grid electrical supply that can provide 10 amps at 120 volts. This can be done using readily available components from most swimming pool retailers. In the late 80’s and early 90’s, I was an authorized dealer for Lectronator, an early in-line swimming pool chlorine generator system. The patent ran out several years ago. However, there are now several different makes on the market that are similar to the Lectronator.

How does a chlorine generator work?

A chlorine generator works by passing a saltwater brine solution through an electrolytic cell. Inside the cell, there are several parallel plates made of titanium that act as cathodes and anodes. As the electrical current passes across the plates, chlorine is freed from the sodium to create a hypochlorite solution. The Lectronator was simple in design. It had the electrolytic cell that was mounted in the filtered water return line, a water flow detector, and a power supply. The unit that is currently on the market, and one that I personally prefer, is Pentair Intellichlor. It is similar to the Lectronator but has a more advanced control system, and it has the ability to read salt levels. Swimming pool chlorine generators are very similar in design and function to the large-scale chlorine generators referred to by the CDC.

How to make your own chlorine factory.

To create your own mini-sodium hypochlorite factory, the four major components needed are:

  1. A water storage tank that holds about 200 gallons (a cube-shaped tank is easiest to plumb into),
  2. A circulation pump, at least a 1/2HP,
  3. Cartridge filter, one that is for a spa or small above ground pool, and
  4. Chlorine generator, such as a Pentair Intellichlor IC40.

You will also need PVC pipes and fitting, and wiring to connect the pump motor and chlorine generator power supply to your electrical service. This set-up will require about 10 amps, depending on the circulation pump you select. The setup is relatively straight forward, if one has a basic understanding of plumbing and electrical. The components are assembled and installed similarly to a pool or spa setup. The tank needs to be plumbed into, with at least 1¼-inch PVC pipes, but 1½-inch pipes work better. Wall return fittings, for vinyl liner pools, work well for this. NO METAL FITTINGS! The bottom must be used as the suction and the higher line the return. Run the suction line to the suction port, on the pump. Then run a line from the pressure port of the pump to the cartridge filter. Even though the water that is put into the tank should be filtered to remove any debris, the cartridge filter is a precaution against the generator cell becoming clogged. After the filter, run a 1½” pipe, at least two straight feet, into the cell. After the cell, run another two straight feet of 1½” pipe back to the tank return point. Install a Tee-fitting, with a PVC ball valve, at a convenient point, low in the system to drain your hypochlorite solution into containers. The PVC ball valve should be installed at the suction and return points on the tank, so that service can be done on the equipment without needing to drain the entire tank.

Using your mini-chlorine factory.

When the water tank is filled, add the salt through a port in the top of the tank. Quality water softener salt works well. The cell will indicate when the salt level is at 3,400ppm. This is 1/10th the salinity of sea water. At this point, you simply prime the pump and make sure your valves, on the suction and return lines, are open so that you don’t dead head the pump. You need to know the concentration levels of the solution. I advise against going above 50ppm. It is easier to handle and it is unlikely that one would need a couple hundred gallons of bleach strength Sodium Hypochlorite. It is unnecessary to make more than one needs for a given period of time. At 50ppm, one gallon would disinfect 50 gallons of water at the 1.0ppm free chlorine level. So, a 200 gallon batch would disinfect 10,000 gallons. Keep in mind that these chlorine generators are designed to keep 40,000 gallon swimming pools chlorinated at 1.0 ppm or more 24-7-365. It is important to note that according to the CDC, Giardia and Cryptosporidium are highly tolerant against all forms of chlorination because they exist in a cyst or oocyst form while in the water. The CDC recommends ceramic filtration to remove these pathogens.

Testing.

Testing the free chlorine level of your drinking water is of the utmost importance. The CDC recommends a free chlorine level of .5 to 1.0, to properly disinfect drinking water. The OTO and DPD reagents, that are commonly used to test chlorine in water, also suffer from the same problem of limited shelf life. The solution is to use an Oxidation Reduction Potential (ORP) meter. ORP meters measure the oxidizing properties of the chlorine sanitation level in water, by electrical current. Readings are generally in millivolts (mV). There are several ORP meters available, ranging from around $35 to $350. Get a quality meter that uses AA or AAA batteries that can be recharged. ORP meters are great preps because they can be stored indefinitely in an EMP-proof container and put into service when needed. All the components needed to make a mini-chlorine factory can be safely stored indefinitely, ready for the day they are needed. That can NOT be said for Calcium Hypochlorite.

The advantages of having one’s own hypochlorite generator are:

  1. It uses salt to generate chlorine, and salt can be stored indefinitely.
  2. Properly stored electrical components can also be stored indefinitely.
  3. It will produce full-potency sodium hypochlorite on demand.
  4. You would have your own hypochlorite factory for fun and profit when the SHTF.

The only long-term way to have chlorination, as a water sanitation option, is with a chlorine generator and a stockpile of inexpensive salt. I am surprised that more preppers are not aware of the potential uses of chlorine generators. I hope that I have been able to shed some light on this subject. Thank you and God bless.


Three Letters Re: A Solid Solution On Securing Home Defense During A TEOTWAWKI Situation, by B.M.

HJL,

I can see some problems. First you must store it and deploy it when things go down. Second, if it is winter, you really don’t want your windows and doors broken. You want to defend them first (maybe both inside and outside). Third, even if you can insure you are safe, you will need to be able to go the other way, perhaps multiple times per day. Fourth, it doesn’t provide security if they decide to firebomb or shoot into your house. Fifth, if there is a fire or something else, you may have to get out fast, but can you do so? – T.Z.

o o o

Hugh,

I have been reading SurvivalBlog daily since early January 2010, and words cannot describe the blessing that JWR, and now you, have been to my family. Finding SurvivalBlog was definitely the result of the hand of God on my life. Until I found SurvivalBlog, everything I had ever read about prepping up to that point was from a world view that was humanist and/or situational with regards to ethics or morals– definitely not Biblical. I devoured JWR’s writings about his survivalist philosophy and his Biblical basis for prepping, with my Bible open in front of me so I could read the portions of Scripture that were referenced. Literally in tears, I thanked God for His leading me to where I received His confirmation that this was the path He had for me. Since then, we have been paying off debt and have been working diligently at getting our preps and skill development “squared away”. To this day, I regularly thank the LORD for both of you and ask Him to bless you and yours.

I am not a security expert, but I do have some experience that way. It seems to me that installing razor wire INSIDE of the home is more than foolish. Trying to change the way you use your home during a time of extreme stress is foolish enough, but to think of purposefully creating a situation where one would have to clean up, from inside your home and/or retreat, dead or dying bodies, hundreds of pieces of flesh, bodily fluids, et cetera from attackers who could easily be infected with who knows what seems to me to be downright stupid. I would find another way to protect my retreat. Thank you again, T.B.

o o o

JWR,

I enjoy all of the subjects that are discussed on SurvivalBlog. After reading the letter on making your home more defensible I thought I might offer a thought. I spent three years stationed in Berlin during the apex of the Cold War (86-89). The main focus of the Berlin Brigade was MOUT. Military Operations on Urban Terrain. For the lay person, this was house-to-house fighting. We were three Mech/Lt.Inf. battalions, a company of M-60 tanks, and an Artillery Battery of Mechanized 155’s. We were surrounded by at least a Soviet Army Group as well as the East German Army. If nothing else, we worked very hard on obstacles. We ran wire concertina wire, tanglefoot, tank obstacles, and so on. My point is that if you run wire, first make sure it’s anchored by metal posts or wood. On top of the concertina, zig zag tanglefoot (barbed wire) across the top and anchor it to your posts. On the unfriendly side, run tanglefoot at about knee high to slow the enemy’s approach. Most importantly, if you have wire have it covered by fire. If Brigands have all day with no gunfire hitting them, they will breach the wire. However, if they are tangled up in the wire and you are hitting them with rifle fire, they will be more likely to become disheartened and move on to less well-defended homes. Finally, if possible, put your perimeter at least 50 yards from the strong point in case they have I.E.D.’s; that is generally outside of most folk’s throwing range. – JMR.