Surviving is really a willingness to accept the challenge of a life-threatening change that is forced on you. A world that requires a grandmother to conceal carry has been one of my biggest challenges. Can I keep a firearm close at hand for self defense, be legal, be safe around my grandchildren, and still be comfortable? I rarely wear any clothing that will handle a holster. I like the belly band system but find they don’t always work with dresses, and at the end of the day they can be rough on the skin. A conceal carry purse seems too risky for me. That same black hole that swallows my car keys could just as easily hide my gun when I need it. A purse opens too many doors for failure. Do I take my purse with me to the garden or on a walk? There are too many times when my purse is just beyond my reach, and will I remember my gun is in my purse when I run into a school, the courthouse, or a hospital? What if my purse gets snatched? Not only do I lose my money, I have now provided a criminal with another gun.
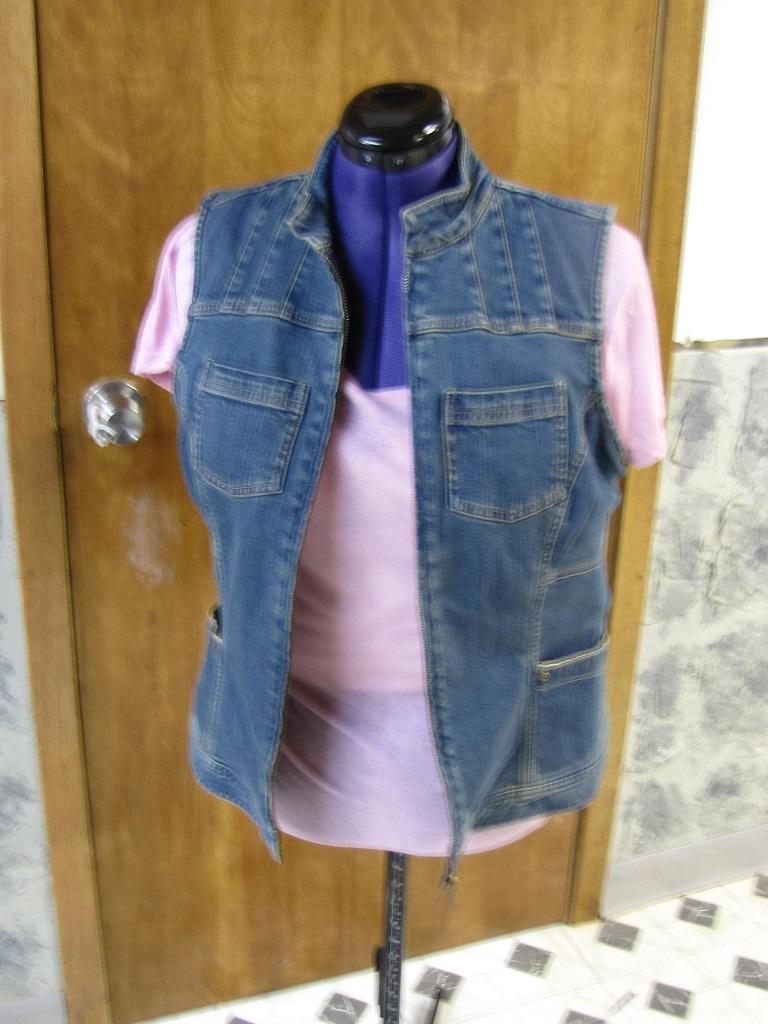
Since my style is casual, I came up with a way to refit a blue jean vest to hold a gun. It is tucked away under my arm, out of sight and in my control. It is also easy to access and does not print. My personal comfort level is to not have a bullet in the chamber. I wear my gun with the clip in but needing to be racked. I try to stay away from dangerous situations and hope that if I have to take out a gun, I will have time to rack it and shoot. My first level of defense is awareness and caution. After that, I rely on the element of surprise and not the speed of my draw. I would not be picked from a crowd as “the person most likely to be carrying a concealed weapon”. That is how I practice and that is where my comfort level is at today. New times will require new adaptations. For now, this vest gives me a great option for carrying a weapon. It is discrete, readily available, and I am constantly aware of its presence without it being uncomfortable.
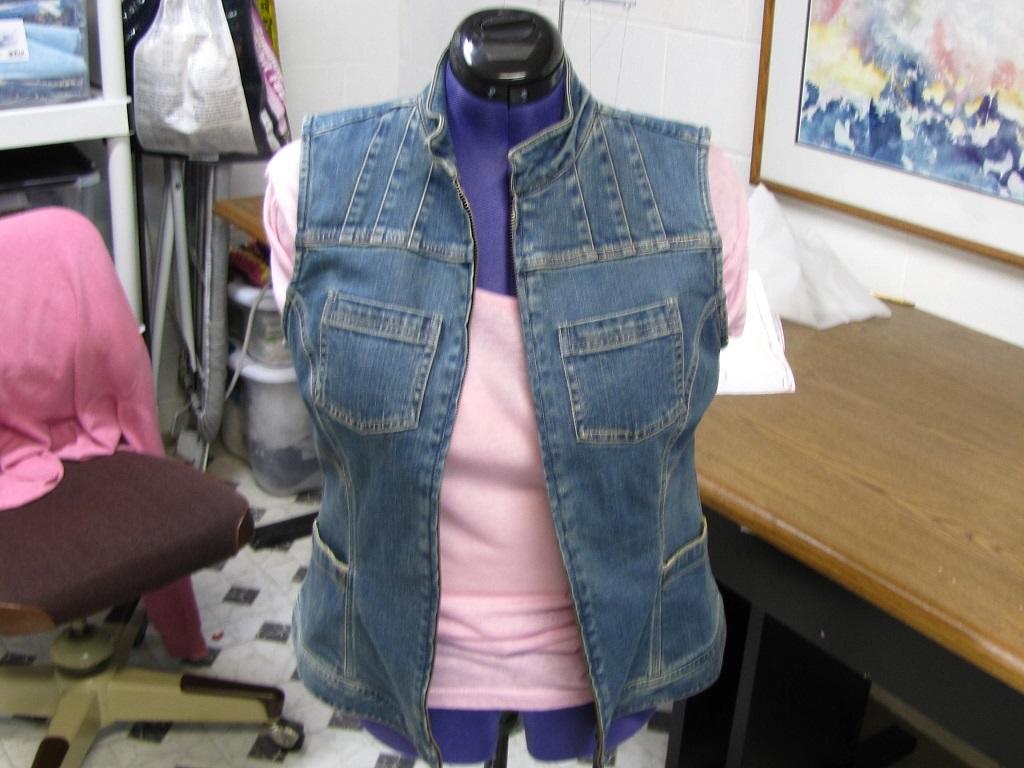
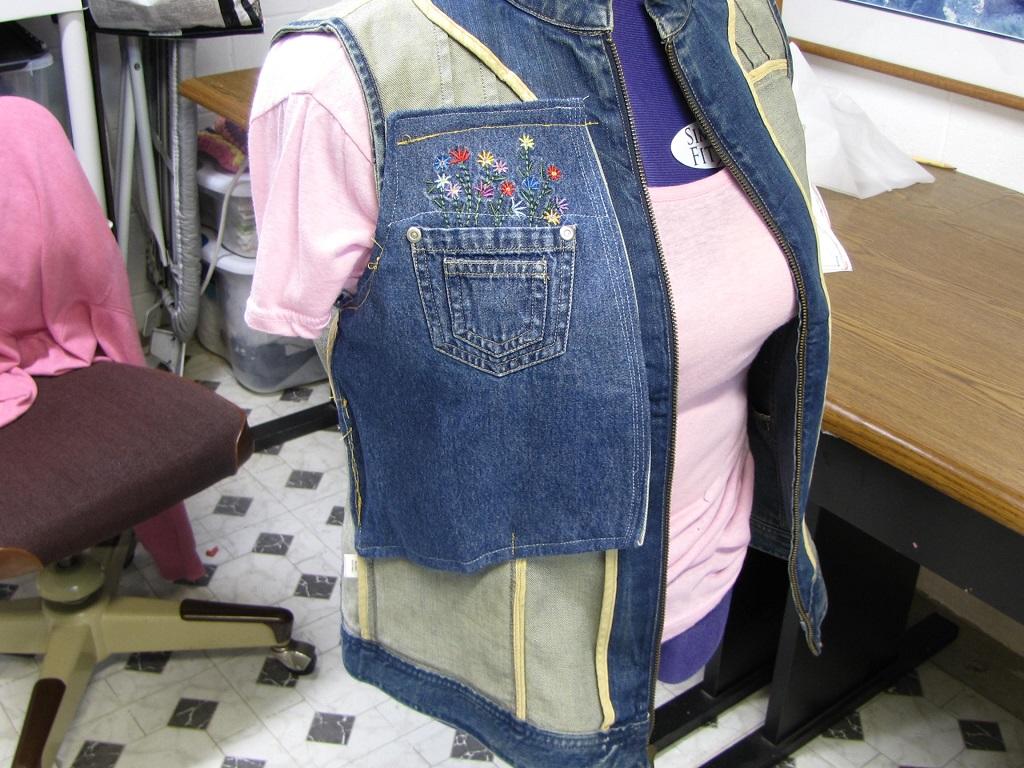
To make an inexpensive conceal carry vest, I recommend you shop Goodwill, Salvation Army, or your favorite thrift shop. Even in my small town, I can usually find two or three vests to choose from. Select a vest with lots of seaming topstitching and/or pockets– the more the better. Every seam adds places to secure the pocket to the vest and draws the eye away from any unusual bumps or indentations. Also buy some extra jeans fabric or medium- to heavy-weight cotton. I have a few skirts or jeans dresses in the sewing room for patches. You will want to have several shades of medium weight fabric or denim for pocket options. For this vest I used a piece of a blue jean dress with an embroidery embellishment and a decorative pocket. It isn’t the best match, but it was too much fun to pass up. Survival doesn’t have to be boring and mundane. Joy and creativity should always be an option. Why survive just to be miserable?
Set up your sewing machine with a jeans (size 16) needle and medium-weight thread that matches the top stitching of your vest. Most jeans are top-stitched in a pale beige or a pale brownish orange. As you make this, remember that the function is far more important than the form. If you are the only one who ever sees this, you are wildly successful.
Determine right or left hand access, and mark the inside of the vest for the pocket. Yes, I made my first one backwards! It would have been wonderful if I was left handed instead of right handed. The weight of your gun will be supported from the shoulder, the lapel seam, the side seam, and the pocket area. I like to design the pocket so that the gun sets just under the bust line and towards the side seam. In a relaxed stance, it is just under my arm. I can cross my arms and reach into the vest in a very natural position and pull out the gun. If you cut the pocket right, your gun will not shift and move around while you wear it. This vest has a yoke front, so I will use it for securing the top of the pocket. I can hand stitch the inside pocket piece to the vest seams. Every vest you make will have a slightly different pocket shape.

I always start by making a paper pattern. Pin your paper to the area you will be installing the pocket and trace around the inside of the vest. I prefer a light-weight paper that can shape to the vest. It may take you several attempts to get it just right. Start big; you can always trim. I have found that I like the bottom of the pocket to drop an inch or two towards the side seam. This allows the gun to always fall into the pocket. I also like the opening to finish a few inches back from the lapel area. You will need to wear the vest open to access the gun, but you don’t want it to be visible from the outside. Make sure you add an inch all around for seam allowances. Take the time to lay your gun on the paper template to be sure it will fit. If you have an inch or two around the gun, it will be more than big enough to handle the bulk and tight enough to keep it stable.
Cut two pocket pieces out of fabrics that best match the inside of the vest. The piece that will show if your vest opens should blend naturally into the vest. Your goal is to blend this pocket in as much as possible, unless of course you find that perfect piece of embellished denim. The piece of fabric closest to the vest can be any kind of medium-weight scrap fabric. It can be similar to what you find in a jeans pocket.
Pin one pocket piece to the inside to check one last time how it fits before sewing. Ripping out stitches is very time consuming and gives sewing a bad name. If you like the size and fit, unpin it and begin to make the pocket. To finish the pocket opening, turn back the fabric one turn to the inside (wrong side of fabric) and sew down. I am blessed with a serger so I used it to finish the edge first. You do not need to do that step. If you use traditional methods of hemming this part (double turn) you will have some very heavy seams later. Use a zig zag stitch or sew several rows of stitching to keep this area flat. This “facing” will get the most handling and will need to be free of anything that will catch on your gun. Repeat this process for the second piece.
Now with your fabric right sides together sew shoulder (yoke), armhole, side, and bottom seams starting one or two inches up the pocket side (blue line). I find it easier to access the gun if the front and back pocket piece don’t match evenly at the opening. Make one piece a little wider at the opening than the other. Isn’t it great when you are better off not being perfect?
Clip the corners and then turn the pocket right sides out. Press flat and topstitch the pocket piece for added durability. Topstitch the blue line area.
If I am going to carry a gun I want to make sure I have an extra clip, so I add a line of sewing across the top of the pocket to hold an extra magazine. The sewing line should run slightly down so that the clip always falls into the vest. You need to have it handy, but you don’t want it rattling around in the gun pocket. Put your clip in the top of the pocket and mark your line. Your clip should go in and out with a slight bit of friction. Sew that before you place the pocket in the vest.
It is time to attach the pocket to the vest at the shoulder (yoke for this one), armhole, and side seam from the outside sewing over the original topstitching. Make sure you increase your stitch length and go slow. You are sewing through quite a bit of fabric. You want to match the original sewing as close as possible. This vest had a front pocket, so I could also hand tack the inside lining down at the pocket and decorative front seam. This allows for the pocket to stay snug to the vest. 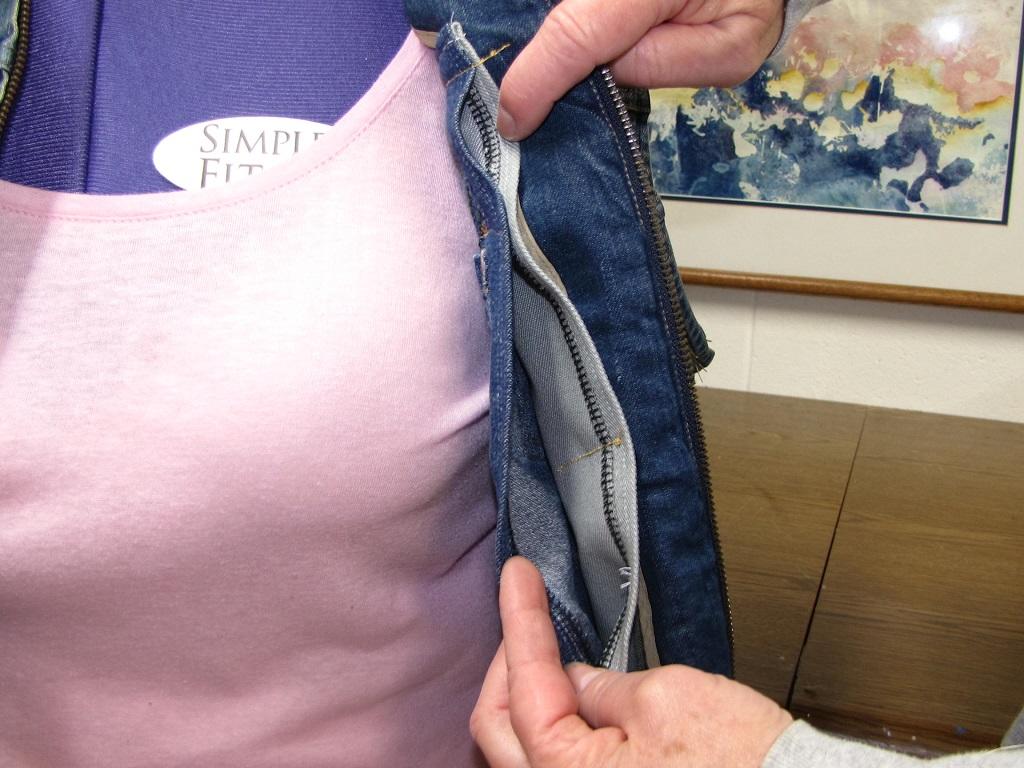 Try on your vest with your gun in it for a final fitting. Make sure everything lays flat against the lapel area. Occasionally you will need to tweak the fit. The pocket may fit a little differently when you go from a flat work table to a three dimensional body. Hand tack down the lapel area where needed.
This is the after picture with a gun in the added pocket. It’s concealed but available and tucked away in your own personal space. You now have one more option for protecting yourself that looks great and is very inexpensive to make yourself.