


Using the Hoof Knife
The next step is cutting away dead sole at the toe to find the white line. Dead sole is hard, flaky, and depending on the moisture of the foot may come out with little effort. If you live in a dry area, I recommend watering down an area about 10 feet in diameter around your horse’s water trough for about a week before you do your trimming. This way, every time they drink they will stand in water and mud, which will soak into the sole and make the trim a lot less work. After cutting away the dead sole at the toe down to the white line, you will want to cut away more of the dead sole to create a bowl like surface to the bottom of the foot. 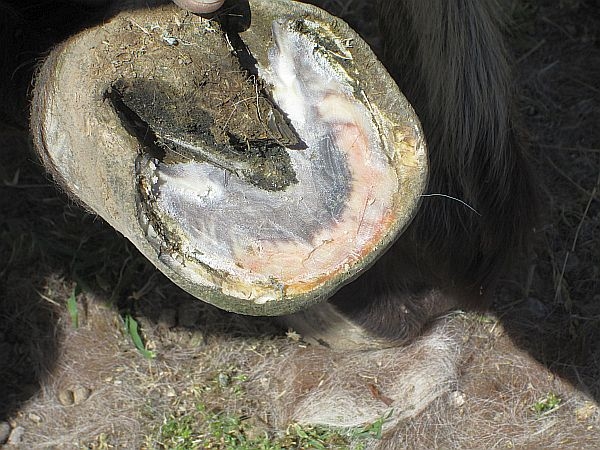 You can tell the difference between dead sole and live sole by using your thumb to press down on the sole. If it feels soft and spongy it is live, and you do not want to cut into live sole. Live sole is sensitive and has blood flow. It is known as the quick, and cutting into it will cause bleeding. If you accidentally cut into the quick, you should stop cutting; most likely, the horse will insist on it. You will need to treat the area with an iodine wash and seal it with something like pine tar. I should note also that if you see an area of light pink in the sole or even in the hoof but that area has no blood flow, it is most likely an old bruise and will not cause bleeding and can be cut out without damage. Bruises are common in horses with bare feet or in rocky areas.
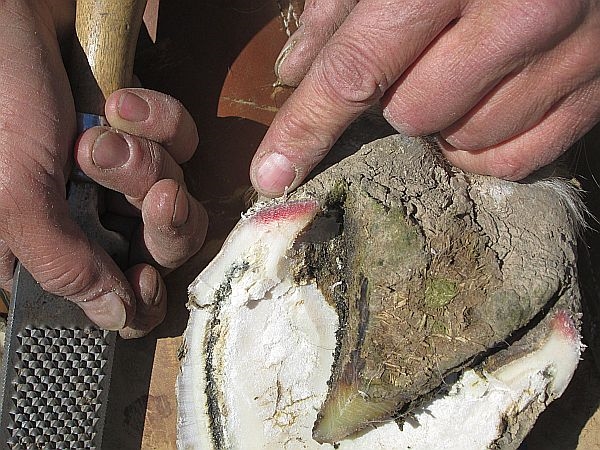
Once you have your bowl-like surface in the sole, you will also want to clean out the commisure. The commisure is the deep part of the foot that runs down both sides of the frog. Remember that the frog is the fleshy triangular pad in the center and back of the foot. The deepest parts of the commisure may have a condition known as thrush. Thrush is a bacterial infection on horses’ feet and is common around the frog. It is black and smells like dirty old socks. The condition can easily be treated holding the foot up, pouring in a little Clorox bleach, and holding it there for a few minutes. It is typical when feet do not get cleaned regularly, and it can clear up quickly from a trimmed and cleaned foot. If left untreated, it can get serious and even cause lameness. Once you have trimmed the sole and cleaned out the commisure, you can now move on to the bars.
The bars are like extended pieces of hoof wall that turn back up from the heel and angle toward the front of the frog. The bars should be trimmed smooth with the sole. 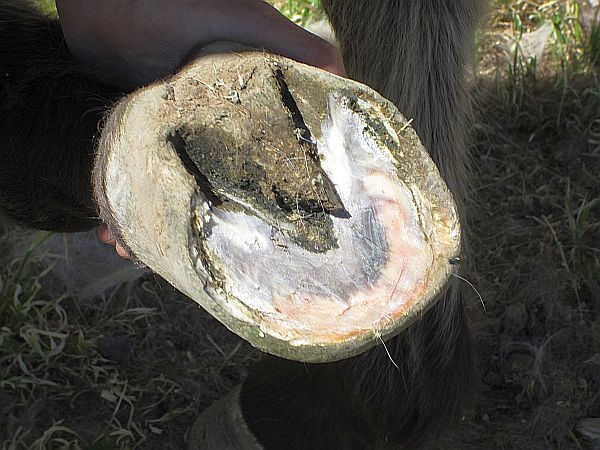 If not trimmed, they can overgrow the sole and trap rock and debris between the bar and the sole. Compressed by the weight of the horse, that debris can puncture the soft tissue of the sole and cause an abscess. Abscesses are very painful for horses and though rare, in my experience, they are a nasty wound that are difficult and time consuming to treat. Keep the bars trimmed and the white line clean, and that will eliminate most of the potential for abscesses caused by improper trimming. Keeping the white line clean is important because it can cause a condition known as gravel. When debris, such as gravel or sand, gets stuck in the white line, it can become trapped as the foot continues to grow. With no where else to go, the debris will travel up the sensitive laminae of the foot and exit at the coronet band in a condition known as a blow out. It is very nasty looking, though treatable. It’s better to avoid the problem in the first place.
From the bars, we move on to examine the frog. Excess frog should be trimmed away and should be trimmed from the front to the back. The bottom of the frog is usually hard and may even be peeling away on its own. Care again must be used on the frog, because under the dead tissue is live tissue with circulating blood. There is a bit of disagreement in the horse world about the amount of frog that should be trimmed. One camp trims the frog down to live tissue, making the frog actually set below the level of the hoof wall, while the other camp only trims the frog of dead tissue and may leave enough to actually extend slightly below the level of the hoof wall. I do not put forth the reasoning for either train of thought. Rather, I will just explain what has worked for me for the last 30 years. I was initially trained to trim to a natural angle [see image 2] and a natural foot. In my years of experience, I have found that only trimming dead frog and leaving just a little below the hoof wall, or even with a horse shoe, seems to work very well as excess frog tends to shed naturally on its own about twice a year.
Using the Nippers
The next part of the standard trim is nipping the hoof wall. Using your hoof nippers you start by making a straight and level cut right at the exposed white line in the center of the toe. 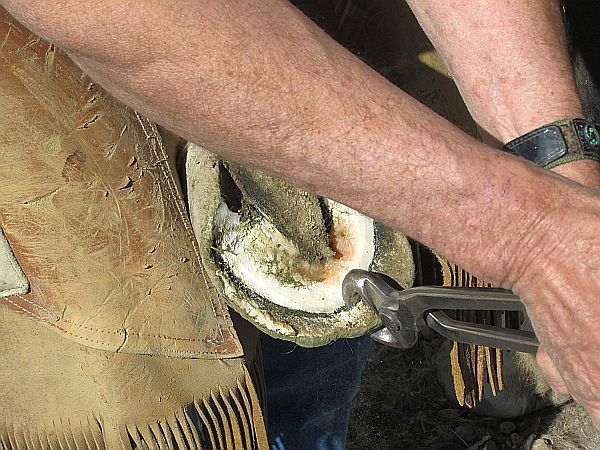 A good rule of thumb for a straight and level cut is to keep the blade of the nippers level left to right with the sole that you just cleaned out, then keep the handles of your nippers at a 90 degree angle from the flat part at the front of the toe. Remember that you can always cut more, but you can’t put any back. The objective is to trim the excess hoof straight and level from front to back. The hoof wall is like a fingernail. Its thickest part is at the toe; it thins considerably along the quarters and thickens again at the heels.
 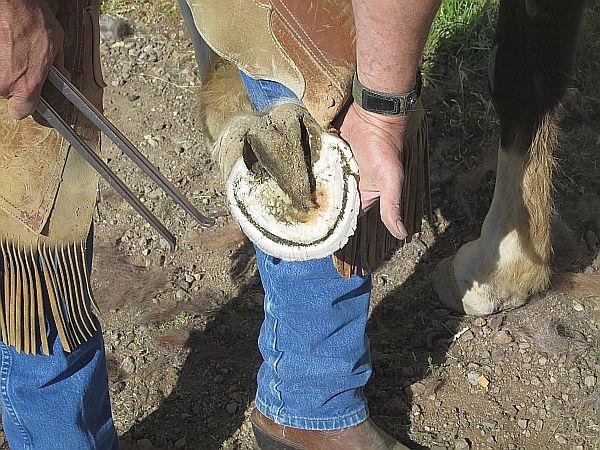 Try to make the cut as even and smooth as possible, as nipping is much easier work than rasping. Any uneven areas left with the nippers will have to be leveled with the rasp.
Using the Rasp
Rasping is like filing. Using the rough side of the rasp with your dominant hand on the handle and your other hand on the front of the rasp, you want to slide the rasp forward from the heel to the toe in a circular motion from the outside of the foot to the inside of the foot. Remember that the toe is the thickest part of the hoof so most of the pressure will be applied with the hand on the front of the rasp while the hand on the handle end is used mostly just to push the rasp forward. 
 Be very careful not to put excess pressure on the handle end of the rasp as you move it over the quarters, as this thin area will file away very quickly, leaving a very uneven foot if you’re not careful. Repeat this motion from back to front on the right and left side of the foot. When you have the foot level from front to back, you now want to make sure it is level from side to side. This is done by examining the foot while looking down the back of the leg. Imagine a straight line going down the center of the back of the leg, and then imagine a perpendicular line going from heel to heel. Your horse’s heels should be perfectly level using this imaginary line. If they are out of level you can make small adjustments using the rough side of your rasp backwards by racking the rasp towards you.
 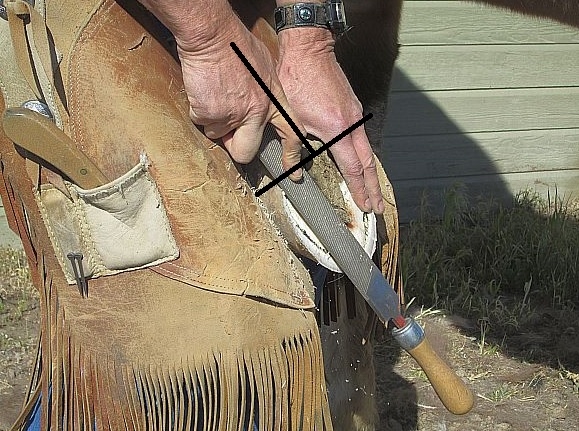 If you occasionally examine the heels while you are rasping, using the imaginary T-line technique, you can avoid the back rasping on the heels by increasing or decreasing downward pressure on the handle end of the rasp, but you should always finish your rasping at the bottom of the hoof wall by making sure the heels are level.
The final part of the rasping is called “rolling the toe”. This is done by taking the rough side of the rasp and making a downward cut at a 45 degree angle all the way across from the left side of the toe to the right side of the toe. Then, with the soft side of the rasp and working now on the outside of the foot, you want to smooth both the top side and the bottom side of the 45 degree cut you just made. The goal is to make the toe round so that it can roll over smoothly as the horse moves. If you leave the foot flat, as the horse moves it will chip and break the edges of the hoof wall. Imagine a round tire and how it rolls as opposed to trying to roll a triangle. If the triangle is heavy, it will break the points of the triangle as you roll it over. 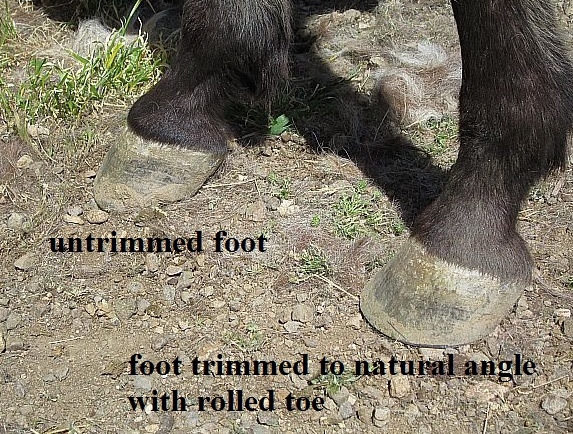
Lifting the Horse’s Back Foot
The rest of the trim is just repeating the process on each foot. Like I said before, I start with the front left foot and then move to the back left, followed by the back right, and finishing with the front right– all in a counter-clockwise rotation. Contrary to what you might think, the back feet are much easier than the front feet. The actual trim work is the same, aside from the shape of the foot. All horses have rounded front feet and more pointed back feet. The big difference is that when you lift up the back feet, you don’t have a horse body in your way. You can just lift the leg, put it in your lap, and go to work. The process of lifting the back leg is much like the front. You start by facing the leg and taking the hand that is closest to the horse’s head and putting it on the horses hip bone. It usually only takes a little pressure on that point to get the horse to shift his weight to his other leg.  Then you take your other hand and start at the top of the horses leg and slide it downward to the hock.
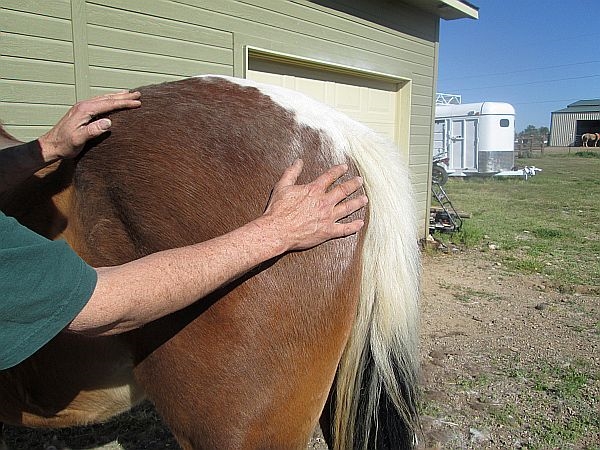
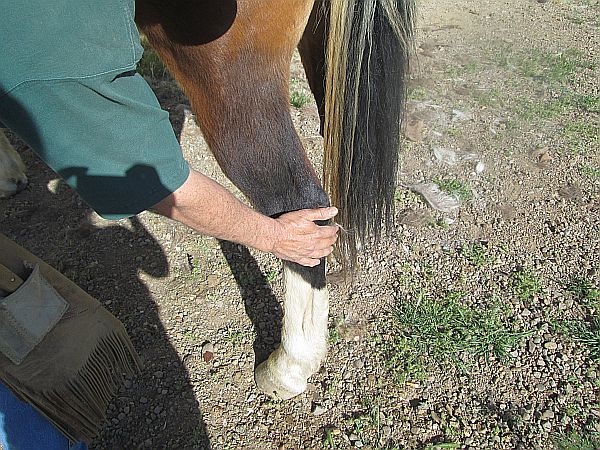
 Now, move the hand from the hip, face the rear of the horse, and reach down and grab the foot by the toe.
 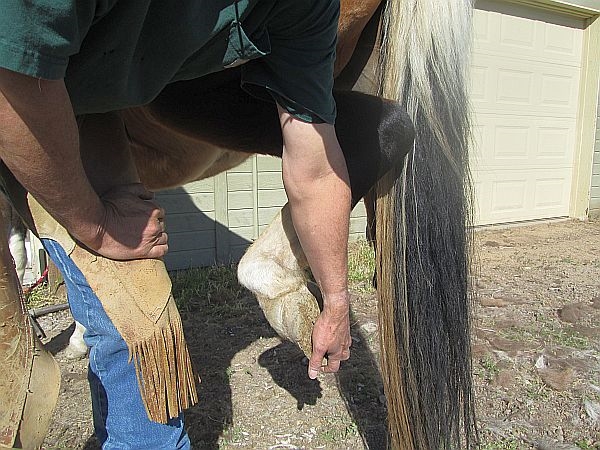 Hold that position for one to two seconds to allow the horse to get comfortable. Then, you just slowly pull the leg straight back while moving your leg that is closest to the horse under the leg until the horse’s foot is resting on your knee.
 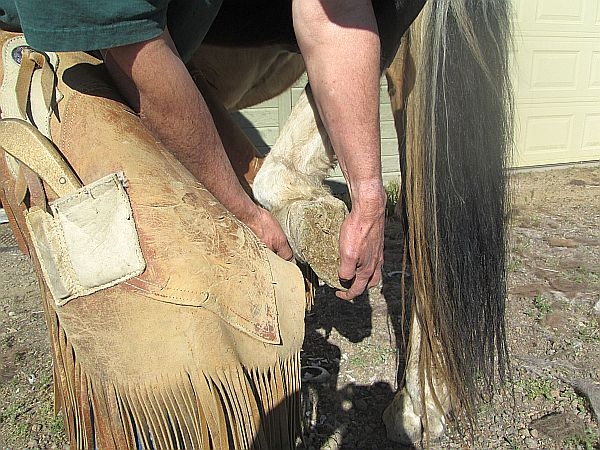 Now with another half step forward, you bring your knees together and slide the horse’s foot securely into your lap.
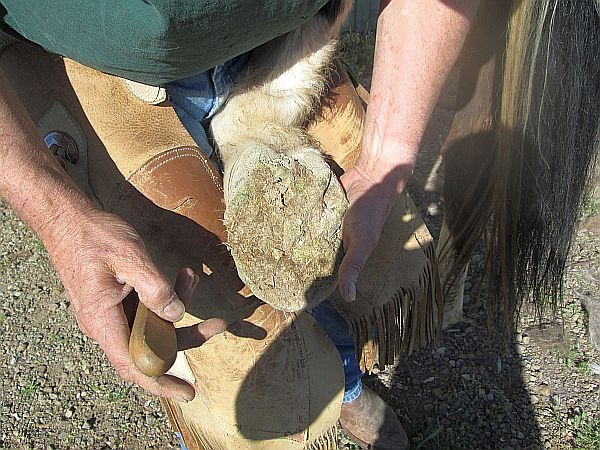 In this position you can comfortably work on the horse’s foot with your back straight and relaxed.
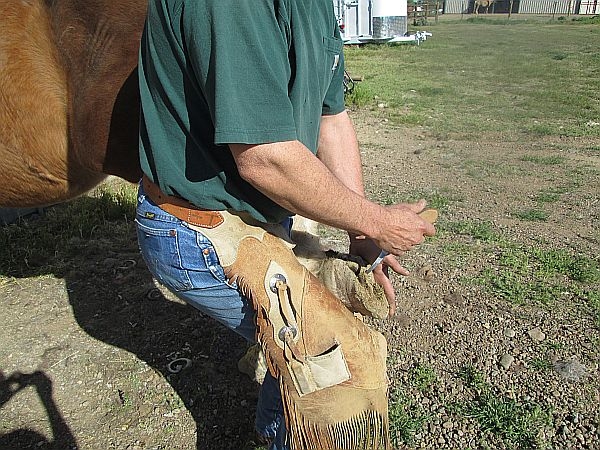
The last thing I should tell you is that this article is just a guide. You can print off the outline, put it with your tools, and get as much practice as you can. Getting knowledgeable and comfortable with this work takes experience. Like shooting, if you want to stay proficient with your firearm, you have to go to the range and practice. The same is true of any other skill you collect; you have to practice using your tools to stay proficient. I recommend contacting a local farrier and asking if you can ride along with him/her once in a while, or you can look for an introductory course at a local college or trade school.
That is the bare bones of trimming your horses feet. Technically, there is not much to it. Physically, there are muscles you seldom use that take a beating at first. Mentally, it is like the famous words of Will Rogers: “There is nothing better for the inside of a man, than the outside of a horse.”