
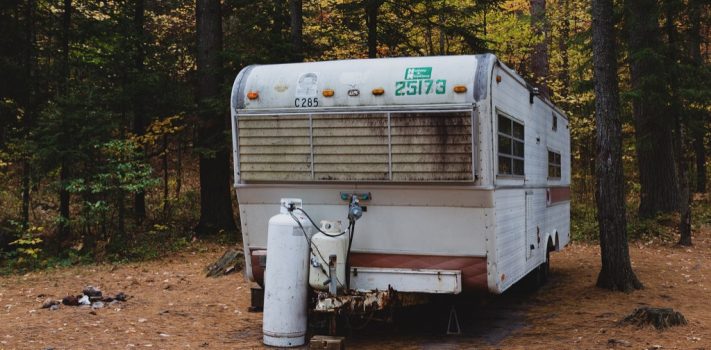


As the collapse occurs, slowly or suddenly, friends and family will need to be provided housing at a retreat location. Most retreats are not large enough to adequately house all the family and close friends that you’ll want to help with security and food production. They can park their recreational vehicle (RV) on your property, or perhaps locate a large storage shed that is converted into a small cabin. In either case, in all but the southeastern United States, these shelters will need a wood stove installed.
This discussion focuses on installing a wood stove in an RV as that is the most challenging. The same techniques can be used in a small cabin. In an off-grid setting, wood stoves are essential and most of our lives will revolve around it as a means to heat, to cook, and to preserve food. I have decades of experience with wood stoves of many kinds and have built my own. I am by no means an expert, but a jack of all trades who has built homes and just about everything else. Even if the instructions are incomplete, the principles needed for a successful installation are provided.
Learn From Video Demonstrations
See the wide selection of YouTube videos about wood stove installation to prepare yourself for this project. I can not overemphasize the risk of fire in an RV that uses flammable materials and if it catches fire, it will burn quickly and very hot. If at all possible, do not locate the stove between the bedroom and the front door. Install smoke detectors and identify avenues of escape and position fire extinguishers in the bedroom, so that you can fight your way out if necessary.
We can reduce the risks of fire if we educate ourselves and install the stoves using the best techniques and test our installations by running the stove for several hours while closely observing it at its peak heat production. For liability reasons, I should state that I do not recommend installing wood stoves in RVs, but only suggest this practice in the event the country collapses and you are left with no other shelter and therefore risk death from hypothermia. You are on your own, so take your time and carefully, and with much forethought, safely install your wood stove so that when it produces as much heat as it can during the coldest months of operation so that there is as close to zero risk of fire as is possible. Test it vigorously now to make sure there will be no problems in the future, and when you need this stove the most. And always have a large fire extinguisher nearby.
Stay Safe!
One should employ the highest safety standards, or housing codes that dictate the construction specifications and materials. I have used these standards in my own installations in homes, and my personal RVs. Newer RVs are not good candidates as radical and permanent alterations are necessary. However, if faced with hypothermia, it may be necessary. Another way to heat an RV is to build a small room alongside the trailer to house the wood stove. This would be the least radical approach, and a safer way, because modern stove pipe kits and other fire-resistant materials can be used. This room can also be large or smaller, and be insulated, or not. However, this method may not adequately heat an RV in sub-zero temperatures. How do I know this? I have lived in an RV during a 2-week long period when the nighttime temperatures were -20 to -30F. Because my plumbing was designed for these temperature extremes, the pipe and water supply did not freeze up, but this is another topic.
I have installed stoves in 12-foot to 30-foot RVs without slideouts. I have made small stoves that take up very little space that can sit on a counter, however, there is a minimum size for cold country if it will be occupied throughout the winter. For the stove to be useful for year-round living in a northern climate, a firebox should be no smaller than 25,600 cubic inches for RVs that are 30 foot in length (or a cabin of similar dimensions.) In cold country where temperatures are below 32 degrees to -40 below for five months of the year, one or more 30- to 55-gallon water tanks should be installed, if there is no other water source. The RV’s original underslung water tank will often freeze and break. The wood stove can gently warm a 55-gallon tank because it is located adjacent to it, but separated by a heat shield. Because of heh heat-holding thermal mass of the stored water, it is a symbiotic relationship that will take up at least a 6′ x 3′ area that includes space for 1 to 3 water tanks. This space is typically an area that is the approximate size of a typical couch found in larger RVs. If a water tank is not required, then a stove will fit in a 3’x 3′ space located just below a window where the stove pipe will exit.
Adding a room to the RV would be the safest way to go. However, some folks will not have the resources to accomplish this, especially after a collapse. Here in Montana, the resale value of an older RV might be increased as there is a demand for older trailers used for hunting camps, and because the rents are now so high in Western Montana, so fewer people can afford proper housing. In most other parts of the country, RVs could be greatly devalued.
A wood stove takes up valuable space in an RV, yet without it, and once the propane is used up, a wood stove is necessary for life in cold country. You could die without it. Use propane only for cooking during the summer. It is precious stuff and can be used as for emergency heating when temperatures are extremely cold. Propane should not be relied upon as a source of heat over the long haul, but only as a temporary means. And it is too expensive to store large quantities of propane. In a societal collapse, once the propane source is exhausted there will likely be no way to replace it.
Two people can be comfortable in a 25 to 30 foot RV with a wood stove. RVs with pull-outs are a good choice as the stove can be located away from flammable materials, and the permanent alterations are not as radical. Double wall stove pipe can be put through a ceiling vent. However, this is not the safest method because of the very close proximity to flammable materials. Putting the chimney through a window section is far better. If using a vent, then use cement, or Hardy backer board, or drywall lined with aluminum sheeting to protect edges of the vent hole and adjacent walls. If double-wall pipe cannot be found, then use 4-inch stove pipe to increase the distance between the pipe and flammable materials.
Since I do not have the ability to provide drawings or photos, this written description can only give you an overview. Take note that this installation does not meet building codes. This is provided for informational purposes only, for potential use in a worst-case collapse.
In an area or space 3′ wide x 3′ deep x sides that are between 3′ to 5′ high, I would not use a stove larger than 18″x 18” x 24”, or a firebox smaller than 10 x 18″ x 18″. It should be an air-tight design where the burn rate and temperature of the stove can be well-regulated using a damper or an airtight wood stove that regulates the burn rate and temperature of the stove. It critically important that the wood stove can be quickly shut down using one or both of these methods. It should have a minimum clearance of at least 8 inches in the rear and sides to the heat barrier that is covered by aluminum sheeting of some kind, to use as a heat shield.
The best source of aluminum sheeting is the kind used for roof flashing. It is a common building material found at most hardware stores and building centers. It is my favorite, since aluminum foil is too easily damaged. Aluminum flashing can also be rolled up and stored inside tent stoves during transportation as used to protect tent walls.
Aluminum and steel sheeting in rolls can be also used as emergency stovepipe, as well. Run it out lengthwise as long as the chimney is needed, cut and roll into the pipe diameter needed and secure it with bailing wire wrapped around the diameter of the makeshift stove pipe. Steel sheeting is more durable and able to stand up to the heat at the outlet of the stove. So aluminum is best used away from the outlet of the stove and on the exterior where it will not rust away.
Heating occurs by convection, conduction, and by radiation. Cement board or Hardy backer board should surround the stove on 3 sides, and have 1-inch stand offs that allow cool air to circulate between the existing wall, and the heat resistant barrier/board. A 3 foot wide aluminum roof flashing or heavy-duty aluminum foil is then installed with staples or screws over the heat shield or barrier. The aluminum does most of the work by reflecting 98 percent of the radiant heat, dramatically reducing the heat that is conducted to the heat shield and the materials behind it that the barrier protects.
Do not use steel sheet metal or attempt this close tolerance installation without using aluminum sheeting of some form as a radiant heat shield. The cement board protects existing wood surfaces from heating via convection and is a barrier that is fireproof. Also, directly above the stove install a 5 foot wide by 4 foot aluminum flashing or foil stapled to cement board that suspended from the ceiling with 1″x 1″ x to 3 to 5 foot long dimensional lumber to provide air flow between the new heat barrier and the preexisting ceiling. This method will protect the ceiling and other surfaces such as cabinets from radiant heat and from heat from convection and conduction. It is best to remove any nearby cabinets.
The windows above and behind the stove can be opened or removed. Two layers of hardy backer board provide a sturdy fireproof and durable plate that is screwed to the wall over the window. Cement board can also be used here. This plate is for the stove pipe to exit the RV. I make my own chimney top “thimble” using aluminum cooking pots to secure and support the weight of the stove pipe that is directed outward and then upward and above the roof of the RV. Obsolete aluminum pressure cooker pots are ideal because these large pots are wide enough and deep enough and have a rim that can be used to attach the thimble to the Hardy backer or cement board plate. Of course steel 90 degree braces can also be used. A hole for the pipe can be drawn on the surface of the pot and are easy to cut with a jig saw, or by a series of many holes drilled along the line drawn. Aluminum is easy to work and reflects radiant heat away from flammable surfaces.
Chimney Pipe Options
4-inch to 6-inch single-wall stainless steel stove pipe is recommended for its superior durability as standard steel pipe exposed to rainwater will rust out after one season. Only use mild steel pipe on the exterior if that is the only pipe available. It is far more cost-effective to use durable stainless steel. Single wall pipe is lightweight and stainless steel lasts more than 10 times longer than standard steel pipe that it blued or painted. Double wall pipe can be used through the wall, but beyond that single wall is adequate and easier to install. Double and triple wall pipe is excessively heavy and requires additional engineering and support, and is not necessary in my experience for short external runs. Insulated pipe is however best for longer runs to reduce fire hazard inside structures, but also to reduce creosote build-up that would restrict flow and cause chimney fires. Short runs of single wall pipe must be cleaned out once each month of daily operation. Because of the short run of pipe, this is easy to do by simply removing the pipe and using a long stick if you don’t have a brush. Here is the best selection of stove pipe and hardware to complete this job that I am aware of: Duravent at Northline.
By studying wood stove installations available on YouTube, you can learn additional safety measures and discover the fine details that improve the safe operation and installing wood stoves, and chimney cleaning, in general. I hope this helps someone who would otherwise would not have shelter and a wood stove that is essential for life in cold country.
In addition to a wood stove, stockpile all the necessary replacement parts, fuel, and supplies to run a chain saw for the next 10 years. I hope to have an article on that in the future.