


(Continued from Part 1. This concludes the article.)
After this, you will “pitch” your yeast into the wort. Pitching the yeast involves pouring it into the wort and shaking the bucket or carboy gently, swishing the wort with the air and activating the yeast. You then seal the bucket or carboy airtight, fill the airlock with sanitizer, attach it to the container, and let it sit. I cleaned and sanitized my equipment a second time, so that no bacteria would form in the sediment. I laid out a rag on top of the dresser in my room, brought the bucket upstairs, and stored my equipment on my dresser. I did not open my curtains for the next three weeks, as sunlight can contaminate beer.
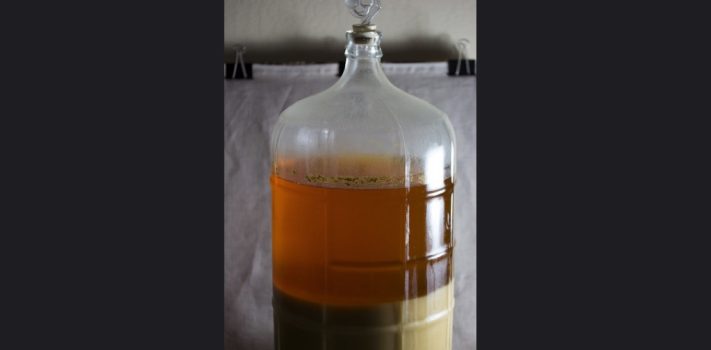
Letting the beer sit was extremely nerve-wracking. I had no idea if my yeast was bad or not, and I unfortunately did not buy a second pack of yeast to save the batch in case it had gone bad. The bucket was also not see-through, so I was unable to tell if krausen was forming. Krausen is the foamy head on top of fermenting beer. It is a good sign. Be aware, if you are making a five gallon batch in a five gallon carboy or bucket, the krausen can overflow and leak out through the airlock. This is normal, just make sure you refill the airlock with sanitizing fluid and wipe up the krausen regularly, since it could lead to wild yeast. Wild yeast is a hazard for a batch because it can cause off flavors in your beer, and a film to develop on the top of your brew. I duct-taped the entire lid shut in hopes of keeping the container airtight, although it did not ease my worries much. The directions informed me to let it sit for two weeks.
I still needed bottles for my beer and was putting off buying some, but my parents surprised me with twenty-four 12-ounce, brand new bottles they got on their way back from buying groceries. Make sure you buy brown bottles. You will find green and clear bottles when you browse websites; these tints allow for sun to get in, which can also ruin your batch. You must make sure not to let the sun touch your batch at all when brewing. The brown hue blocks out the sun and protects your batch. I was busy the weekend I was supposed to bottle my batch, so I had to let it sit for an extra week. I looked into whether this was acceptable, and found that some homebrewers let their batch sit for an extra week to really absorb the ingredients, and it supposedly produces a better mouthfeel. I opened the lid a crack, and it really smelled like beer. My hopes soared when my dad concurred. When the next weekend finally came, I brought my bucket of what was hopefully beer downstairs, and employed my parents to help me bottle. They had been incredibly supportive the entire time, and I am so grateful to them.
The bottling process was the most fun part of actually making the beer, in my opinion. I want to stress that you do not yet know at this point if the liquid is beer or not. I began siphoning the fluid into the bottles. The one gallon batch instructions boasted to fill ten bottles, but I barely filled six due to the heavy amounts of sediment in the bottom of the bucket. The recipe called for an ounce of corn sugar to be put into the bottles, reactivating the yeast once again. How the yeast works is it basically “eats” the sugary wort you made, and produces alcohol from the mixture it absorbed. Pouring sugar into the bottles before sealing them causes the yeast to give the beer a carbonation effect when you open the bottles again. Although the recipe asked for corn sugar, I can tell you it does not matter what sugar you use. I siphoned the beer into the bottles, my mom measured out the sugar and poured it in, while my dad held the bottles steady while I was siphoning. I like to be independent and not ask for help from my parents, but I needed them to make the process as fast as possible because the less time the batch is exposed to oxygen, the better. Using the capper, which is this relatively large handheld contraption used to crimp the beer bottle caps, was loads of fun.
After you bottle your liquid, you set it at room temperature for a week in a dark, dry place, and then put it in the fridge for another week to chill. Once the week is up, you get to try your beer. I hosted a little tasting party with my family, and got out pretzels and a bottle of beer. My dad chose this moment to go and install a light on our shed, so I was stewing in anxiety over whether it was going to be beer or not while I waited. If your batch is contaminated, it will not hurt you. It will just taste very sour. When he finally came inside, I opened the bottles and it gave off a little hissing sound, which is a great sign. I poured everyone a little sip and we tried it. I immediately ran to the sink and spat it out. I have never liked the taste of beer. Ironic, I know. When I spat it out I thought it was over, and I wasted all that time, effort, and money. But my dad called out that the liquid he was drinking was in fact beer! I was ecstatic. My dad noted that there was, despite my siphoning efforts, still some sediment in the bottles. He assured me though that some people really like there to be sediment in their beers.
The first thing I did after our little tasting party was bring a bottle to my buddy’s dad who lives down the street, knowing he is a big fan of beer. It was near Christmas time, so I did this in the spirit of festivities. Because of the time of the year, we were having more family gatherings than usual and I was able to share my first ever batch with my extended family. Two of my uncles enjoyed nerding it up with me and talking about alcoholic drinks. I believe they were very impressed and found me incredibly knowledgeable on the topic, and I felt so proud.
One of the things a homebrewer will want to do when creating their first successful batch is to measure the alcohol by volume content in their beverage, or “ABV” for short. An individual can do this with a hydrometer. I am unfortunately unable to inform you about how to use one, as when I got all my equipment, I laid it all out on my floor to look at it and accidentally stepped on my hydrometer and snapped it in half. I received a new one for Christmas, as well as two carboys and a book about ingredients and their effects on the taste of beer, so I will be measuring the ABV of my first batch of beer when I open the last bottle left.
Now that I have written about the process of homebrewing, I would like to bring up that you can start anywhere in the brewing process. When I was at the brew shop, there was canned wort, meaning you do not even need to make the wort, you can just add yeast and let it ferment. You can also make your own malt, instead of buying it pre-made. The malt will mainly consist of a certain type of grain and sugar. You will need a big machine to hand grind the grain, but if you prefer that, by all means, go ahead. The main grain used in homebrewing is barley. Its organic makeup makes it ideal for brewing, but wheat can also be found in North America, and in Asia, rice is a common grain to be used in beer.
Although there is much, much more to homebrewing than I can relate in a single article, these are at least the fundamentals. If homebrewing becomes a hobby, an individual should do additional research and really learn more than just these foundational points. Homebrewing is a great skill to have for preppers, and it will come in handy time after time. And worst case scenario, if TEOTWAWKI doesn’t come, then at least you’ll have beer to enjoy with friends and family!
JWR Adds: Be careful when brewing.