


Nothing beats stepping into our toasty cabin on a subzero day to a nice, warm wood stove. Having had experience with all types of heat and fuels, wood beats all! As soon as friends come in, they stand right in front of the stove to warm up. The dogs fight over who gets to lay directly in front of the stove on the hearth rug. Our Jack Russell Terrier usually wins that argument.
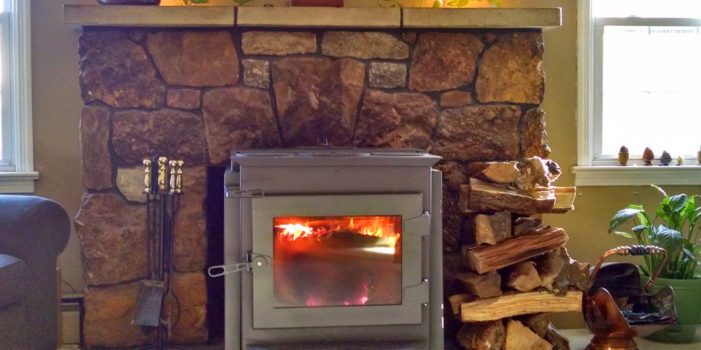
We do not have access to piped natural gas in this part of the state but there are many ways to heat your home. After trial and error, we like wood the best. I am not covering brands of stoves or how to install them. Do your homework and research the type and size of stove you want. Our stove is stainless steel. Installation should be done by a professional. Do not take chances with installation. Hire a professional and use top-quality materials. This is your home and you want the job done correctly to avoid fires.
The primary reason we chose wood heat is that we are subject to power outages, especially in the winter, and the outages have lasted anywhere from a few hours to two weeks. We do have a whole house generator but running a heat source off the generator for a lengthy period did not seem efficient to us. We do use a propane heat monitor for days when it’s not cold enough to light a fire or if we will be gone for a while and don’t want the house to cool too much if no one is feeding the fire. Electricity and propane are required for the heat monitor to run. Heat pumps were not available when we first moved into the cabin. They run on AC electricity and don’t really work well when temps drop below 30 degrees so this did not seem like something we would invest in.
Pellet stoves give nice, even heat but they require electricity and pellets must be purchased and can be subject to supply chain issues. Our previous home in Maine had an oil furnace back up to the wood stove and it worked just fine. As of this morning as I am fine-tuning this article we are having a snow/high wind event. The western and middle part of the country are experiencing a “polar vortex”, and the headlines are screaming about the power grid maybe not holding up. You can give a weather event a serious name, like polar vortex, but in reality it’s just winter. And guess what? It gets cold, windy and snowy in winter. Wood stoves require no electricity unless you specifically purchase a stove with a fan/blower motor. No power, no problem.
Come mid-spring, as soon as mud season ends, our friendly neighbor woodman drops off 2 to 3 cords of seasoned wood, cut 16-18 inches in length. You can get the whole tree delivered and cut it yourself into the size you want or if you are really energetic, you can go cut the trees down yourself. We are too old to be cutting down trees so we pay to have it cut to size. We then get to open stack all that wood on pallets to dry during the summer.
When early fall arrives, it’s time to stack the wood in the garage. Whoever said wood heats three times was correct. It heats you when you work up a sweat cutting it, it heats you again when you stack it, and then it heats you when it burns! Fall is also the time we get the chimney cleaned. Do it yourself if you can or hire someone, but don’t skip this important step. It’s easier to have the chimney cleaned yearly than to rebuild due to a fire. There are kits with long brushes and poles for the do it yourself crowd but I don’t want my husband up on the slanted metal roof. It’s cheaper to hire someone than to pay the medical bills from falling off the roof! There is creosote remover available at hardware stores. The stuff we use is a grainy, black powder and you throw a cup full on a hot burning fire. It has a sulfur smell for a minute or two and some of the flames turn blue. We add this once or twice a week and keep a good supply of this product on hand.
Creosote builds up over time in the chimney. Creosote is soot that is formed in your chimney. The burning wood makes smoke, which can contain creosote. If the smoke doesn’t rise fast enough, creosote can form. Soft wood creates more creosote than hardwood. Soft woods like pine or cedar are good for getting your fire started. But for good, hot fires, use maple, oak, yellow and silver birch, and ash.
The dryer your wood, the better it burns and the less creosote builds up over time. We purchase wood that is already seasoned. Seasoned means that it has been dried already for a period of time. In summer, we allow our wood to sit out in the sunniest part of the yard, open stacked, and uncovered. We leave it like this from April/May to September for maximum drying time. If there is going to be an extended rainy period, we cover the wood the best we can with the big blue tarps found in most hardware stores and tie bottles of water from recycled soda/juice bottles to the end of the tarps to weigh it down. The end piles of wood may get damp but the center and top of the piles will remain dry. Last summer we had record rain fall and lots of smoke due to Canadian wild fires which made wood drying challenging.
A word of caution when moving wood that has been sitting for a while…stuff may be living in it. Aside from bugs, we find mouse nests, bird nests, snakes, and yellow jacket nests. I hate yellow jackets! We always have several years of wood supply stacked up so this year’s wood can get some extra drying time in the garage. On dry days, year-round, we open the garage doors to allow for extra airflow.
When purchasing a new wood stove you cannot just build a rip-roaring fire immediately. The stove has to be seasoned or broken in. Most stove manufacturers usually recommend at least five small fires. Do this on a warm day as the new stove smells because the stove paint is curing or hardening. Light a small kindling fire and add small pieces of wood and let it burn for about 45 minutes. Make a minimum of five small fires, over the course of a week or two and the stove should be ready for work. Open your windows for plenty of ventilation during these “curing” burns.
To start a fire, we use a small pile of kindling, placed crisscross in the stove. Use cedar, pine. or dried twigs. Dried pine cones make excellent fire starters. Place a small log or two on top of the kindling pile. Make sure damper is open. We use a small propane torch for starting fires. It’s easier and you are less likely to burn yourself. Fires are more difficult to get going if the stove is cold or it’s damp or going to storm and the barometric pressure is low.
If you are keeping the door open for extra air to get the fire started, DO NOT LEAVE THE ROOM. All it takes is one spark from the wood popping and it’s a raging house fire. We leave the door open an inch for a few minutes and then it’s closed. Once the chimney warms up, the smoke should rise and the fire should be burning well. The damper stays open until the fire is roaring. Add logs as needed. When the fire is roaring, start adjusting the damper. Close a little bit at a time until fire is doing what you want. If the damper is left wide open, your wood burns much faster and most of your heat goes up the pipe.
Keep a pot of water on your stove to add humidity to the air. Make sure your water pot can take a high temperature. Add logs as needed and stack it full before you go to sleep for a nice, toasty home. When one of us goes to the bathroom in the middle of the night we add more wood. It’s okay to burn a piece or two of paper or a small cardboard box, but paper creates a lot of ash, which means more cleaning out the stove.
When the stove has a good amount of ash, empty it into a metal ash can, with a lid and place outside and not near the house or any other flammable stuff, like garages, sheds, or cars. When the can is full of ash, we empty it in a snow pile and water the ash with a full 2 gallon watering can to make sure that no embers are still smoldering. You would be surprised how long those glowing embers stay alive in a metal bucket.
Do not be lazy in these areas of advice. One time we dumped the ash in a big snowy hole. It melted through the snow and some old chicken wood shavings underneath started smoldering. I looked outside and thought the blowing snow looked weird until I realized it was smoke. Thank God we were home and able to use the watering can and smother the embers! The outside hose and faucet will not work for putting out fires in winter.
Heating with wood is messy, be prepared for ash everywhere! Every time you open the stove door, some ash will get out no matter how careful you are. Try to keep the hearth clean of ash and this will make life cleaner in your home. A hearth rug is a good investment also. They are pricey but when a hot ember pops out, the floor will be protected. We do have a wood rack for stacking wood inside but little pieces seem to fall off constantly and leave a mess also. Hang some hooks near the stove to dry off wet clothes, making sure they don’t touch the stove. Shoes and boots also dry nicely next to it.
There are safety gates for wood stoves and fireplaces if you have children. The stove itself gets very hot and you don’t ever want a child to touch it. At some point, you will burn yourself at least once during winter. My friend Dee and I compare burns daily. We do have welders gloves that we can use when placing wood in the stove or emptying embers but, well, you get lazy and then you burn yourself.
Some wood stoves have a burner on top for cooking and most have a large enough surface you could make eggs, heat soup, or cook a hot dog if you needed to. I don’t have any specific experience with wood cook stoves so I can’t provide information on how well that can heat up a house or how to cook using them.
So if your choice is to heat with wood, it can be done safely and I believe you will be pleased with the results. It requires no electricity and trees are a renewable resource. Be safe and warm and God bless!