


Clean Clothes
The first line of defense in protecting the skin is your clothing. Protect the hands by always using gloves appropriate to the task at hand—medical gloves for caring for the sick and injured; heavy duty rubber gloves for washing dishes and a completely different set for bathroom cleaning; garden gloves; and leather work gloves. Beyond the gloves, we also need to use clothing to protect the rest of the body. The better covered the body, the better the defense. Understand that sunscreen will eventually run out or lose its efficacy, so protecting the skin from sunburn (and the potential for blisters and infection) will be more important than ever. Use hats and wear long sleeves when appropriate. Protect yourself from insect bites and scratches with long pants and long sleeves and even insect repellents. Protect the feet with good shoes and good, clean socks.
Choose clothing wisely. Natural animal fibers are water repellent, so they repel odor and spills better than cotton and synthetics. This has the added benefit of less time and effort expended in doing laundry. Natural animal fibers also wick perspiration away from the body, creating a cooling effect, meaning you’ll be able to wear long sleeves more easily while working in warmer temperatures.
My father was a diabetic. He wore wool socks every day, whether in the cold of winter or the heat of summer. His feet didn’t stink or develop fungus such as athlete’s foot. Not until I started wearing wool socks after surgery on my foot did I realize wool helped to regulate my body temperature. I also noticed that my feet didn’t smell, even after wearing tennis shoes. This is because wool wicks away perspiration, keeping you cool and dry in summer and warm and dry in winter. Perspiration itself is rather odorless, but when it remains on the skin bacteria immediately start to grow. That is where the odor comes in.
Ounce of Prevention
Wearing the proper clothing will protect the skin, which is the body’s first line of defense in preventing disease.
Laundry
Our clothes must be clean to keep our skin clean and protected from dirt and germs. We also feel better emotionally when we are clean.
Detergent
This DIY laundry detergent has the advantages of being cost effective as well as space saving. Instead of using ½ cup to 1 cup per load of commercial detergent, you only use one or two tablespoons.
1 bar Fels-Naptha soap, grated
1 cup Washing Soda
1 cup Borax
Mix it all up. If you are still able to use a food processor, you can process it for a minute or two to make it a more powder-like texture. Store in airtight container. Use 1-2 tablespoons per load, depending on the size of your load and softness/hardness of your water.
In preparation for a time when your clothes washer is no longer available, consider the following options. As you do so, bear in mind that until commercial washing machines came on the market, women spent an entire day (usually Monday) each week doing laundry. Make sure you have several pairs of heavy duty rubber gloves to protect your hands. Washer women in the 19th century were very well paid (for women, anyways), but they also paid the price with their hands. They always hid their hands behind their backs or in their pockets, because they were so cracked and raw.
Boiling
Fill a large (non- rusted) stockpot or canner 2/3 full with water and add laundry soap in an amount appropriate to the size of the pot and the quantity of laundry. (Add bleach with the soap, if you are washing whites.) While the water is heating, pre-rinse your laundry by soaking it in a different pot. Wring out the pre-rinse water from the clothes and set them aside. When the washing water reaches a hard boil, add the presoaked laundry. Boil for 15-20 minutes, using a wooden spoon to stir clothes occasionally. Use the spoon to remove one item at a time from the wash water and put into a basin of warm rinse water. Stir around to get out the soap. Have another basin or two of warm water to finish rinsing out the soap. (My grandmother used three rinse tubs for her laundry.) Wring out the water and hang on a clothesline.
Scrub boards
Heavy duty wool and cotton fabrics of history could handle the scrub board. Our light-weight, synthetic fabrics may not. If you choose to use a washboard, be careful how hard you scrub.
Portable hand-powered washer
There are several options on the market. You can purchase a portable washer to wash your clothes. You manually turn the handle to agitate the clothes. They’re not inexpensive, they’re small, but they work. The Kiwi Camping Washing Machine is $59 and handles 12 kg. of clothes. The Ezywash Manual Rotary Washing Machine costs $99 and handles 2.2 kg of clothes.
Punching clothes
This method combines pioneer methods with a modern twist to reduce labor expended while still cleaning the clothes.
Begin with a new heavy-duty toilet plunger and drill ¼ – 3/8 inch holes sporadically in the rubber section of the plunger. Get a large tub/canner/tub/bucket that can handle hot water. Pour boiling water into the tub, add detergent, and mix thoroughly. Place some laundry, for example, all the socks or a pair of jeans, in the wash water. Take the plunger and pretend you are plunging a toilet, working the plunger up and down, to agitate the clothes. Continue for about 5-10 minutes, depending how soiled they are, and then remove them from the still hot water with a large stick. Wring out the clothes to remove as much of the soapy wash water as possible, and then place them in the rinse tub of warm water. Stir and repeat rinsing process two more times. Use heavy duty gloves, as wringing out the clothes can also be harsh on hands.
Clothesline
Regardless of which washing method used, hang all clothes on a clothesline. Cotton clothesline rope ¼’’ diameter is best and can be found at any hardware or department store. Thicker rope may not accommodate clothespins. Use wood clothespins; the plastic ones deteriorate quickly in the sun and break. Do not just lay clothes on top of the line. This may not permit air to penetrate to the inside and will increase drying times, and wind can pick up lighter items and drop them in the dirt.
Ounce of Prevention:
Keeping our clothes clean is also essential in protecting the skin, the body’s first line of defense in preventing disease.
Waste Management
Proper sanitation, including the proper disposing of human and animal waste to prevent the spread of disease, is essential. Following are some options when a traditional toilet is not available. Regardless of the method used, all waste must be buried at least eight inches deep and at least 200 feet (about 70 steps) away from any surface water to prevent contamination.
Chamber Pot
For best results, use a metal container, such as a bucket or an old cooking pot that you’d never use again, or a ceramic crock with a lid. You do not want a porous container, like plastic; it will retain odor. The chamber pot needs to be sanitized daily by mixing two teaspoons of bleach with 1 cup of water and swishing within the container.
Two five-gallon buckets with toilet seats attached
This method works better for the short term, because of the disposal options. Line each bucket with a sturdy biodegradable toilet bag with the opening draped over the edge of the bucket. Toilet bags are designed to be biodegradable on their own, allowing you to bury the bag directly. If you are just using plastic bags you will have to retie them later, so it’s worth it to purchase biodegradable or waste treatment-approved bags to begin with. Toilet bags are also long enough that you should be able to twist the top closed and form a single overhand knot in the neck without coming into contact with the interior of the bag. Put a toilet seat on top of each of the buckets. To reduce odor and speed decomposition, sprinkle sawdust, coffee grounds, finely shredded paper, baking soda, or lime over the waste in the solid’s bucket. At the end of the day tie both sacks and dispose of them by either burying the sacks or dropping them in a vaulted toilet.
Cat holes
Cat holes are meant for one-time use only. Select a site at least 200 feet from any surface water. Using a trowel, dig a hole 6-8 inches deep and 4-6 inches in diameter. After business is complete, cover the waste with dirt.
Latrines
Latrines are for larger groups of people. The number in your group determines the size of the hole. Cover the deposits with dirt. Latrines should be used when necessary as the concentration of feces to soil takes up to three years to decompose.
Vaulted Toilet or Out House
Dig a large pit more than 200 feet away from water. Build a structure over the pit. In a corner of the outhouse, store lime in a covered can with a scoop nearby. Sprinkle one scoop of lime in the hole after each use. Do not allow lime on the toilet seat; lime will burn skin. Lime controls odor, hastens waste decomposition, and helps eliminate flies. If lime is not available, wood ash may be substituted.
Wiping
The toilet paper alternatives—newspaper, phone books, rags, plants (mule’s ear)—all have their advantages. They’re free, space-saving, and/or renewable. However, if you’re inclined to stick with toilet paper, here’s how to estimate how much you will need.
Put new rolls of toilet paper on all toilet paper dispensers. Mark the calendar out for two weeks. As each roll is used and replaced, put the empty cardboard tube in a designated place so you can count up the total number of used rolls at the end of the two-week period. (Be sure to make allowances for people who are away from home, at work or school. Remember, when TEOTWAWKI hits, everyone will be home 24×7.) After two weeks, count the empty rolls plus any rolls on your dispensers that are half used. Let’s say you have four empty rolls and two half-used rolls left; that would equal five full rolls. Then multiply the total number used, five in our example, by two (for there are two weeks left in the month). This equals ten total rolls that would have been used for that month. Multiply that number (ten) by twelve months and you calculate that you need to purchase 120 rolls of toilet paper for a year’s supply.
For illness purposes, or when guests come, you might want to include an extra package or two in your calculations. Storage space is at a premium. Mega rolls are great for storage, but they are too big for some dispensers. Store the biggest roll your dispenser accommodates.
Ounce of Prevention
Proper waste management will reduce flies, which spread disease, and will also keep the water supplies clean, keeping everybody healthy.
Cleaning the Bathroom
Surface cleaner
Here is a terrific DIY cleanser for bathroom surfaces, including porcelain, tile, and glass. (Test in an inconspicuous area for granite or Corian.) It cuts through soap scum and mildew, like any commercial bathroom product, and costs just pennies.
1 2/3 cups baking soda
½ cup liquid soap
½ cup water
2 tablespoons white vinegar
1 clean 16-ounce squirt bottle with closing cap
Mix baking soda and liquid soap in a bowl. Add in the water and vinegar. Stir mixture with fork until all lumps have been dissolved. Pour liquid into bottle. Shake well before using. Squirt on area to be cleaned. Scrub with a nylon-backed sponge. Rinse with water. Replace cap after use.
Cleaning the toilet
To clean the toilet, pour apple cider vinegar into the bowl and allow it to soak overnight. In the morning, use a brush for a sparkly bowl. The bathroom will be apple scented. If you don’t care for the smell, use an air freshener or light a match.
Cleaning the Kitchen
Apple cider vinegaris one of the greatest natural cleaning agents as it has antimicrobial properties. Acetic acid, which is found in apple cider vinegar, is what kills E. coli. The combination of lemon juice and vinegar kills salmonella. It is the acidity of the vinegar that is key in fighting germs. A 10% malt vinegar solution is just as effective in killing A/H1N1 influenza virus as are commercial cleaning wipes. If vinegar is less than 5% acid it will not be effective enough, and bleach should be used instead.
Kitchen surfaces
To clean kitchen surface areas, fill a spray bottle one-third full with apple cider vinegar, top off with water, and replace sprayer. Spray vinegar solution onto surfaces such as counters, stove tops, and table tops. Wipe dry with a clean rag.
A solution of equal parts of white vinegar and water is effective and safe for washing both the interior and exterior of the refrigerator and the fruit and vegetable bins. It also prevents mildew growth. It would be wise to have at least a few gallons each of white and apple cider vinegar on hand. (As noted, apple cider vinegar is a cleaning agent, but it is also medicinal. However, it must be true apple cider vinegar and not the flavored stuff that has been making its way onto store shelves.) White vinegar is also useful for cleaning, for softening laundry, and in preserving food.
Vinegar is also useful for cleaning cutting boards. Of course, there should always be at least two cutting boards in every kitchen—one for raw meats and another for breads, fruits, and vegetables. Wood boards should not be used for cutting meat because they are too porous. Meat should be cut on plastic boards only, and once a plastic board exhibits deep cuts it needs to be replaced. Sanitizing it is just too difficult at this point. Wood cutting boards are best used for breads and produce.
Cleaning Dishes
I served as part of the kitchen crew at two summer camps. One of the duties included making sure each camper got her dishes clean. We accomplished this in an assembly line fashion with four washing bins/stations: (1) pre-rinsing, for removing most of the food particles from the plate; (2) washing in hot water; (3) rinsing; and (4) sanitizing. While the young campers could tolerate brief dips in each bin for washing her own dishes, an individual on dish duty for every meal is really going to want heavy-duty rubber gloves to protect hands from the scalding water and sanitizing solution. (Be sure that there is a different pair for bathroom cleaning purposes.)
The sanitizing solution we used consisted of two teaspoons of bleach per three gallons of water. The dishes were then drained and allowed to air dry. Be sure to use only plastic tubs—bleach and metal don’t mix. Also, do not attempt any shortcuts here. The dishes must be washed and rinsed before applying the sanitizing solution. Food particles remaining on the dishes will reduce the efficacy of the sanitizing solution.
Cleaning the Rest of the Home
Deep cleaning against germs, especially when sickness is in the home, is a sure precaution. Bleach is a powerful disinfectant. Bear in mind that it has a relatively short shelf life and that it must be rotated frequently. Within a year of opening a new bottle of bleach, 70-80% of the labeled strength will be gone, and that is assuming that it was stored properly—in the dark and between temperatures of 50-70 degrees Fahrenheit. After the bleach bottle is opened and exposed to air, and especially if it is diluted with water, the chemicals break down faster and the bleach loses its strength.
Bleach disinfecting solution
In a spray bottle, add two tablespoons of regular bleach and then four cups of water. Gently shake to mix thoroughly. Use this solution once a day. While it may still be effective the next day if kept out of light in a cool place, it would be best to make a new batch each day. When you’re done, empty the bottle and let it dry out.
Ounce of Prevention
Clean living areas will prevent the spread of all illnesses.
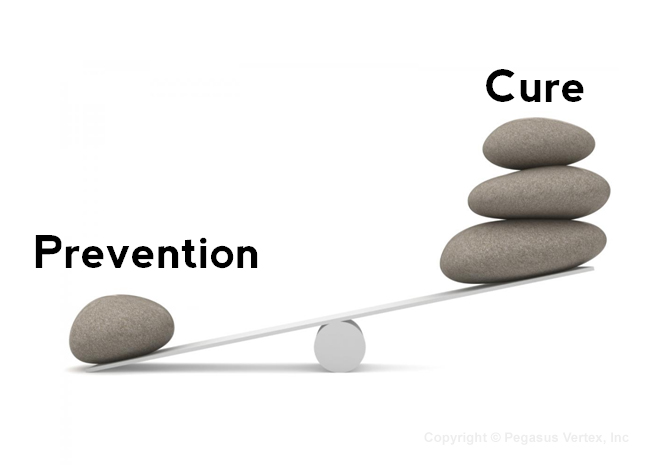
Over the years, I have learned when normalcy of life ceases to exist, so does the rational thought process of people. Our brains go into survival mode. Logic can and does go out the window. When it comes to clean water and sanitation, an ounce of prevention will be worth far more than a pound of cure.