


Something that we always stress to fellow preppers, is that “when the SHTF, what you have is all you will have,” stressing the importance of permanently sustainable and renewable things like wood heat, electricity from solar panels, etc. Once you have that covered, however, it is worthwhile to consider that some of the disaster scenarios we may have to cope with may be temporary – whether a weather event such as a snowstorm or tornado, or something medium-term like an EMP event affecting a smaller town where the residents are likely to pull together and survive. A limited-supply fuel may still be valuable in such a scenario, as long as you realize that it is limited and you (hopefully) have a more permanent long-term approach also in place.
LP GAS (PROPANE)
Many of you have propane in your homes and are very familiar with it. This is for the person that doesn’t, and may not be as familiar with it.
My main heat source for cooking and temperature control at my Bugout Location (BOL) is a wood stove, and I have eight acres of woods to support that. Some time ago, I was gifted an LP stove from a person that had just had natural gas service extended to him from the public utility, and he and his wife decided to get all new appliances. Its initial attraction to me was the ability to make coffee, or a hot meal, in the summertime without making the house unbearably hot with the wood stove all day just to have coffee first thing in the morning – along with waiting for over an hour for the stove to get hot! I had planned to just run the stove off small, easily-transportable tanks, since the remoteness of my BOL precluded getting a large propane tank back there, or getting a truck back there to fill it even if I had one.
 However, after a little research here, I discovered that a LP stove really doesn’t use that much propane. The site claims that an LP stove will consume about five to ten gallons of propane per month. Propane weighs just over four pounds per gallon, so a standard twenty-pound barbecue tank will have nearly five gallons of propane, or almost enough to run a range for a month! Six standard barbecue tanks would run your LP stove for nearly six months, and last you through a pretty significant medium-term disaster. Obviously, this would not be practical for a propane furnace or water heater, but it is very practical for heating food and beverages over the medium-term. I have also installed a tankless LP water heater to provide hot water for a shower, and I am in the process of seeing just how much propane it typically uses.
For those not familiar with LP storage, it is stored in liquid form, as the name implies. The liquid “boils” off and changes state to a gas as the pressure in the tank is lowered, as when you open the valve and start to withdraw the gas. Consequently, the pressure in the tank is not affected by how much gas is left inside – the pressure of the tank varies only with ambient temperature. To determine how much fuel is in the tank, the tank needs to have a level gauge in it, or without that, the tank has to be weighed to determine how much fuel is in there. The tare weight – the weight of the empty tank – is stamped on the metal collar that guards the valve on top. Total tank weight – tare weight = weight of fuel in the tank. A typical twenty-pound barbecue tank has a tare weight of around 19 lbs., so a full tank will weigh around 39 lbs. A fifty pound range spring scale is a useful tool to quickly tell how much fuel is left in the tank, as is a plain old bathroom scale.
Keep your eyes open for used propane tanks. I read a story recently about someone who went to an estate auction and found an old, rusty barbecue grill. When he got to it, the auctioneer said, “Who’ll give me a dollar for this?” The writer got it for a dollar with no one bidding against him. He loaded it up to haul it home, stopped at the first dumpster he saw, and removed the nearly-full propane tank before he put the rest of the rusty grill in the dumpster. That tank, purchased new, would have been close to $50, and he got it for $1! Even if he didn’t need it, it would be a great barter item.
KEROSENE
Kerosene was very common as a source for heat and light in this country up until the 1950s, when rural electrification finally became widespread. It is still common today among the Amish, of course. Kerosene is a very energy-dense fuel, and packs a lot of heat per gallon. It is a straight-run or distillate fuel, not a blended fuel like gasoline, so its storage capacity and shelf-life are much longer than gasoline. Kerosene burners and lamps are of two general types – the simple ones that are basically just a tank and a wick, and more sophisticated ones that have an induced draft system to make them burn cleaner and much more efficiently.
STOVES
Small kerosene stoves were also very popular in this country pre-1950, and are of two basic types:
Straight wick types (commonly known as Game stoves):
They are very simple, just relying on capillary action to feed the kerosene up the wick, just like a simple kerosene lamp, and don’t require much maintenance other than fueling and keeping the wick trimmed evenly.
Induced-draft types with round burners and chimneys, such as were commonly sold by Sears and Roebuck:
These are much more efficient and burn much hotter. Typically, these have a central fuel tank (usually glass) with a one-way valve, which is inverted into a holder to gravity-feed the kerosene to the burners. The burners have a flat wick that sits vertically on edge in a round holder, forming a circular-shaped flame around the inside surface of the chimney. Here is a view of the burner with the chimney removed, before lighting:
Here it is after lighting, before the chimney is put in place:
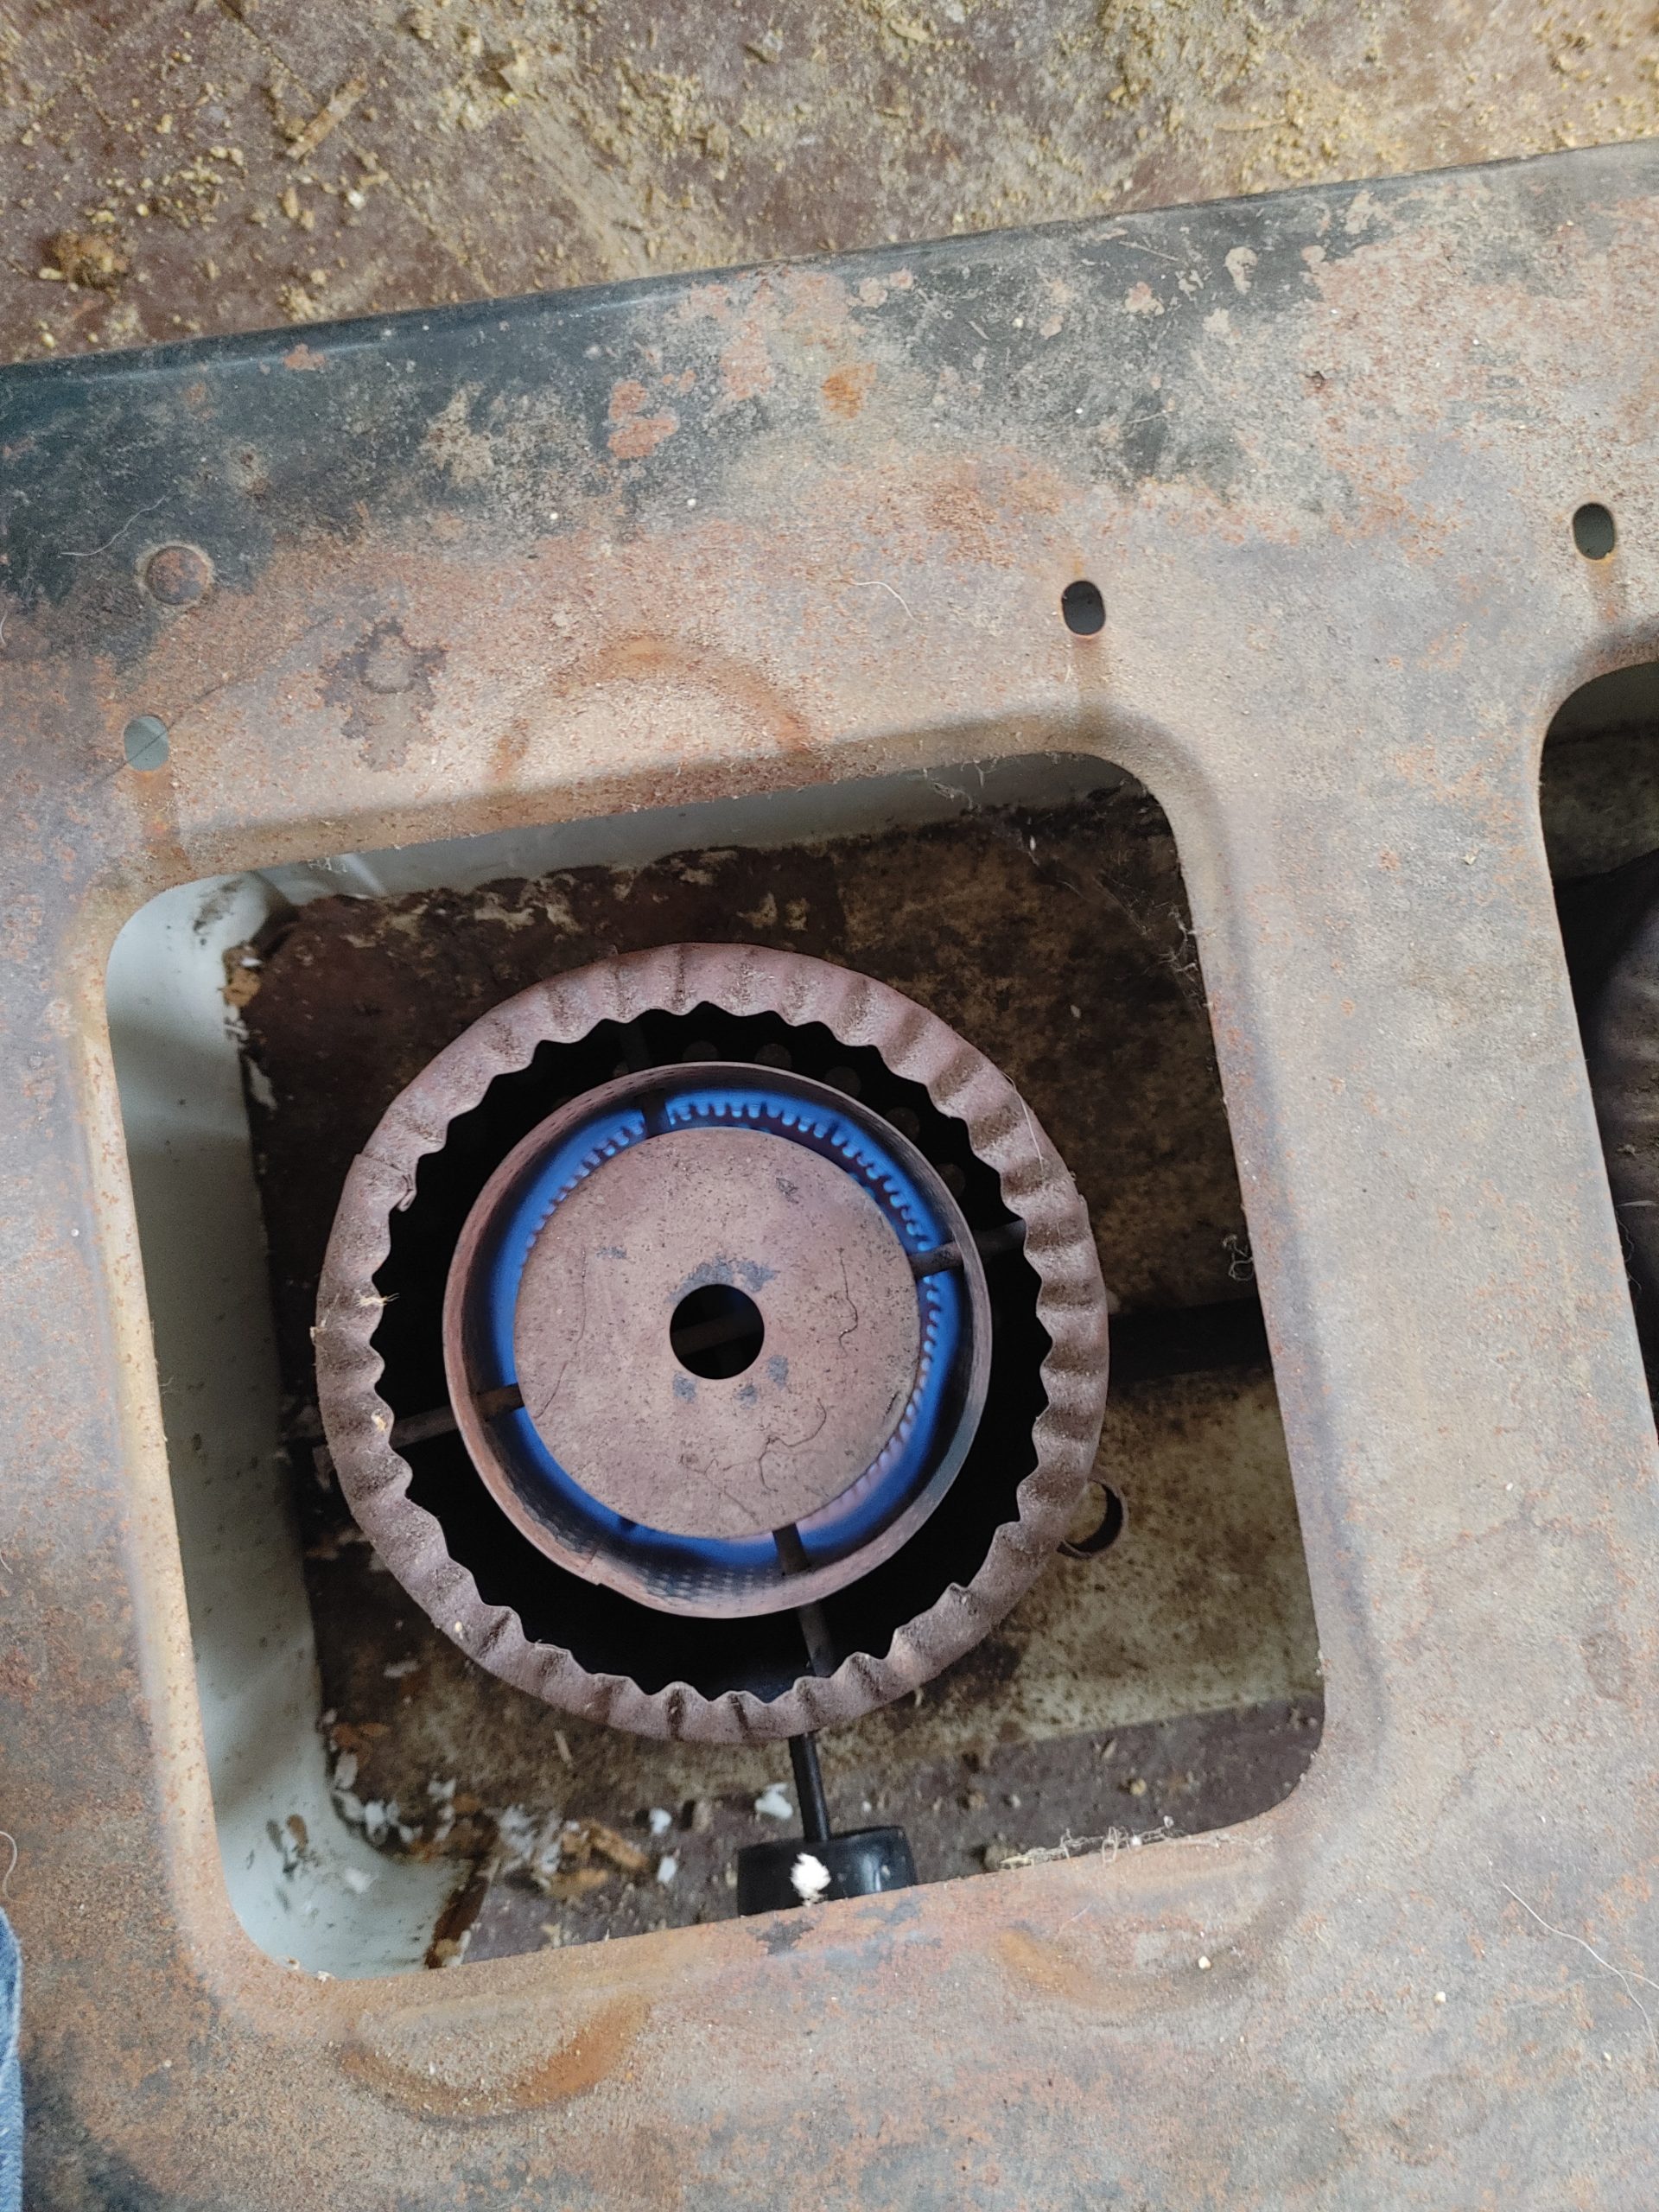
And ready for use, with the chimney in place. Note how there is a nice hot clean blue flame now:
The burners put out the heat equivalent to a standard gas stove burner.
The downside is that they are not nearly as controllable as a gas stove burner. To light them, you have to remove the chimney, turn on the kerosene, and wait a minute or two for the wick to soak up enough kerosene to light. After lighting the wick and waiting for the flame to spread all the way around, then you replace the chimney and you are ready for use. While in theory the heat can be controlled by varying the amount of kerosene by varying how far the valve is open, it takes a few minutes for the flame to respond to those adjustments, and you have to keep an eye on the flame to make sure you didn’t turn it down too far and it goes out. A better method of control is to leave the burner setting alone (my stoves usually run about one turn open on the valve) and move the pot or pan partially off the burner to reduce the heat.
These stoves (including one with an oven) can still be purchased from Lehman’s.
LAMPS
Kerosene lamps are similarly of two types:
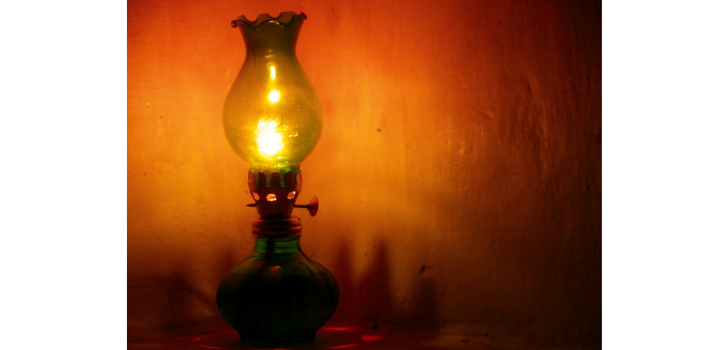
1. Simple tank-and-a-wick “hurricane” lamps, and hand lanterns:
They are simple, rugged, and foolproof, but have the disadvantage of giving off a yellowish light, and are not nearly as fuel-efficient as a mantle lamp.
2. Mantle lamps (such as the Aladdin)
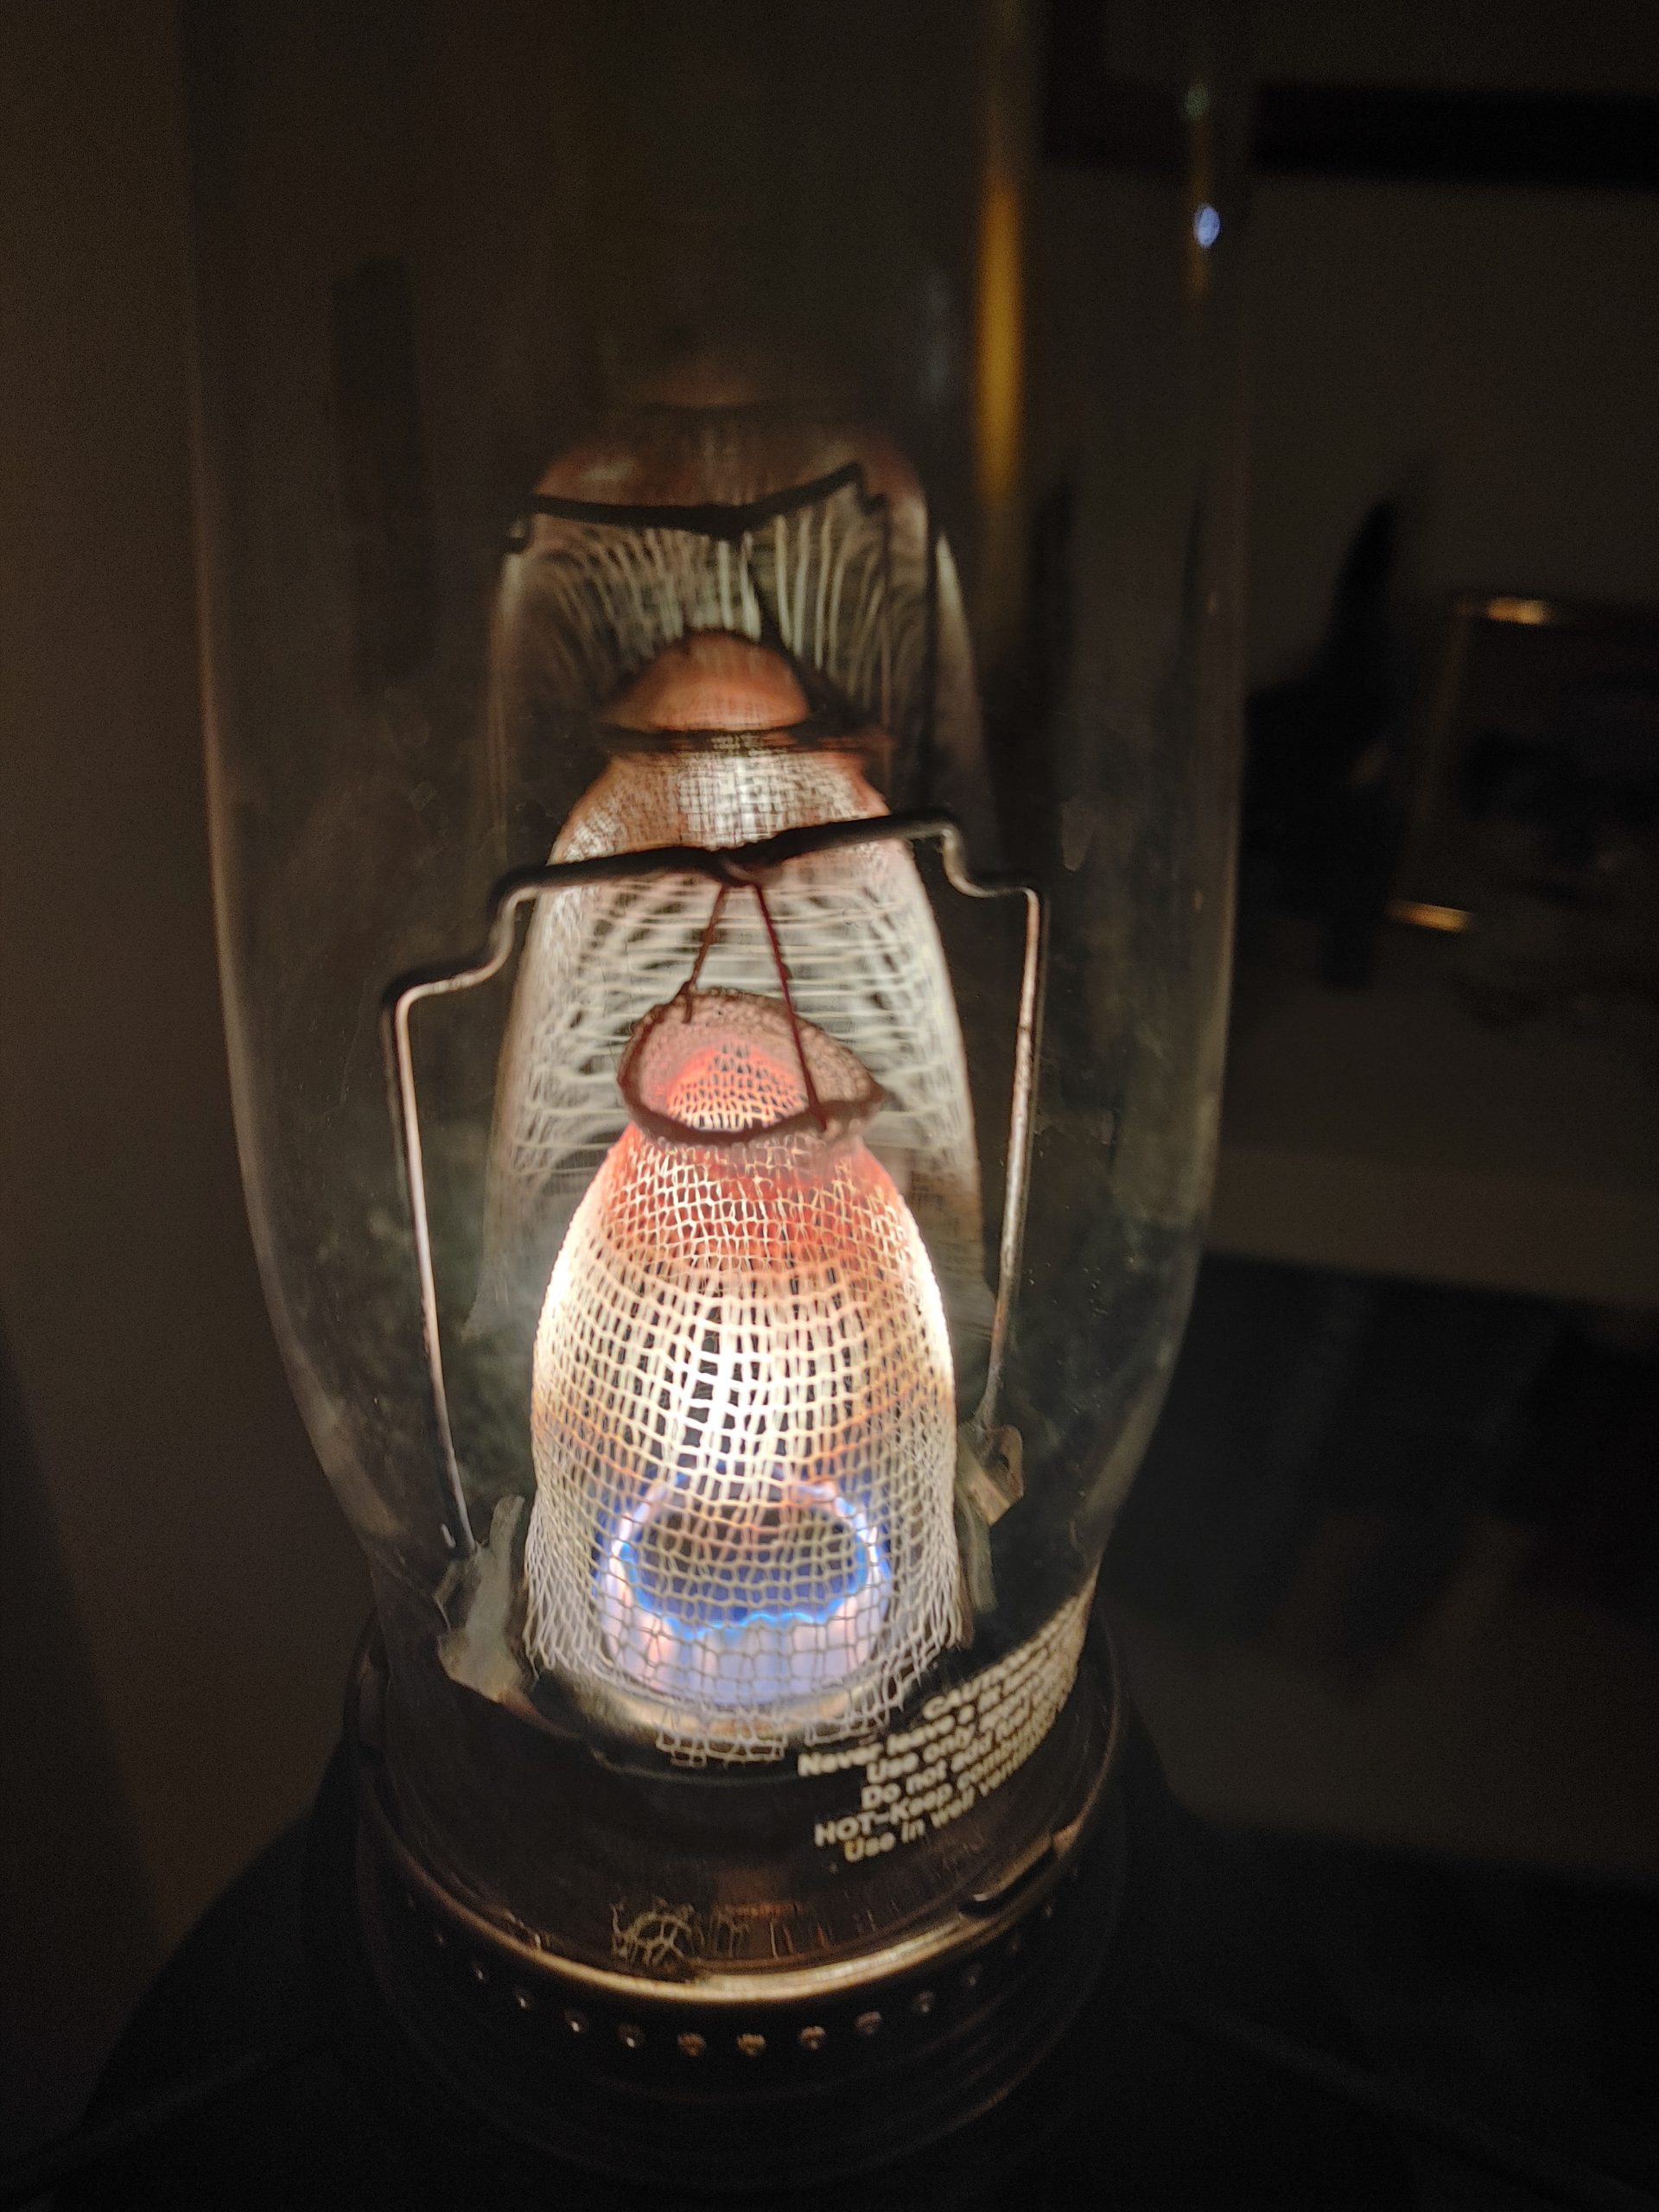
Mantle lamps are much more fuel-efficient and produce a much brighter, whiter light than the old flat wick hurricane-style lamps. Instead of relying on the actual flame from the wick to provide the light, the Aladdin lamp uses a nearly invisible hot blue flame to heat a mantle to incandescence to produce a bright white light.
Here is a picture of an Aladdin burner turned down low so you can see the cylindrical blue flame at the bottom, and the mantle just starting to glow:
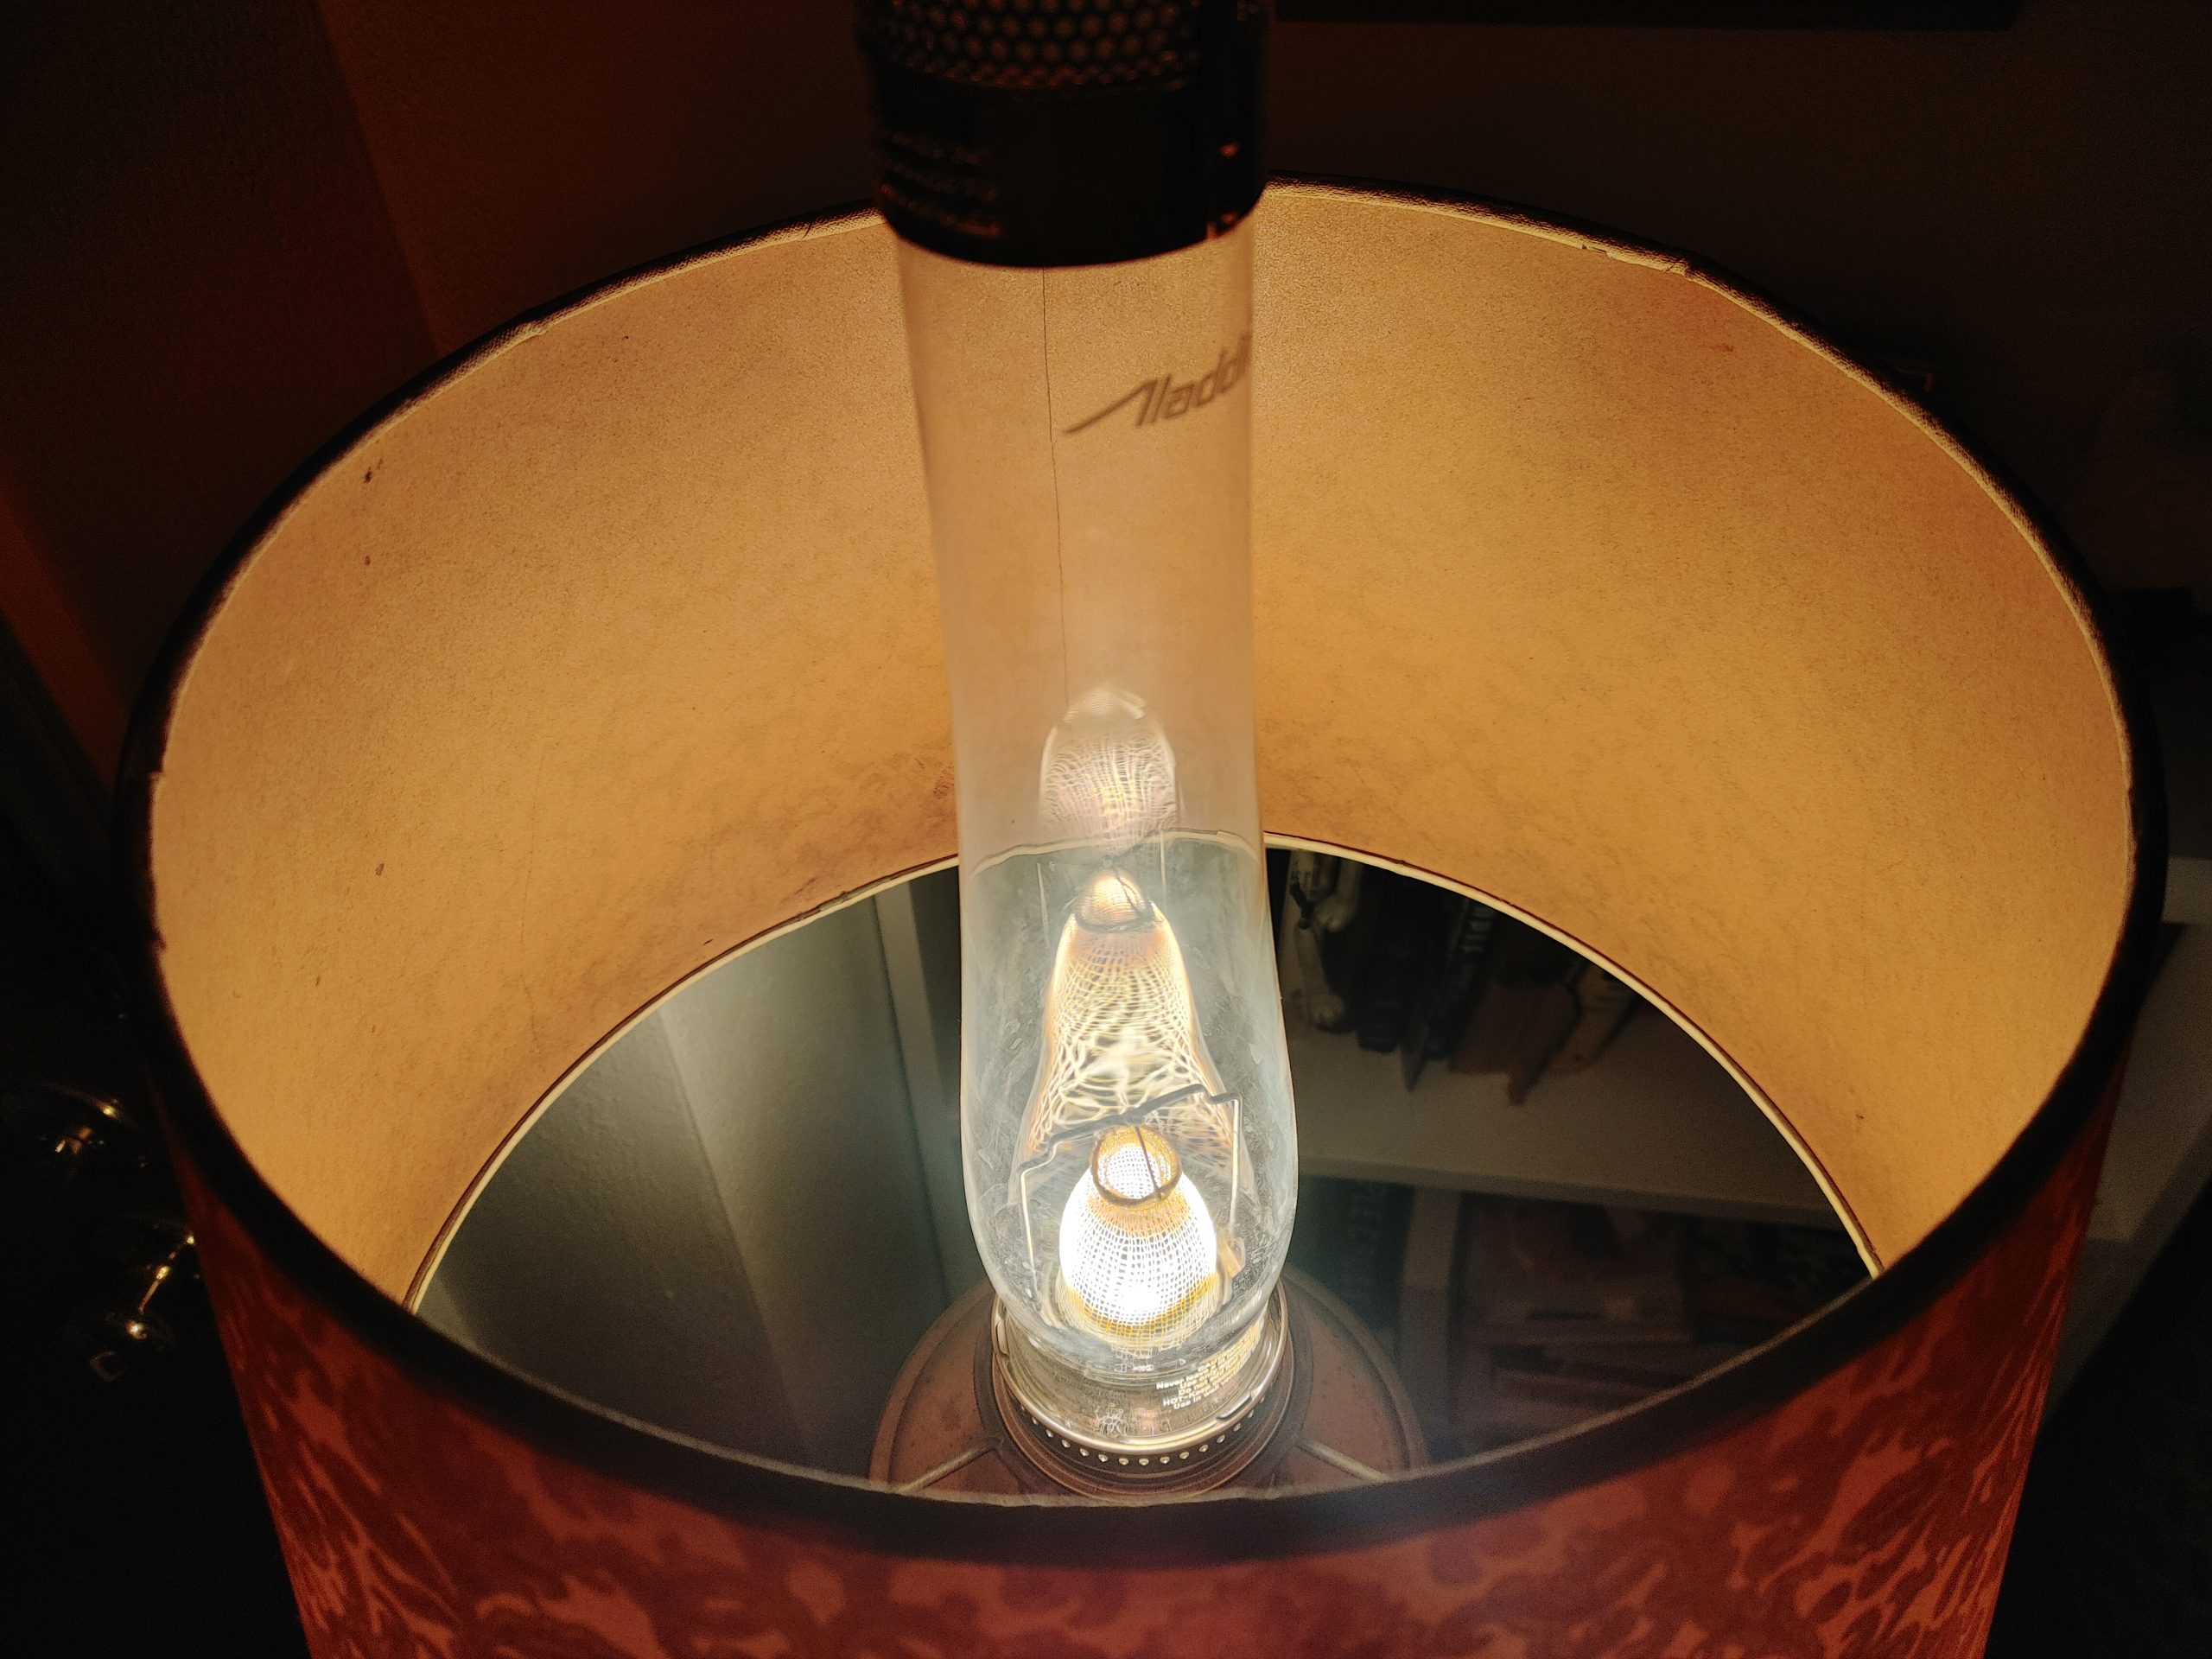
And here is the view inside the shade with the burner turned up full:
Their downside is that once they’ve been used once, the very thin mantles are extremely delicate, so they do not lend themselves to portable use. The lamps do need some care and maintenance, and a stock of spare parts such as wicks and mantles. There is a learning curve about how to use and take care of them, but it is not terribly difficult. The flame also produces a lot of heat. Aladdin lamps are much more suited to winter use than summer, and provide a nice cheery light and welcome warmth for reading on winter nights. My Aladdin lamps typically consume about one cup of kerosene when burned for about four hours on a typical evening. (Typically, from six to ten o’clock.)
One downside, as of this writing, is that Aladdin lamps are in high demand among the prepper crowd, and parts are really expensive. Mantles, that I can remember getting for $18 each, are now almost twice that amount, at the few places that have them. I have some mantles that I bought on eBay that were originally sold by Lehman’s, the online Amish supply store, that have price tags on them of $5.99!
Aladdin lamps require some patience to use. To light them, you remove the gallery assembly that contains the outer burner ring, the mantle, and the chimney. Turn the wick up to where it is visible, and light it with a match or lighter. Allow the flame to work its way all around the wick, then put the gallery assembly back on, and adjust the flame height to where the mantle just starts to incandesce. Leave the flame at this level for at least five minutes to allow the lamp to fully warm up, then turn the flame up to where the mantle is fully glowing.
WATCH THE LAMP CLOSELY To Set The Flame
If you turn the flame up too high, then the mantle will begin to ‘carbon up’ and show brown carbon spots on it. If you don’t quickly turn the flame back down to where those carbon spots disappear, they will quickly spread through the mantle and clog it up with carbon, thus greatly reducing the amount of air that can flow through it. At this point the lamp will smoke profusely from lack of oxygen, and the gallery and flame height knob will get so hot you can’t touch it. Get a pot holder or other insulation for your hand, and turn the flame down to where the is enough air flow to allow it to burn cleanly again and wait for the excess carbon to slowly burn off. Then, turn the lamp all the way off and let it cool so you can take the chimney off and clean all the carbon out of it. If it gets too far gone, you may just have to replace the mantle, which is very expensive!
Keeping the wick trimmed so that the flame is the same height all around is very important, as any high spots on the wick will put a flame through the mantle first and start carboning it up at those points, while the rest of the flame is not heating the mantle as much as it should. There is a simple tool with two separate cleaning edges that will clean the carbon off the burner ring surface, and also trim the wick to an even height, so that one part of the mantle does not carbon up before the rest. They are not expensive and are a must for an Aladdin lamp owner.
If you want to obtain an Aladdin lamp (and I strongly recommend that you do), I would suggest that you buy a new lamp instead of trying to get one used, unless you know the seller and they can demonstrate the lamp working. I have purchased around a dozen Aladdin lamps used from eBay. Probably only two of them were usable. The others were missing parts, or the rack-and-pinion arrangement that is used to adjust the wick up and down was simply worn out. Many of these lamps are seventy or more years old, and many eBay sellers are looking to get a big price for them because they are antiques. Aladdin lamps can be purchased new from Imperial Lighting (https://imperiallightingco.com/) and Lehman’s (https://www.lehmans.com/) from just over $200 for a bare lamp (fancy shades drive the price up quickly). New-old-stock (NOS) lamps come up occasionally on eBay as well.
A well-equipped BOL will have both types of lamps – a conventional hand lantern for portable use (particularly outside), and Aladdin lamps for fixed use inside the house.
As always, good luck and God bless!