
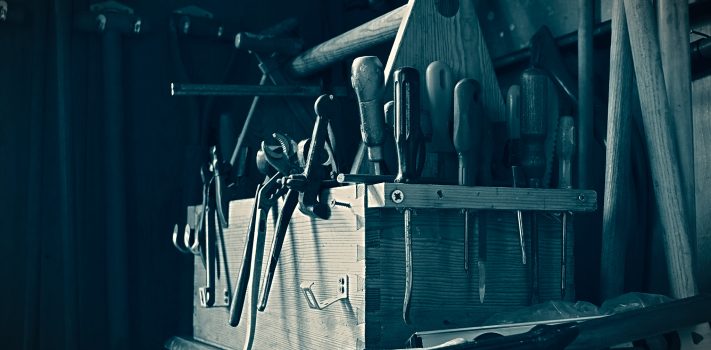


In this article, I’d like to emphasize the importance of tools that will be needed by our descendants. To begin, I’d like to stress the importance of buying quality tools. Don’t buy junk tools from Mainland China, often sold at places like Wal-Mart and Harbor Freight. I prefer tools made by companies like Snap-On, MAC, Matco, Irwin, Stahlwille (of Germany), Proto (called Plomb in the company’s early days), SK, Klein, Husky (pre-Taiwan), Cornwell, Kobalt (pre-China), Facom (of France), Worx, Fiskars (of Finland), Knipex, Ridgid, and Craftsman (pre-China). Sadly, many tool companies like Craftsman, Husky, Kobalt, and Stanley have moved part or all of their production to mainland China, and their quality has dropped. So look for older hand tools from those brands that are marked “Made In USA”.
Next, it is important to avoid misusing or abusing tools. Use tools only for their intended purpose. Do not over-stress them. Buy a larger tool rather than over-stressing a smaller tool. And, of course, always put away tools clean, dry, well-oiled, and in their proper places.
Take Care of Them!
In my book Tools for Survival, I discussed tool selection and workshop design at great length, but I didn’t go into much detail on tool maintenance and restoration. If we want to pass our tools down to our progeny, then we must care for them properly. If we treat them poorly, they can become rusty relics very rapidly. To illustrate: One summer I misplaced a pair of nice Proto brand wire cutters in some tall grass when I was out working on a field fence, here at the Rawles Ranch. I found them the following spring horribly rusted beyond repair. I felt like crying.
I recently restored a fairly large number of old hand tools that I’d collected over the years. Most of these were rusty tools that I’d found at yard sales and estate sales.
Here, I must mention that I always keep any rusty tools stored separately from my other tools. This is because rust is essentially contagious. Iron oxide is slightly soluble. Corrosive vapors can induce rust on closeby tools. Humidity is the accelerant in the corrosion equation. And salt-laden humid air is perhaps the worst environment. Avoid it, if possible. In coastal locales, it is worthwhile to buy airtight cases such as Pelican cases to store tools in them, along with silica gel packets.
An aside: Most folks casually use the terms, rust, oxidation, and corrosion interchangeably. But technically, there are differences. “Rust is used to describe the process of iron corrosion, so if a metal alloy doesn’t contain iron, [then] it can’t rust.” Hence, the non-threatening oxidation layer seen on the surface of older aluminum is not rust.
If you have a new tool, or a freshly-refinished tool, then you have an obligation to protect it. A heavy coat of oil – or better yet grease – is your best protection in a humid climate. The only exception to this is for files and rasps, as I’ll discuss later.
If you live in a humid climate, then consider also buying Golden Rod dehumidifiers for each of your tool cabinets or workshop tool chests. These only draw about 40 watts of current, so the small expense of running them 24/7 and year-round is well justified.
Even if kept well-oiled and quarantined, a rusty tool is doomed unless the rust is completely excised. You can slow the progression of corrosion, but as long as any rust remains, it will continue to very gradually do its damage. At some point, rust must be stopped, or you won’t be passing a tool down to your children and grandchildren. The only sure cure for rust is stripping a tool down to bare metal and then almost immediately refinishing it.
Removing Rust
For stripping rust from a tool, I generally recommend sandblasting. If you have access to an ultrasonic cleaner, then use that first, with soapy water. For any non-plated tools, you can also set up an electrolysis rig, without much difficulty. But I’ve generally gone directly to bead blasting or sandblasting. Brushing with a wire wheel is a distant second choice. It seems that a wire wheel always misses a bit of rust. But if it is done properly, sandblasting can get all of the rust, on most hand tools.
Naval Jelly and other rust-removing “dips” have their place — particularly for tools with concealed surfaces where a sandblaster won’t reach.
The goal is to get the steel back to a true “in the white” condition. Note that before sandblasting, be sure to heavily mask tool handles, so that they will not be eroded by the sandblasting media. Generally, cutting edges should also be masked and only touched with sharpening stones – not the sandblaster.
When sandblasting, any tool that has multiple parts needs to get a second blast, after the tool has been opened or adjusted to expose any concealed parts. For example, a pair of pliers or snips should be given and an initial blast in the closed position and then swung completely open, for a second blast. And, likewise, after an initial blast, any adjustable wrench like a Crescent wrench or pipe wrench should have its adjustment wheel turned enough turns to fully expose any parts that were concealed during the first pass of the sandblaster.
But here is one caveat: Heavy mechanical abrasion – of any sort – can ruin the temper of spring steel, so use abrasives on saws only as a last resort.
Refinishing Metal
My two preferences for rust-resistant refinishing of steel tool parts are powder-coating and Cerakoting. Both are available in a wide range of colors. Rustoleum paint will suffice, unless you live in a very humid climate and/or live aboard a boat or in a house on a coastline.
Another more expensive option is electro-chemical plating. The choice to do that falls heavily on personal preferences and the desire to keep tools looking original, and/or to maintain their resale value. Not everyone wants to “Pimp” their tools!
Tool Handle Care
Tool handles deserve care, too. Worn wooden handles can simply be sanded lightly and refinished with oil, or paint. And any badly damaged handles can usually be replaced. If you are handy, you can fashion new handles from a hardwood such as hickory. By the way, whenever I break a hickory tool handle, I save it for later reshaping and repurposing it into a handle for a smaller tool.
Plastic tool handles can develop an odd sort of rot that discolors handles and gives them a rough, milky appearance. Dipping plastic handles in household ammonia solution can almost completely restore the “rotted”-looking plastic. But take note that ammonia is corrosive to ferrous metals, so be sure to blot off all of it and air dry the tool thoroughly before putting a tool back into storage. If it still smells of ammonia, then your steel tools and nearby hardware will not be safe!
Tool Sharpening
The topic of tool sharpening is so complex that it is probably worthy of another article. Suffice it to say: Do not attempt to sharpen any tool unless you know what you are doing. It is easy to ruin a tool if you try to sharpen it improperly. I recommend that you study how to sharpen tools under the watchful eye of some gray-haired fellow with lots of experience. The more gray hair, the better.
Here are two key points:
1.) Try to match the original angles, perfectly.
2.) Take care not to remove too much metal. Tools can only be resharpened a limited number of times. You don’t want to expend several of a cat’s proverbial Nine Lives, in one sharpening session!
Keep Them Oiled, Keep Them Dry!
Most tools other than files and rasps should be kept well-oiled. Files and rasps are designed to be abrasive, so oiling them is detrimental to their intended purpose. A file or rasp should just be kept clean with a file card. A typical file card has a brush on one side and a set of fine wire teeth on the other. These are designed to keep the tool’s grooves cleaned out, so that the file or rasp can do its work.
Some types of wood that are sappy or oily can quickly clog the grooves on a file. If a file card does not work, then the best way to clean the grooves is with a lightweight solvent that evaporates quickly, and a rag. Again, do not use oil on a file or rasp!
The internal mechanisms of tools should also be kept either oiled or greased. One exception: Power tools with internal motors should also be kept dry, but resist the urge to oil the inner workings of a motor. And if you ever need to clean up the brushes of a motor, then do not use oil and never use steel wool! Both mild steel wool and stainless steel wool leave microscopic metal fragments that can short out an electric motor. Properly, motor brushes should be cleaned up with very fine grit non-metallic Emory paper. By the way, I also avoid using mild steel wool when cleaning any tools, for the same concern about leaving fragments that might rust.
Tools should be stored away from heavy dust and any sources of moisture or rust-inducing vapors. As previously mentioned, contiguous tool rust fumes and ammonia fumes are problematic. Even more so for chlorine bleach, iodine vapors, hydrochloric or hydrobromic acid fumes, and most salts. Because it is so commonly used in home laundry rooms and swimming pools, chlorine is one of the most frequent offenders. Chlorine is known as a “primary oxidant”. It can even rust stainless steel. Be careful to avoid storing any of those chemicals near your tools. If you store salt blocks for your livestock, then they should be stored far away from your tools and hardware!
Mice and rats, and even some insects can be a hazard, especially for electric tools. Critters just love to chew on some types of plastic and rubber. If you cannot make your tool storage space truly “mouse-proof” then at least use traps and poison baits, such as D-CON.
Avoiding Thievery
In recent years, tool theft has become an issue, even in fairly small towns. Drug addicts are drawn to tools like moths are drawn to porch light fixtures. It is worth the expense to install a steel door with a deadbolt lock on your tool room door. And hopefully, that is a steel door, or at least a solid core door.
Tools that are transported need to be in locking toolboxes that are either bolted down or chained and locked to something immobile, or placed in a toolbox that is so heavy that it cannot be moved by would-be thieves. Given enough time, any obstruction can be removed by a thief, so security cameras with regularly-uploaded images and/or concealed AirTags are apropos, these days.
Obsolescence
Another risk to tools that I only rarely see mentioned is the risk of obsolescence. Cordless electric tools in particular seem to be at particular risk. The general trend has been toward higher-voltage DC tools. 30 years ago, 9 VDC and 12 VDC power tools were the most common. Then it was 18 VDC. And presently it is 20 VDC. It is already hard to find some replacement 9 VDC and 12 VDC tool batteries. I expect 18 VDC batteries to be next.
In the long term, I expect 24+ volt DC tools to become the norm, especially for tools that require high torque and long endurance. When shopping for cordless DC tools, buy only well-known brands (read: Makita, Dewalt, or Milwaukee) and the highest voltage models available. And when buying spare batteries, be willing to pay more for top-quality lithium-ion batteries. Eventually, even better battery chemistries will become available, but it is safe to assume that changing to those batteries won’t necessitate buying a whole new generation of tools, as long as the batteries are from the same maker, with the same voltage.
A Tool Is Only Useful If You Can Find It
The final point that I’d like to make is about tool organization. Keeping tools properly organized saves a lot of time, and even money. I will illustrate this point with a brief story: I had an elderly relative who kept a notoriously messy and cluttered tool bench. After he died, his heirs finally cleaned up that 16-foot-long bench and pieced together three complete 3/8ths-inch socket sets and four complete 1/4-inch socket sets. They also found dozens of stray drill bits and six nearly identical Channel Locks – all 10 inches long. His heirs concluded that the old boy was so chronically disorganized that when he couldn’t find the right tool in the mass of clutter on his workbench he would just go to the nearby hardware store and buy another tool, or tool set! – JWR