


(Continued from Part 1. This concludes the article.)
When the time to cook arrives, the first step is to sort through the beans and remove any detritus or shriveled beans. In commercial products, it isn’t uncommon to find small rocks that were collected by the combine at harvest mixed in with the beans. Your next step is deciding if you are going to pre-soak or not. I tend to pre-soak dried peas but skip the pre-soak for beans. In both cases, I prefer cooking in a crock pot over using a pot on the stovetop. The common belief is that adding salt to soaking beans prevents the beans from fully hydrating and softening. I have never added salt for this reason and therefore can’t say if its presence before cooking negatively impacts the texture. I do give my rehydrated peas a rinse with cold water before cooking.
As to flavoring your dish, both garlic and onion in fresh or powdered forms are mainstays in our home. Field peas pair well with small amounts of bay leaf or rosemary whereas pinto beans deserve a bit of cayenne and butter beans only need time and salt (in my opinion). For cooking liquid, never use water alone. Beef stock, bullion powder, apple cider and marinades can be used as partial water replacement to impart unique or specific flavors to dishes. For crock pot cooking I aim for six cups of liquid per pound of beans and cook on low all day.
As a note, one pound of dry pea/beans approximates 2.5-2.75 cups depending on the variety. In contrast to my cooking style, my wife will always choose to fix dried beans in the instant pot. Her base recipes still call for six cups of liquid per pound of beans with a 50-minute cook time and a 20-ish minute pressure release keeping the overall cook time around 1.5 hours. Everyone’s preferences differ so it pays to experiment. Given the array of beans and field peas available to us there is no limit to the recipes one can prepare. As a last thought on eating dried beans/peas I will throw in these observations. I find beans to be the more filling of the two dried legume types but find field peas and their more complicated flavors to be the more satisfying meat substitute. (Your mileage may vary.)
The following recipes include an easy crock pot pinto bean recipe, a pepper relish recipe that has been a favorite in my mother’s family for ages and pairs very well with pintos, my wife’s instant pot pork and black bean stew and a traditional buttermilk cornbread.
Crockpot Beans
Spread out a pound of beans on a flexible cutting board or kitchen towel and sort through them collecting the good beans and discarding any shriveled beans or harvest detritus. Rinse well with cold water and transfer the drained beans into a medium-sized crockpot. Cover the beans with a total of six cups of liquid. I have used two cups of low sodium or no salt beef stock with four cups of water as well as a full six cups of water to which I add two packets of Herb Ox sodium-free granulated beef bouillon. Add 1 tsp of salt, several grinds of fresh black pepper, ¼ tsp of cayenne pepper, ½ tsp of onion powder or half of a small onion, and if desired several slices of cooked bacon or 1/2 cup of roughly diced pieces of spiral ham. Cover and set the heat to low. If possible, in three or so hours remove the lid and stir. Replace the lid and let the beans continue to cook for another 4-6 hours.
When finished the beans will have plumped and the top layer may be just sticking above the cooking liquid. Seasoning to taste is completed by adding salt or spices and allowing an additional half hour of cooking time. This recipe works equally well with dried field peas although I leave out the meat(s) and substitute in a teaspoon of bacon grease. Serve as a compliment to rice, as a side to a larger meal or in our favorite combination with buttery cornbread and pepper relish.
Sweet Pepper Relish
12 large red bell peppers
12 large green bell pepper
6 large sweet onions
12 tart to sweet apples (Honey Crisp, Granny Smith, or similar)
6 to 8 small tender yellow squash
3 cups sugar
2 tsp pickling salt
1.5-2 cups of good apple cider vinegar
Ice cubes
Wash, seed or peel and finely chop all of the vegetables and apples (for us it takes 9 medium pulses of the food processor for each container worth of produce). Combine these ingredients and mix well in a large bowl with the with the pickling salt. Add sufficient ice cubes atop the mixture to keep everything chilled. This helps prevent any browning of the apples and squash. Let the salt draw water from the vegetables for at least thirty minutes. Remove any remaining ice cubes and drain off as much of the salty water as possible. Transfer the mixture to a large pot, add 2 cups of sugar and the 2 cups of apple cider vinegar. Cook over medium heat with frequent stirring until everything is soft and heated through. Taste to determine if additional salt, vinegar or sugar is desired.
After final seasoning, transfer the relish mixture into hot pint jars and process by the Ball Water Bath Method for 15 minutes. As written, the yield should be around 6 pints. If you anticipate the yield to be over six pints because of your vegetable sizes, add additional vinegar to scale. Depending on how our garden is producing at the time, we have used multiple types of thick-walled sweet and banana pepper in this recipe. In addition to use as a garnish for beans, the relish adds substantial flavoring to deviled eggs, egg salad and potato salad.
Instant Pot Pork and Black Bean Stew
1 lb of lean ground pork
1 pint of frozen chopped bell pepper
1 pint of frozen chopped onion
2 chipotle peppers, chopped
2 tsp adobo chili sauce
3 cloves of garlic, minced
1.5 tsp cumin
1.5 tsp coriander
12 oz hard apple cider
1 quart unsalted chicken stock
1 lb dried black beans, rinsed
Brown the ground pork in the instant pot on sauté. Drain off the fat and add the spices, peppers, onions, garlic and adobo sauce. Sauté until tender. Add the hard apple cider and scrape the bottom of the pot. Add the chicken stock and black beans; mix everything well. Cook on high for 50 minutes then allow a further 15 minutes for natural release prior to performing the full pressure release. Salt the finished stew to taste and serve over rice. Garnish with salsa and/or sour cream.
Buttermilk Cornbread
2/3 cup self-rising cornmeal mix (Our choice is White Lily buttermilk white cornmeal mix)
1/2 cup buttermilk (whole or low-fat works best; if you can only find fat-free versions, increase the oil and reduce the buttermilk slightly)
1 small egg, beaten
1 TBS sugar
1.5 TBS vegetable oil
1 to 1.5 TBS butter
Set the oven temperature to 450 F and pre-heat a small (6-inch) skillet. Mix the egg, buttermilk, sugar, and oil together. Add to the cornmeal and stir just until blended. After the oven reaches temperature, remove the skillet using a pot holder and add the butter to the hot pan. Tilt the pan to fully coat the bottom with melted butter. Add the cornbread batter to the pan, shake slightly to evenly spread the batter and butter, and return to the oven. Cook for approximately 18 minutes; remove from the oven and immediately turn the cake out onto a plate to cool for several minutes. Slice and serve warm.
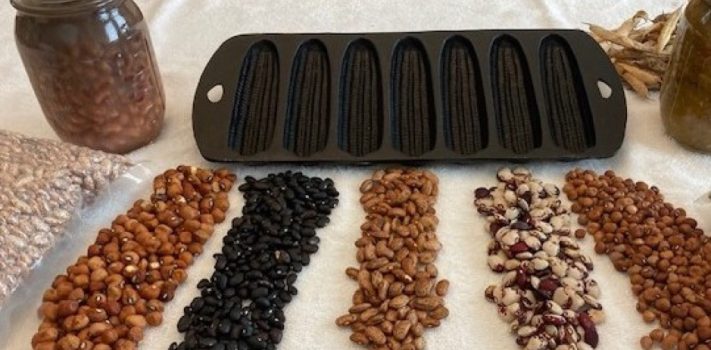
As you may have noted, this recipe only yields a small cake. As much as we enjoy fresh baked cornbread, we don’t care much for it as a leftover. If you need to bake for a larger group, roughly tripling the ingredient quantities will yield enough mix for a full 9-inch skillet or thinner 10-inch (as recorded in The Ultimate Southern Living Cookbook). Another reason we prefer the smaller mix quantity is that it perfectly fills one of the seven position cast iron bread stick pans (as shown in the banner photo) and the larger surface area of the cornbread sticks means more buttery goodness.
The idea for this article came to me last week as I was trying to get my thoughts straight on how to write about the occasions when I have been able to get non-preppers to honestly engage in the beginning levels of preparedness. The tangential question of why there seems to be so much less said about growing and using “prepper foods” in contrast to all of the surface level advice given about their nutritional value and storage potential. This thought was immediately followed up with the childhood memory of carrying beans home from my grandparent’s place that I used to start this piece….
With an article such as this covering a foundational preparedness topic, I’ve surely echoed previous writings. I encourage any of you who have read this to the end to next take a bit of time and type “growing dried beans, pinto bean” and similar terms into the SurvivalBlog search box then read many of the other how-to articles and recipes that will be supplied. Several of my favorites were:
- The Easy Storage Survival Harvest. by Minnesota Rose on June 22, 2011
- What’s for Dinner, by J.R. starting on January 8, 2016
- Food Security in Beans and Peas by C.J. on January 9, 2015
- Our Experience Growing and Storing Our Own Food, by Tennessean, starting August 6, 2015.
I’m getting better at specifying search terms on this site as time goes on and truly appreciate its effectiveness. Thanks again for your attention and to the Rawles family and team for this blog.