


Many people know the theory of how to sharpen a knife. One needs only to sweep each side of the edge of a blade over a whetstone at a consistent angle until the edge is honed to perfection.
The problem is that it is extremely difficult to put that theory into practice. Few people can hold a knife at a consistent angle as they run it over a whetstone. I am not one of the skillful few who can hand sharpen a knife well.
I recently tested a tool that makes me feel like a knife-sharpening pro. It is the EdgePro Apex 4 Knife Sharpening Kit. I was able to get excellent results on three “problem” knives that had frustrated my attempts to sharpen them using other sharpening methods. With a price at the time of this writing of $285 at www.edgeproinc.com, the Apex 4 Kit is worth every penny. I highly recommend this excellent tool to anyone who sometimes struggles to get a good edge on a knife.
Background
I had given my son-in-law, “Sam” a knife for Christmas. The knife has a CPM 154 steel blade. CPM 154 steel is extremely hard. That hardness gives blades made with CPM 154 excellent edge retention, but it also makes them extremely difficult to sharpen once they become dull.
Sam and I were talking about this knife recently. I knew it was difficult to sharpen, so I offered to try to sharpen it for him. Sam replied that this would not be necessary, since he had purchased an EdgePro Apex Knife Sharpening Kit.
I was intrigued by what Sam said about the sharpening kit. I looked it up online, and was excited to find out that it is made in the USA. I contacted EdgePro, and asked if they could provide me with a sample for testing and evaluation. They were kind enough to agree. The following week, I received a package via UPS.
Opening the Box
 The box contained four items that normally need to be purchased separately: The Apex 4 Kit, a retractable magnet, a bench mount, and a slide guide. The Apex 4 Kit was enclosed in a carrying bag. The bag contained a manual, the blade table, the stone arm/pivot shaft, the sharpening stones (120, 220, 400, 600, and 1000 grit), a water bottle, 2000 and 3000 grit polishing tapes with mounting blanks, a card presenting some optional accessories, and a ceramic hone.
Reading the Manual
It has been said, “If at first you don’t succeed, read the directions.” I usually try to skip the “don’t succeed” part, and go straight to reading the directions.
 The manual consists of 20 pages including the front and back covers. It contains contact points for additional information like a QR code, phone number, email address and web address. The web site includes a host of helpful videos. For example, there is one video that gives an excellent overview of the system and how to use it. That video is the 8 minute and 41 second long “How to Sharpen a Knife–A Step-By-Step Guide for the Beginner”.
The videos also include instructions for using the various accessories, as well as advanced pro tips for things like sharpening serrated knives, scissors, axes, pruning shears, etc.; rehabilitating old knives; and sharpening specific makes and models of knives.
Another interesting piece of information included in the manual is that EdgePro offers a free sharpening demo. If you would like to see what an EdgePro sharpener can do, you can send them a knife. They will sharpen it for free and return it to you to show what the system is capable of.
With a basic understanding of how to use the tool, I went to the pole barn to do some sharpening.
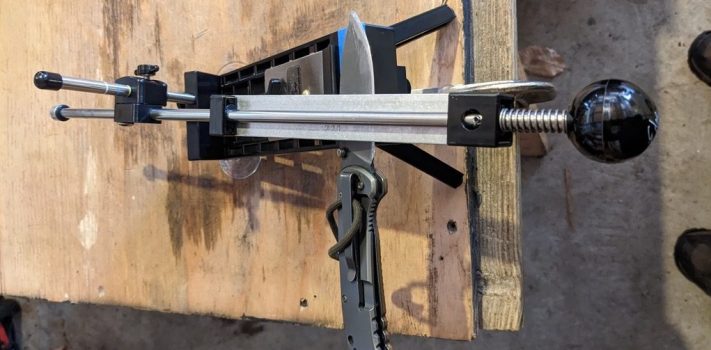
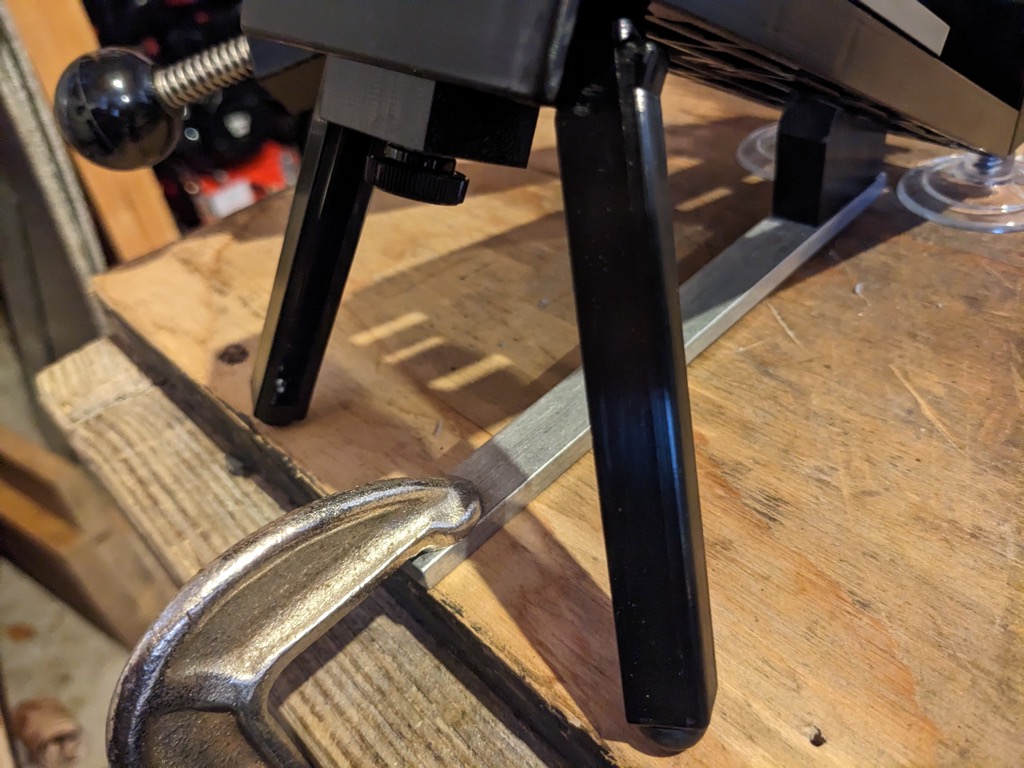
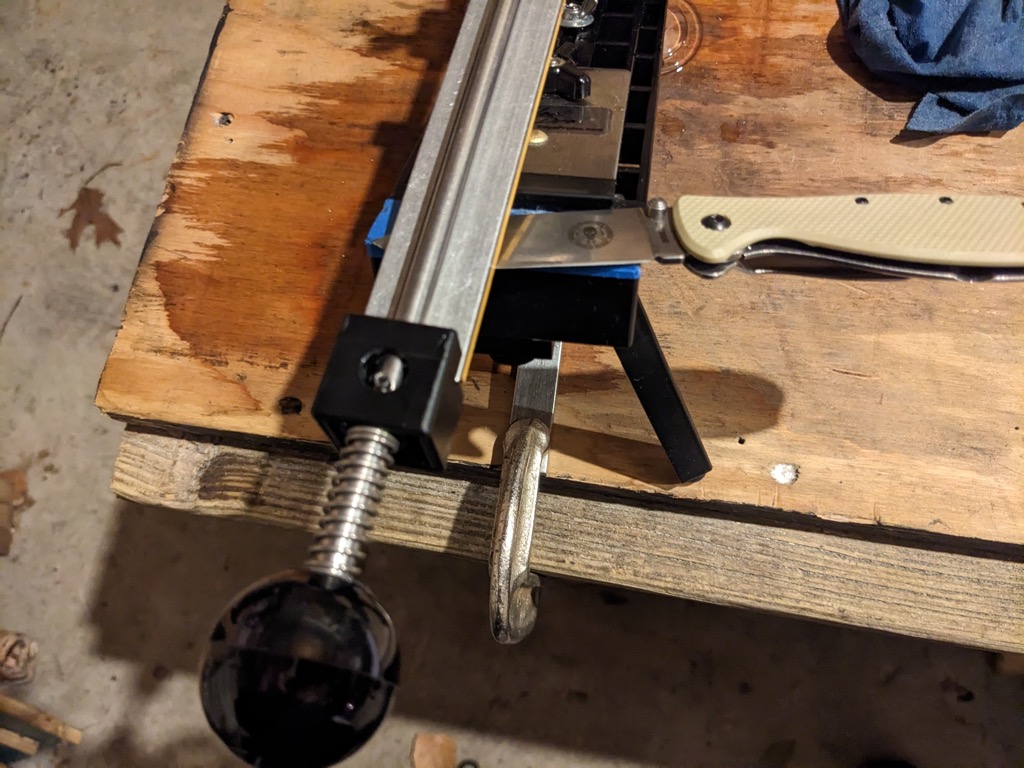 I began by removing the blade table from the case and rotating the legs 90 degrees. My work surface was a piece of plywood that was not smooth enough for the suction cups on the blade table to grip. As a result, I installed the optional bench mount to the blade table according to the supplied directions. I then clamped the aluminum bar of the bench mount to my work surface with a C-clamp.
Next, I inserted the pivot shaft of the stone arm into the back of the blade table. I kept the stone arm angle set to 21 degrees. The manual recommends sharpening most knives at this angle.
The manual suggests starting with an easily sharpened knife. Although I read the directions, I guess I do not always follow them. Based on the design of the system, I was pretty confident that it would work well with an easily sharpened knife. I wanted to see what it could do with knives that were not so easy to sharpen. I had three “problem knives” that I wanted to test the system on.
Problem Knife #1
The first problem knife was a Coast FX350 that I had reviewed for SurvivalBlog back on June 27, 2020. It is a decent knife, but I made the mistake of grabbing it from the pegboard in the pole barn one day instead of a utility knife. I was going up on the roof of a tree house I was building for my grandchildren to install some shingles. There are many reasons that utility knives have replaceable blades. Shingles rank highly among those reasons. By the time the roof was done, cutting shingles had pretty thoroughly ruined the edge of the FX350.
Over the course of the past couple of years, I had tried to restore a decent edge to the FX350 using a number of different tools. None of those tools were up to the task. Now it was time to try the Apex kit.
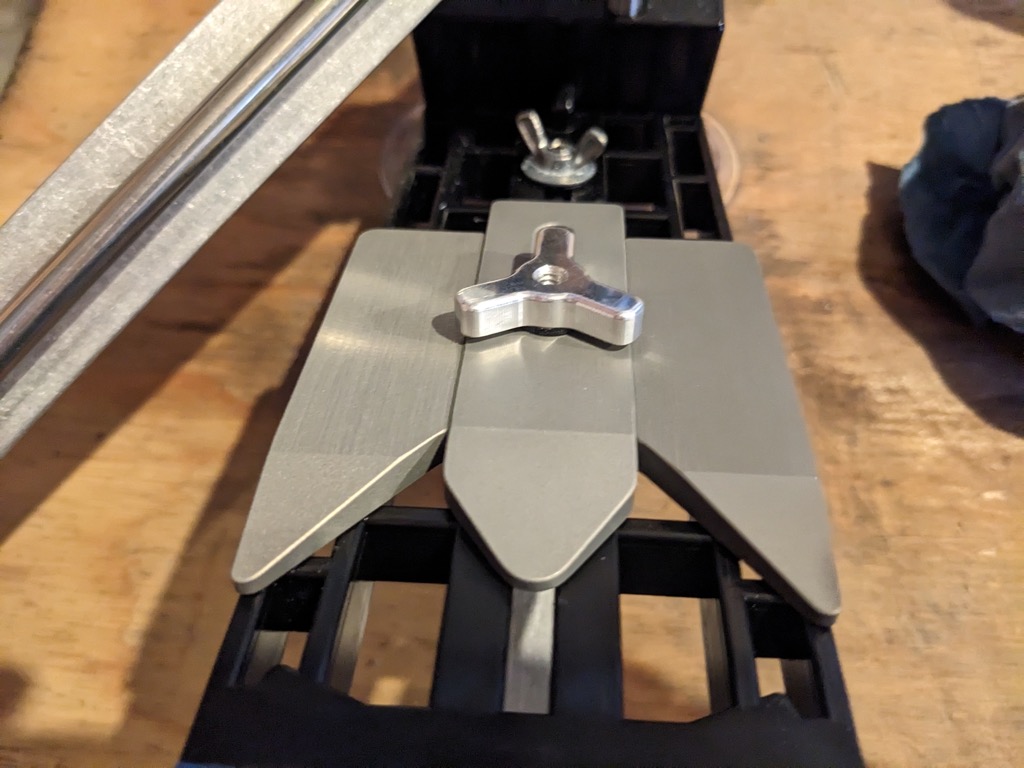
I set the knife guide on the blade table so that as much of the knife as possible was resting on the table without exposing the table itself to the stone. The 220 grit stone was pre-inserted into the stone arm. I left it in place, since the manual suggested starting with that stone.
The optional retractable magnet had been pre-installed on the bottom of the blade table. In conjunction with the knife guide, it did an excellent job of holding the blade in place. I only needed to stabilize the knife slightly with two fingers of one hand while operating the stone arm with the other hand.
I wet the stone, and then made several passes on each side of the knife as the manual recommends. I felt for a burr, but could not detect any. I switched to the 120 grit stone, because it was obvious that much more extensive work was needed. During the course of 4 sharpening sessions ranging in length between 10 and 60 minutes each, I gradually restored the edge of the knife. When the edge was finally fully restored, I worked my way up through the 220, 400, 600, and 1000 grit stones.
The results were outstanding. The knife was sharper than it had been brand new out of the box. The edge was also quite attractive in its uniformity and mirror-like finish. The kit passed the test of problem knife #1 with flying colors.
Problem Knife #2
 The second problem knife was an old paring knife from our kitchen. I had tried to sharpen it a number of times over the years, without any noticeable success. It was so dull that I felt that I could drive on it to Boston and back without getting a flat tire. The tip of the knife was also bent. Perhaps someone tried to use it as a screwdriver at some point.
I took the knife to the pole barn, and pounded out the bend on the end of the blade on the tiny anvil on my vise. Then I tried some passes with the 220 grit stone.
The paring knife was so small that the stone came into contact with the knife guide. I cut a piece of a paint stirrer to use as a spacer to get the knife higher. Sam later mentioned that he has a small knife attachment for his kit that works quite well. In my case, the spacer was adequate to do the job.
After several passes on each side of the blade with the 220 grit stone, I still did not have a burr. I switched to the 120 grit stone. The steel on the paring knife was fairly soft, so I was able to work my way up through the stones fairly quickly. In spite of the cheap steel, I was able to get the blade to the point where it was just barely shaving sharp. I brought the knife back in the house, and warned my wife that it was quite a bit sharper than it had been, so that she should use it with care until she had the chance to get used to it.
A couple of days later, I wanted to cut some summer sausage for a bedtime snack. I grabbed the paring knife. Previously, the knife would have been hard-pressed to cut through the case of the sausage. Now it cut through the case with ease. The kit passed the test of problem knife #2.
Problem Knife #3
The third problem knife was an ESEE Zancudo Framelock that I had recently tested for SurvivalBlog. I used the knife to experiment with a new method for opening cans. The new method for opening cans was a failure. It also ruined the edge of the knife. I subsequently tried to sharpen the knife with another tool with indifferent success.
I started the attempt with the Apex kit with several passes of the 220 grit stone on each side of the blade. A burr did not develop. I then installed the optional slide guide.
The slide guide gives two points of contact to the back of the knife on the blade table rather than just one. It keeps the knife remarkably stable in conjunction with the retractable magnet.
The tough D2 steel of the Zancudo blade required a great deal of persistence before I could restore an edge. During a total of 4 sessions, I was gradually able to restore the edge so that it was just as sharp as it was when it came out of the box new.
The kit passed the test of problem knife #3.
Conclusions
I am extremely pleased with the EdgePro Apex 4 Knife Sharpening Kit and the optional accessories that I tested. With sufficient patience, I was able to achieve professional-level results on three extremely difficult sharpening subjects.
Before I next restore an especially badly worn edge, I plan to get the 80 grit diamond matrix sharpening stone that EdgePro offers on their website. This extremely coarse stone should more quickly rough out the new edge, which can then be finished and polished with the other stones.
The EdgePro Apex 4 Kit is of sufficient quality to be suitable for professional use. EdgePro also offers Pro Kits that are a step above their Apex Kits. I am delighted that Sam directed my attention to these outstanding tools, and I highly recommend them to SurvivalBlog readers.
Disclaimer
EdgePro was kind enough to provide me with an Apex 4 Knife Sharpening Kit, along with an optional retractable magnet, bench mount, and slide guide. Coast was kind enough to provide me with their FX350 folding knife for a review that I wrote back in 2020. I tried not to let the kindness of Edge Pro or Coast interfere with my objectivity in this review, and believe that I have succeeded. I did not receive any other financial or other inducement to mention any vendor, product, or service in this article.