


A number of months ago, I purchased two Seahorse protective cases at a thrift store. Someone had drilled and cut holes into them before making the donation. I recently patched the holes in the cases using J-B Weld and fiberglass fiber tape. I am very pleased with the outcome.
Based upon these good results, I would recommend all of the products involved for their usefulness: Seahorse Protective Equipment Cases, J-B Weld Original Formula, and fiberglass fiber tape.
Buying the Cases
I bought the two Seahorse Protective Equipment Cases at a bin sale at a thrift store outlet. At a bin sale, items are sold by the pound rather than being individually priced. For example, at this particular bin sale, household goods, electronics, and toys cost $.99 a pound, clothing and shoes cost $1.69 a pound, small appliances, luggage, rugs and framed art cost $2 apiece, and large camping supplies and large sports gear items cost $4 apiece.
Since each of the Seahorse cases that I purchased weighs 2.45 pounds, they cost me a total of $2.43 each.
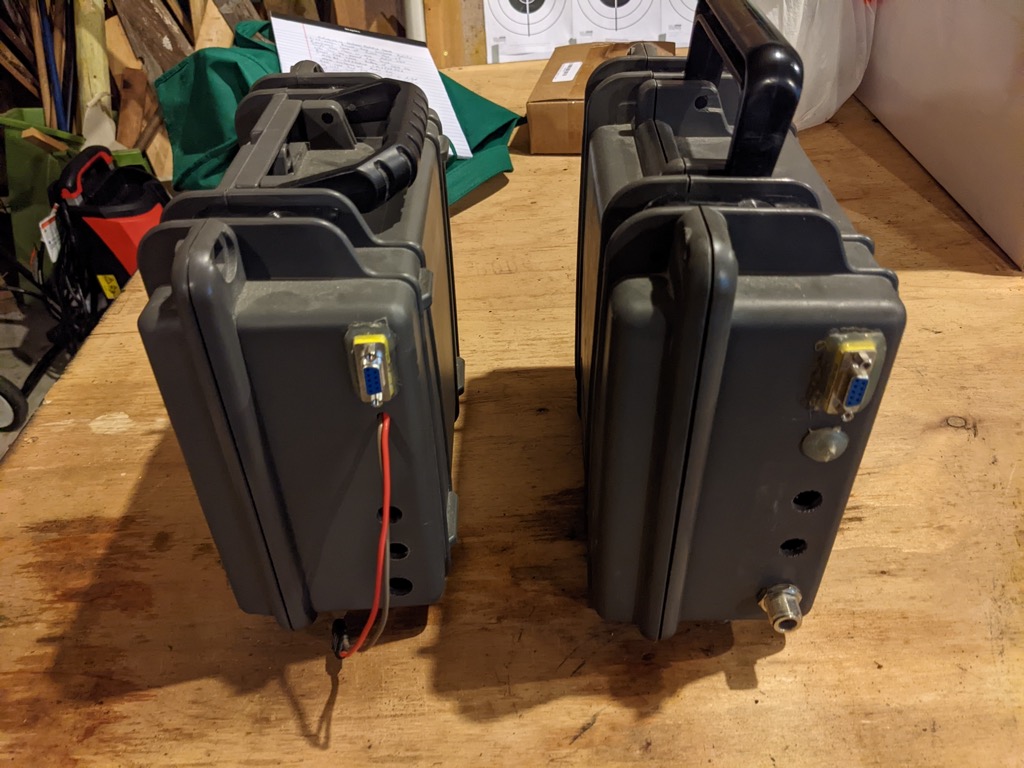
Each case had five holes cut or drilled into the left side of the case to allow for the installation of wires and fittings for electronic equipment. Most of the equipment had been removed, leaving a few stray wires, jacks, ports, and holes in the sides of the cases.
Seahorse Protective Equipment Cases
I did not know the brand of the cases when I bought them. I just saw that they looked durable, and decided to give them a try.
 When I examined the cases more closely after bringing them home, I discovered the words, “MFG BY SEAHORSE CALIFORNIA” on the inside bottom of the cases. The inside bottom was also stamped with the web address for Seahorse ( www.seahorse.net ) and the model number of the cases (300). I was not previously familiar with Seahorse brand cases. When I visited the Seahorse website, I was delighted to learn that Seahorse designs and manufactures these hard, waterproof, protective cases in the United States. They have been doing so since 1997. The cases come in a variety of sizes, and have a lifetime guarantee. They are designed to carry guns, cameras and lenses, notebook computers, and other sensitive equipment.
Seahorse cases are roughly similar to Pelican brand cases, but tend to be more moderately priced for comparably-sized models.
The current version of the Seahorse case design that I purchased is the SE300. It has interior dimensions of 9.2 x 7.7 x 4.1 inches, exterior dimensions of 10.7 x 9.8 x 4.9 inches, weighs 2.45 pounds empty, provides 10 pounds of buoyancy when empty, and has a weight capacity of 30 pounds. It can be configured as a simple case, a single pistol case with foam inserts, or as an equipment case with foam inserts. The best price I could find on eBay was for the single pistol case at $29.99. Counter-intuitively, the simple case without the foam inserts costs more than the pistol case with foam inserts.
The Cases find a Purpose
The cases sat in my workshop for several months, until I acquired a cap and ball revolver from Elk Creek Company (link to review). In order to use the revolver, I needed to purchase powder, lead balls, wads, percussion caps, a powder measure, and the other essential supplies and equipment. Then I needed a container to hold all of that stuff. The plastic shopping bag that I was using did not seem especially durable, protective, or aesthetically pleasing. So I decided to refurbish one of the Seahorse cases for the task.
Preparing the Cases
The first task was to remove the remaining wires, jacks, and ports from the cases. A Leatherman Skeletool, a mallet, a chisel set, and some elbow grease made quick work of the various pieces of electronic residue.
Next, I roughed up the plastic around the holes on the inside of one of the cases with sandpaper to create a better surface for adhesion. Then I cleaned the dust away with a rag.
Patching the Cases
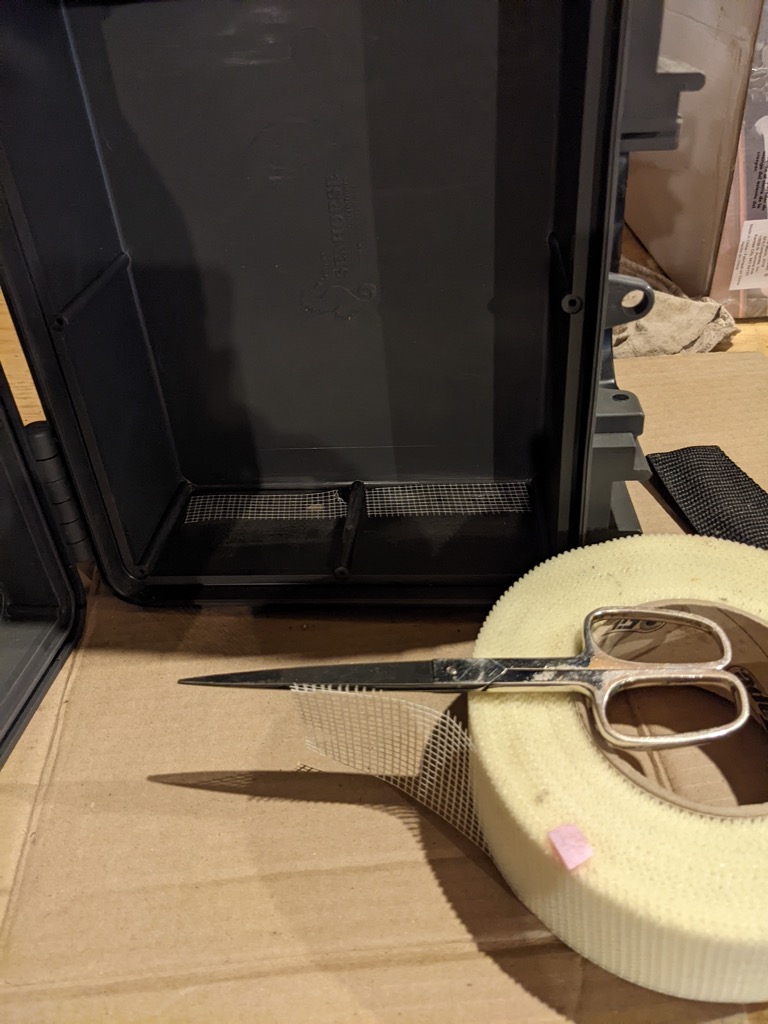
I cut two pieces of fiber tape to the appropriate size to cover the holes in the side of the first case. I then set the prepared pieces of tape aside.
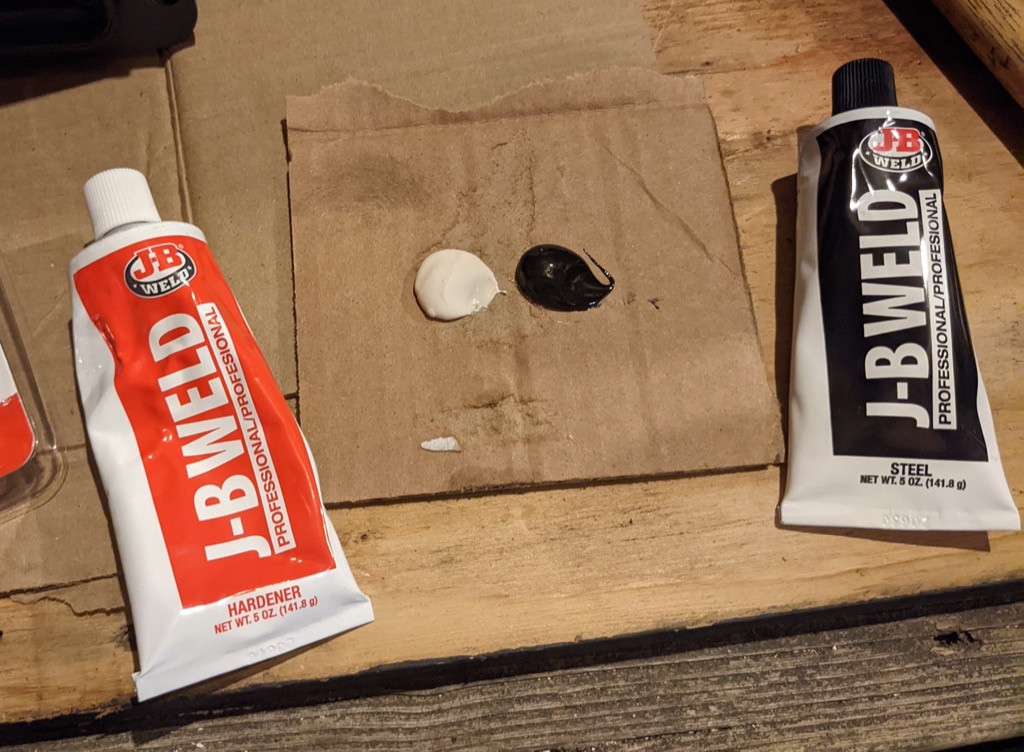 Using a fingertip in a vinyl glove, I mixed up some J-B Weld and spread it over the area around the holes. I then placed the fiber taper over the layer of epoxy. I pressed the fiber tape into the epoxy so that it oozed through the holes in the tape. Using the same fingertip, I smoothed the epoxy that had oozed through the holes over the surface of the tape. I then left the epoxy to dry overnight. Over the course of the next three days, I added another layer of J-B Weld over the fiber tape each day until I could no longer see any pinpricks of light through the fiber tape.
The day after completing the work on the inside of the case, I sanded the area around the holes on the outside of the case. I then cleaned the dust away with a rag, and filled the holes with J-B Weld.
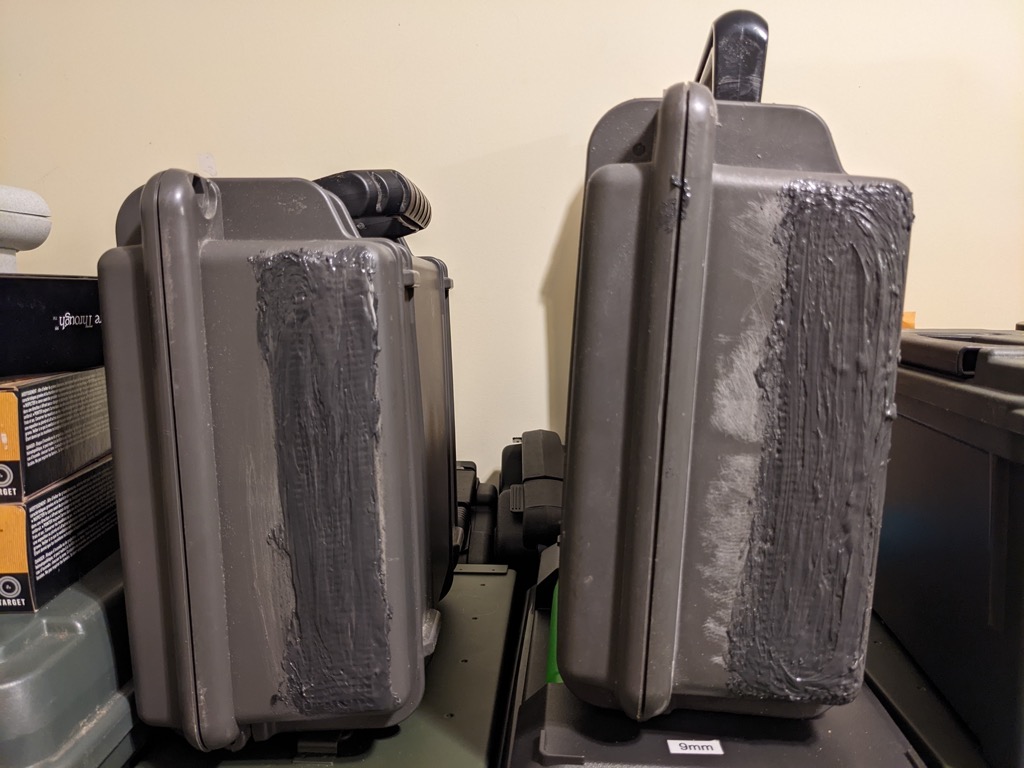
 Still another day later, I cut a section of tape to cover the area on the outside of the case around the holes. I set the piece of tape aside, mixed up some J-B Weld, and applied it to the area on the outside of the case around the holes. I then pressed the tape into the J-B Weld, and smoothed the J-B Weld that oozed through the holes in the tape over the outside of the tape. The next day, I put one final layer of J-B Weld over the tape on the outside of the case. When that layer cured, I was fully satisfied with the result.
 The entire process took eight days, seven pairs of disposable vinyl gloves, and about four ounces of J-B Weld. That would be about eight dollars’ worth of J-B Weld, about one dollar’s worth of vinyl gloves, and a very small amount of fiber tape. That resulted in a total investment of about nine dollars to patch the case. After adding the $2.43 it cost to purchase the case in the first place, this brought my total investment in the case to about $11.50.
I was so happy with the results, that I repeated the process with the second case. I was happy with the results on the second case as well.
I am now using the first case to store my cap and ball supplies, and the second case to hold some of my 7x57mm Mauser ammo. The cases seem to be doing a good job of protecting their contents.
Reflections on the Process
Mixing and applying the J-B Weld with a fingertip in a vinyl glove gave me a great deal of control over exactly how much of the epoxy I was applying. It seemed to work much better than using a popsicle stick or similar implement for that purpose.
Over the course of the patching process, a very thick layer of J-B Weld built up on the scrap of cardboard that I was using as a mixing surface. Whenever possible in the future, I plan to mix the J-B Weld directly on the surface to which I am applying it in order to minimize waste.
J-B Weld
The original J-B Weld formula was developed in the late 1960s in Sulphur Springs, Texas by a machine shop operator with the help of a chemist from Texas A&M University.
It is a two-part epoxy. When fully cured, it can withstand a constant temperature of 500 degrees Fahrenheit, and a temperature of 600 degrees Fahrenheit for up to 10 minutes. It can be used as an adhesive, laminate, plug, filler, sealant, or electrical insulator. It is resistant to water, chemicals, acids, shock, vibration, temperature fluctuation, and microwave radiation. It can be drilled, formed, ground, tapped, machined, sanded, and painted.
The J-B Weld company now makes a multitude of other products, none of which I have any experience with. But I am very impressed by the original formula.
Conclusions
The Seahorse cases seem to be extremely durable and fasten securely. I am glad to have these handy containers. If you need a protective case, a Seahorse case might be a good alternative to consider.
This was my first experience working with J-B Weld. I like it better than the other brands of epoxy that I have used in the past. I plan to continue to experiment with it on other types of repairs in the future. I recommend that you include some in your preparedness supplies.
I had fiberglass tape left over from installing drywall and cement board. It seemed to work very well at reinforcing and providing structure for the application of the J-B Weld. It is very handy stuff to have on hand, as well.
Disclaimer
I did not receive any financial or other inducements to mention any vendor, product, or service in this article.