


I grew up in the kitchen, with both parents very capable in the kitchen and spending time with my dad in the restaurant he worked in for much of my life. Though my mom did not “love” me doing my own thing in “her” kitchen, she was always happy with me helping, which taught me a lot. Once I had my own kitchen, I would experiment with many a variety of dishes for breakfast (homemade waffles and apple turnovers), lunch (homemade vegetable sushi), dinner (eggplant, parmesan, and chili), and dessert (homemade cheesecake and cookies). Though I felt comfortable with all of these items and more, I hesitate to make my own bread. There was something about making bread that felt too hard and time-consuming. Well, the time of quarantining and not being able to work in person with my clients for a period of months (I am a real estate broker), I was given plenty of time. My boys were already homeschooled, so luckily being home together was something that we were already well-adjusted to.
So, enter the world of bread! Scary at first with concerns about what yeast is best, when is the water too hot or too cold, so many flour options, which sugar and salt, just so much to consider. So first I bought my yeast, local yeast that I purchased at a nearby family-owned farm. I decided to start with bread flour, organic as we try to keep all of our food clear of any pesticides, GMOs, and artificial colors, preservatives, or artificial flavors. I used organic pure cane sugar and organic kosher salt. I just use the filtered water we have at home and bring it to a “warm” temperature in a pot on the stovetop.
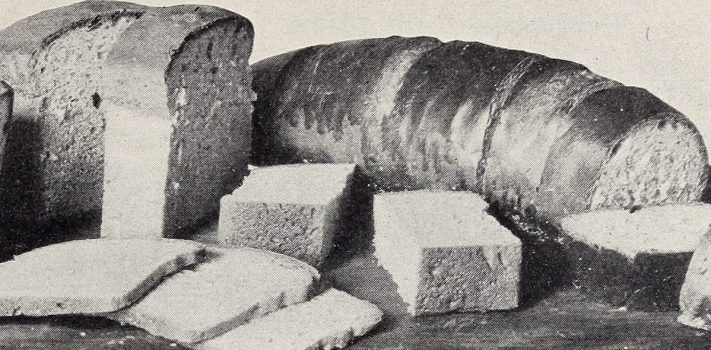
Peasant Bread
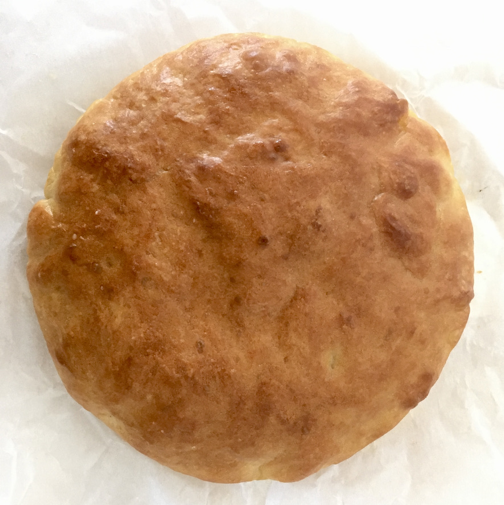
I began with peasant bread, the bread most loved by our family, especially my eldest son. The first two went well, but not great. I prepared everything as I read in multiple recipes, as I have found over the years that I do best with blending recipes. After much trial and error, I have this recipe down now. My first attempt I completely forgot to do the second rise (with all breads I have prepared, your bread should rise first in a bowl, then it should have a second opportunity to rise in the pan you will be baking it in), thus the bread with not moist and fluffy, instead it was very dense.
On my second attempt I did do both rises, but not for long enough based on the temperature of my home, as we do not keep it very warm. Thus, this bread was also dense, but much better that my first attempt. It is important to remember whenever trying something new, be it bread-making or any other new skill, learn through your failures! I didn’t give up, and I am glad I kept at it. My third attempt proved to be successful! This time I let my bread rise for a longer length of time for both the first and second rise (longer time helps with cooler temps), and I put the bowl on the oven to rise while keeping the oven at a low temperature.
Now that I have been making this specific bread for months now, I have made a few changes, one specific and very cost-effective one has been using organic all-purpose flour instead of bread flour. Another change has been not stressing over the rising, that is it can always rise longer, just not less. In case you are interested in trying your own peasant bread, here is my recipe… 4 cups of flour (I use organic all-purpose unbleached white or whole wheat), 2 ½ teaspoons of active dry yeast, 1 ½ teaspoons of salt, 2 ½ teaspoons of sugar (organic pure cane), and 2 cups of filtered warm water.
Once you have all of the ingredients, mix all of the dry ingredients together, then add the warm water and mix all ingredients thoroughly. Cover the bowl with plastic wrap, another bowl, or just a cookie sheet (that is what I do) and let rise in a warm place for at least 1 ½ hours. While it is rising determine what you will baking the bread in, you will need two pans. I prefer using two cast iron skillets, but I have also used loaf pans and cake pans (not springform pans). You will want to grease these pans, I used organic earth balance vegan butter, but you can use any butter. I do prefer butter over any oils because you can give a nice think barrier between the bread and the wall of the pan.
Once the first rise has completed you will use a rubber spatula to push the dough off of the sides of the bowl, then split between the two prepared pans. Once split you will let these two pans of bread dough rise again for at least 45 minutes. I have done the second rise both covered and uncovered and have not seen much of a difference. You do want the second rise to remain in a warm place as well. While the second rise is happening, you will put a pan of water on the bottom rack of your oven (helps to crisp the crust) to preheat your oven to 425° F. Once the second rise is complete you can put your bread in the oven! You will set the timer for 15 minutes, then reduce the temperature to 375° F for approx. 17 minutes. Do not open the oven until the second timer has gone off, open it will both change temperature of the oven and release moisture. I have tried other recipes that call for baking at a consistent temperature the entire time, but the bread goldens much nicer while not overcooking inside with this method. Turn the bread out on a drying rack after baking is complete and brush lightly with butter.
 There is truly something special about the smell of fresh bread in your home. I also love to give it as a gift when joining friends or family for any gatherings. Most recently, as per my hubby’s recommendations, I made bread muffins. Because the “pans” are smaller in a cupcake tray I did have to make some time adjustments as to not burn them, but they were perfect when we had some friends over for chili! Now that I have gotten my peasant bread to the point where I do not make any changes to the main recipe, other than to add flavor at times. I have brushed a drop or two of food-grade quality rosemary essential oil onto it before baking, delicious! Also, when I make the whole wheat peasant bread, I often add everything bagel seasoning generously, which I enjoy very much.
Baking Baguettes
Baguettes are a bit hard to bake without the special wire rack designed for them, but possible. I have made egg braid so that I could take advantage of our eggs from our organic, free-range chickens. The first time it was a bit too dense, which happens to me the first time I make any new bread, so it seems. We do not waste anything here though, so I made some delicious French toast with it for breakfast! Also, in case you are having trouble finding local active dry yeast, do not worry as any active dry yeast will work.
Another staple bread in our house that is most loved by my youngest son is sweet bread. As you likely have gathered form the name, this bread is sweet. My first time preparing it was very messy as it does not have the same consistency as the peasant bread at all, and thus needs to be handled differently. This also was much too dense when I first attempted it, but now is very fluffy, and is honestly more like a treat. This recipe calls for quite a bit more sugar, so I definitely recommend going with the higher quality organic pure cane sugar if you haven’t already. Here is my recipe… 5 ½ cups flour (organic, unbleached, all-purpose flour), ½ cup sugar (organic pure cane sugar), 4 teaspoons of active dry yeast, 1 ½ teaspoons of salt, ¼ cup of vegetable oil (organic extra virgin olive oil), 2 cups of filtered warm water.
First, in a large bowl, add the warm water to the dry active yeast and let sit for at least 5 minutes to rehydrate the yeast. This process is also referred to as proofing or blooming. After this add the sugar, salt, and oil to the bowl and mix well. Now the hard part, add the flour to the bowl a cup at a time, make sure to thoroughly mix. Once flour is all added and mixed you will need to knead the dough, but first oil (I use olive oil) a bowl for the dough to be placed in once kneading is complete. Make sure to keep your hands lightly floured while kneading. Continue to fold dough and press down with the heal of your hands for 5-10 minutes, until dough bounces back when you push on it. Once complete, place dough in oiled bowl and turn the dough over to make sure all of it has a coat of oil.
Cover the dough and place in a warm place for 1 ½ hours to rise, during this prepare your greased pans. Once first rise is complete split dough into your two greased loaf pans, though I have done the entire dough in one cast iron pan and it did tun out well. Allow dough to rise again for at least 45 minutes in a warm place and preheat oven to 350° F, don’t forget to place a dish of water in the oven. Once the second rise is complete place sough in the oven for about 35 minutes. Once the bread is finished baking turn it out on a drying rack and brush lightly with butter.
There are other breads of course that I aspire to make but have not done as of yet. My next hurdle will be making my own sourdough starter. I cannot wait to have fresh sourdough bread at home, a try new items such as homemade sourdough waffles. I have put this off due to fear of trying something new at first, but at this point, after reading so many recipes I feel comfortable trying it out. Now, I just am putting it on hold because we are in the process of moving and I truly have no urge to add anything new to my plate right now, as sourdough start does needs some tending to, especially in the beginning.
So, in a nutshell, you can make your own bread, just do it. There will be some trial and error, just like when you try anything new, but you will figure it out and enjoy the smell of fresh-baked bread in your own home. I encourage you to read blogs and compare recipes until you find something that sounds like a bread that you and those around you will prefer to have on a daily basis. Once you have perfected it (your own definition of perfection), then try another. Do not get overwhelmed, just enjoy it, and send me some!