


After a search lasting more than three years, I recently settled on a deer rifle to replace the Remington 742 in .30-06 that I inherited from my Father. The old 742 is still a dandy gun, and I have passed it along to my brother-in-law for continued use. But as the years have passed, I have become somewhat recoil-adverse, and I wanted a rifle that is a little kinder and gentler to my shoulder.
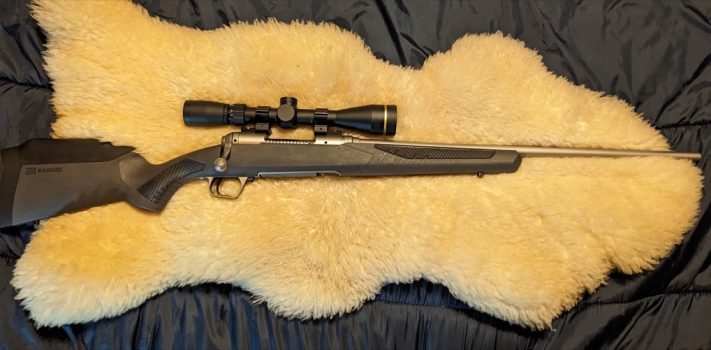
My new rifle is a Savage Model 110 Storm in 6.5 Creedmoor. It is accurate, sturdy, weather resistant, well balanced, and chambered in a cartridge for which a wide variety of ammunition is readily available. With a manufacturer-suggested retail price of $959 it represents an excellent value for the money.
I initially borrowed the rifle from Savage for testing and evaluation in preparation for this review. I liked it so much that I decided to buy it. It is only the second firearm that I have ever ended up purchasing after testing and writing a review. (The other was my MAPP from Rock Island Armory. Here is my MAPP review, Part 1 and Part 2). It was fun to recently take the information stickers off the stock of the Storm, and place the rifle in its permanent place in my gun cabinet.
First Impressions
When the box from Savage arrived at my FFL, I went and picked it up. Inside the box I found the rifle in a plastic bag, an empty chamber flag, a tag on the trigger guard with safety warnings, a sticker on the stock with information about the accufit comb and the accustock LOP, another sticker on the stock about the accutrigger, a plastic bag containing the nicely jeweled bolt and the metal magazine, a bag with earplugs, an accutrigger adjustment tool, a cable lock, a range card sticker, an NRA ad, a Savage sticker, a manual, and a kit for adjusting the comb and LOP.
I took the rifle out of the box and tried to insert the bolt. I could not figure out how to do it. If at first you don’t succeed, read the directions. I checked in the manual and discovered that I needed to keep the trigger pulled while inserting the bolt.
Some dry firing quickly convinced me that the accutrigger is outstanding. It pulls smoothly and breaks cleanly. Using a Ready Up Gear Digital Trigger Pull Gauge, the trigger pull weight measured between 2.64 to 3.64 pounds over a series of 5 measurements, with an average weight of 3.04 pounds and a mean of 2.91 pounds. I was satisfied with that trigger weight and did not adjust it in any way.
I was impressed with the potential weather resistance of the stainless steel barrel and receiver and the sturdy synthetic stock. I was also impressed with the nice balance of the rifle and its excellent fit and finish.
Reading the Manual
Many people buy a new rifle and never read the manual. Some would go so far as to skip someone else’s list of highlights from a manual. That is unfortunate. Manuals are chock full of helpful information. Some of it is even interesting. Here is some of the helpful and/or interesting information that I found in this one:
∙ Savage sanctions the use of ammo that is competently hand-loaded in accord with the recommendations of reputable manuals. Most firearm manufacturers sanction only the use of factory loaded ammunition. Savage deserves kudos for recognizing that good handloads can be even better than the very best factory loaded ammunition.
∙ Each Savage bolt is matched to a specific rifle. They are not considered interchangeable.
∙ The trigger needs to be pulled and the bottom bolt release depressed in order for the bolt to be removed.
∙ The bolt must be closed and the action uncocked in order for the stock to be removed.
∙ Savage used Hornady 140 grain A-Max ammunition for their 100 yard targeting evaluation at the factory.
∙ The magazine has a capacity of 4 cartridges.
∙ The rifle has a 1 year warranty.
∙ The boring state-by-state warnings are not included in the manual.
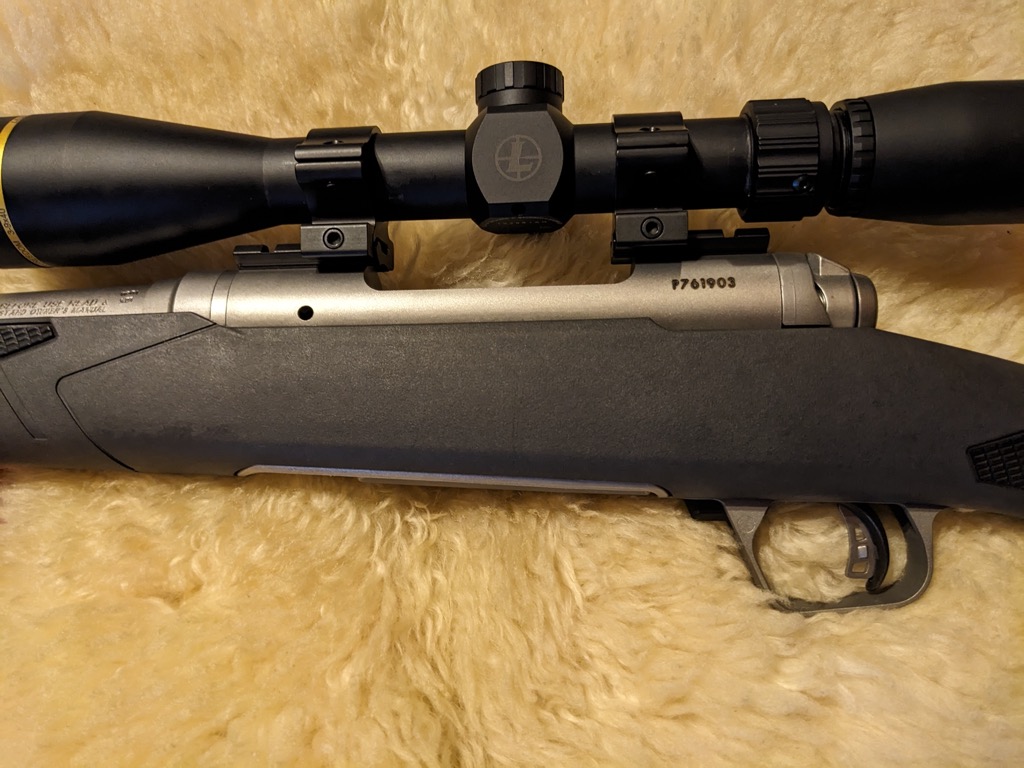
Mounting a Scope
 I ordered a Leupold Rifleman 2-piece scope-base online. When it arrived, the Allen wrench necessary for its installation was included in the package. That is a nice touch by Leupold. Leupold recommends using thread locking compound when installing the base. I did not initially do this, since I was borrowing the rifle for testing and evaluation and did not yet know that I would be buying it.
Leupold also advises that when installing the base, one should “Tighten until secure. Do not over-tighten.” That is nice advice, but some sort of objective number would be even more helpful.
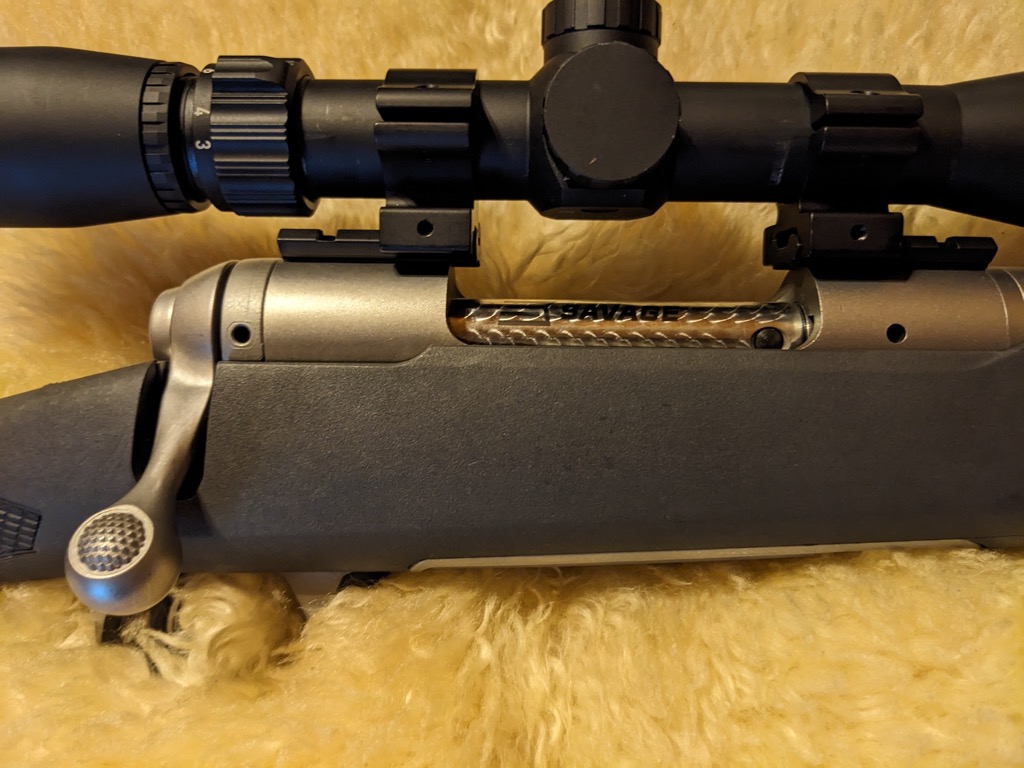
After the base was installed, I installed a pair of Leupold Rifleman scope rings on the base pieces.
Next, I installed a Leupold VX-Freedom 3-9X40mm scope in the rings. I set the eye relief, leveled the scope, and then tightened the rings evenly.
Adjusting the Comb
 The comb that came installed on the buttstock was just a little low for an ideal cheek weld with the Leupold scope. So I opened the accessory kit for the AccuFit comb and followed the enclosed directions. It was a simple matter to remove the two screws holding on the recoil pad and the length of pull insert in place, slide the installed comb back and then up in order to remove it, insert the next tallest comb into the stock and slide it into place, replace the recoil pad and the length of pull insert, and then tighten the screws.
After this process, the comb was still just a smidgen low, so I repeated the process with the next tallest comb. This was the third highest of the five combs, and was just right. I was very impressed and pleased with the AccuFit comb system.
Range Session One
It was an overcast morning in early Autumn. The temperature was 59 degrees Fahrenheit and was headed for a predicted high of 68 degrees Fahrenheit. There was no wind.
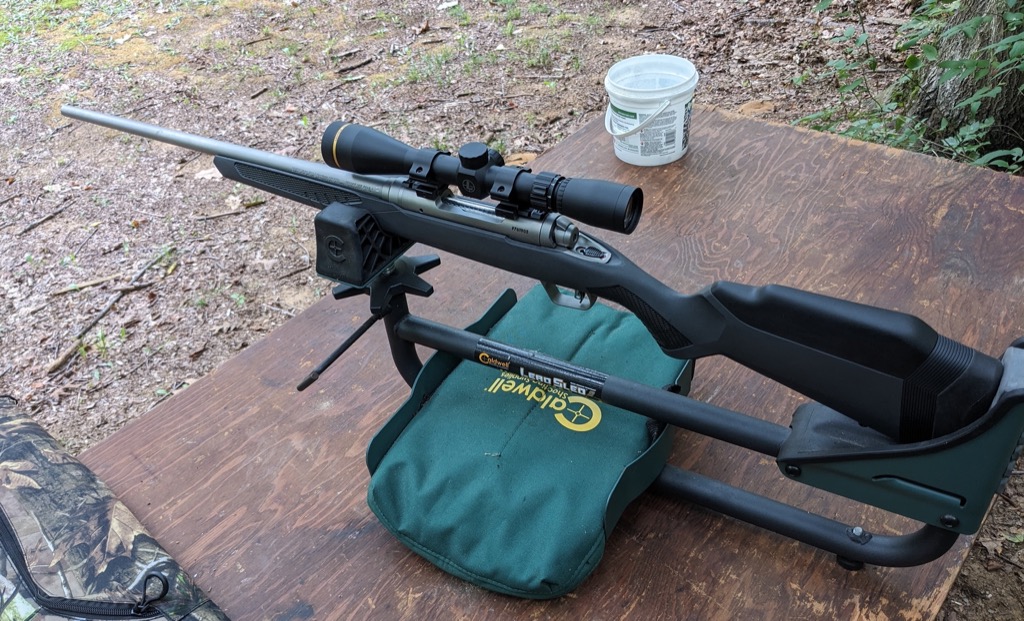
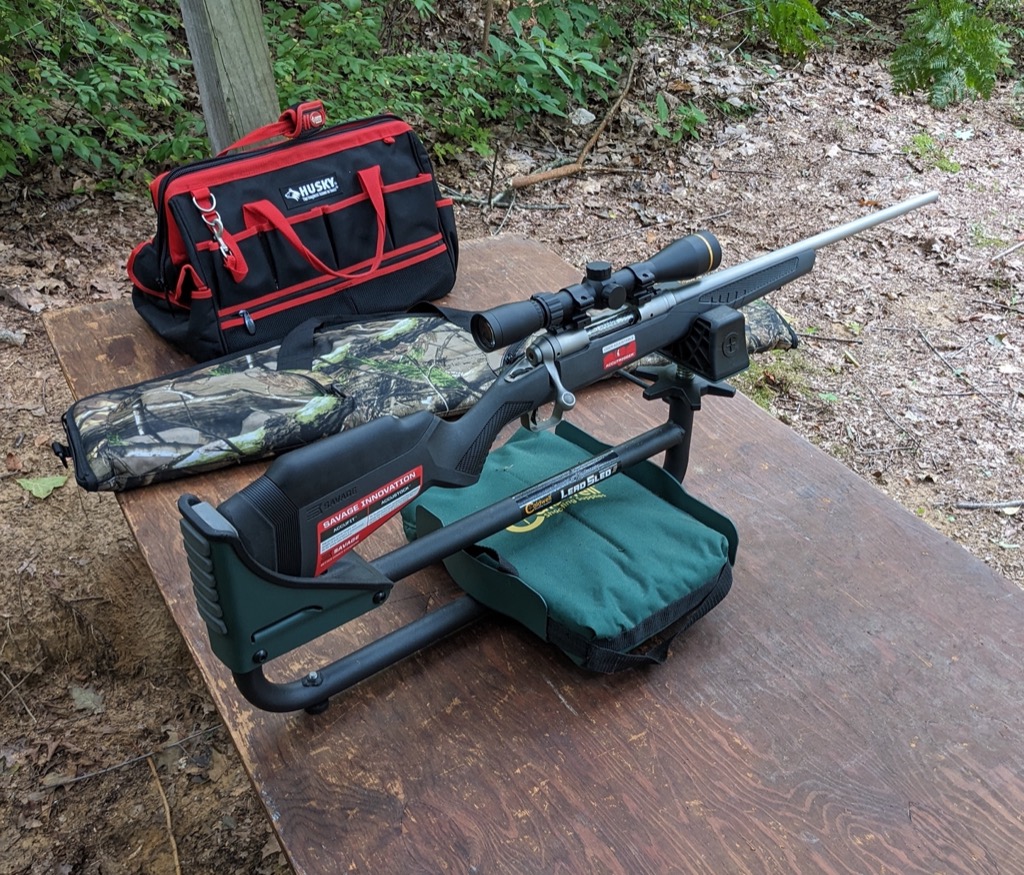 I set up a target stand in front of the backstop at the improvised range behind my pole barn. I set up a table 25 yards away from the target stand, placed a lead sled on the table, and placed the rifle in the lead sled. Then I removed the bolt, and bore sighted the rifle. Next, I loaded a single round of Aguila 140 grain FMJBT in the rifle, and fired at the target. The bullet struck 2 inches to the right of and 3.5 inches higher than the point of aim. I adjusted the sights and fired another round a couple of more times. Then I fired a 3-shot group which was .99 inches in size.
The rifle fed well, and I found the metal magazine easy to remove, load, and insert.
Then I loaded the magazine with 3 rounds of Winchester 129 grain Power-Point. The resulting group was .49 inches in size.
Next, I loaded the magazine with 3 rounds of Hornady Match 140-grain ELD. That group was .49 inches in size as well.
Range Session Two
I went to the 100-yard indoor range of the local rod and gun club. I loaded and fired a single round of Aguila 140-grain FMJBT. It hit about 4 inches above the point of aim.
 I adjusted the scope, and then started shooting three shot groups, using Aguila 140 grain FMJBT, Sellier & Bellot 140 grain SP, Winchester 129 grain Power-Point, and Hornady Match 140 grain ELD. The resulting groups varied from 3.99 inches to 0.62 inches in size. Surprisingly, the best group was with the Sellier & Bellot ammo, and the worst group was with the Winchester ammo. The Hornady ammo had the second-best group, at 1.12 inches in size, and the Aquila ammo had the second-worst group at 2.99 inches in size. If I had to guess ahead of time, I would have expected the best groups from the Hornady ammo, followed by Winchester, Sellier & Bellot, and Aguila.
One of the rounds of Winchester ammo would not feed at all, and the tips on the others looked slightly irregular. I am wondering if someone dropped the box of Winchester ammo, and deformed some of the tips, resulting in less precision.
I can’t claim to be the best bench rest shooter in the world, and the 0.62 inch group with the Sellier & Bellot ammo was my very best group at 100 yards ever. Needless to say, I am pleased, and I am planning to buy some more Sellier & Bellot 140-grain SP for further testing.
Cleaning
Cleaning was extremely simple and straightforward. I removed the magazine and bolt, brushed the bore with a brass brush, ran solvent patches through the bore until they came out clean, and then ran a dry patch through the bore. I repeated this process with the magazine, bolt, and exposed metal surfaces of the rifle. Then I ran a patch with Breakfree CLP through the bore, and applied a thin film of CLP to the magazine, bolt, and the exposed metal surfaces of the rifle.
Conclusions
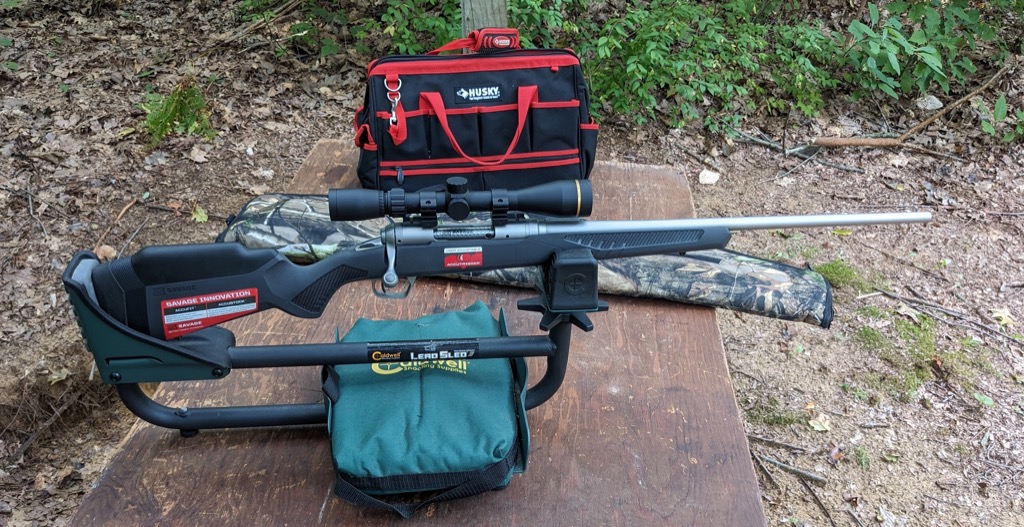 The Savage Model 110 Storm in 6.5 Creedmoor provides a rugged, well-made, and accurate rifle in a weather-resistant package. The AccuFit comb and AccuTrigger are outstanding features that I expect to be widely copied by other manufacturers in the future. I am giving this rifle a vote of confidence with my dollars by buying it. If you are also looking for a good rifle for medium-sized game, I recommend that you give the 110 Storm a good look.
Disclaimer
Savage was kind enough to loan me a sample of their Model 110 Storm in 6.5 Creedmoor for testing and evaluation. Rock Island Armory had previously loaned me a sample of the MAPP FS for review. I subsequently purchased both samples. Ready Up Gear provided me with a sample of their Digital Trigger Pull Gauge for testing and evaluation. Leupold had previously provided me with a sample of their VX-Freedom 3-9x40mm scope for review. I tried not to let the kindness of any of these vendors interfere with the objectivity of my review, and I believe that I have succeeded. I did not receive any other financial or other inducement to mention any vendor, product, or service in this article.