Notes for Tuesday – July 07, 2015

July 7th, 1907 was the birthday of Robert A. Heinlein.

o o o

Today, we present another entry for Round 59 of the SurvivalBlog non-fiction writing contest. The $12,000+ worth of prizes for this round include:

First Prize:

  1. A Gunsite Academy Three Day Course Certificate, good for any one, two, or three day course (a $1,195 value),
  2. A course certificate from onPoint Tactical. This certificate will be for the prize winner’s choice of three-day civilian courses. (Excluding those restricted for military or government teams.) Three day onPoint courses normally cost $795,
  3. DRD Tactical is providing a 5.56 NATO QD Billet upper with a hammer forged, chromlined barrel and a hard case to go with your own AR lower. It will allow any standard AR type rifle to have quick change barrel, which can be assembled in less than one minute without the use of any tools, and a compact carry capability in a hard case or 3-day pack (an $1,100 value),
  4. Gun Mag Warehouse is providing 20 Magpul pmags 30rd Magazines (a value of $300) and a Gun Mag Warehouse T-Shirt. (An equivalent prize will be awarded for residents in states with magazine restrictions.),
  5. Two cases of Mountain House freeze dried assorted entrees in #10 cans, courtesy of Ready Made Resources (a $350 value),
  6. A pre-selected assortment of military surplus gear from CJL Enterprize (a $300 value),
  7. A Model 120 Series Solar Generator provided by Quantum Harvest LLC (a $340 value),
  8. A $300 gift certificate from Freeze Dry Guy,
  9. A $250 gift certificate from Sunflower Ammo,
  10. KellyKettleUSA.com is donating both an AquaBrick water filtration kit and a Stainless Medium Scout Kelly Kettle Complete Kit with a combined retail value of $304,
  11. TexasgiBrass.com is providing a $300 gift certificate, and
  12. Two cases of meals, Ready to Eat (MREs), courtesy of CampingSurvival.com (a $180 value).

Second Prize:

  1. A Glock form factor SIRT laser training pistol and a SIRT AR-15/M4 Laser Training Bolt, courtesy of Next Level Training, which have a combined retail value of $589,
  2. A FloJak EarthStraw “Code Red” 100-foot well pump system (a $500 value), courtesy of FloJak.com,
  3. The Ark Institute is donating a non-GMO, non-hybrid vegetable seed package–enough for two families of four, seed storage materials, a CD-ROM of Geri Guidetti’s book “Build Your Ark! How to Prepare for Self Reliance in Uncertain Times”, and two bottles of Potassium Iodate– a $325 retail value,
  4. A $250 gift card from Emergency Essentials,
  5. Twenty Five books, of the winners choice, of any books published by PrepperPress.com (a $270 value),
  6. TexasgiBrass.com is providing a $150 gift certificate, and
  7. RepackBox is providing a $300 gift certificate to their site.

Third Prize:

  1. A Royal Berkey water filter, courtesy of Directive 21 (a $275 value),
  2. A large handmade clothes drying rack, a washboard, and a Homesteading for Beginners DVD, all courtesy of The Homestead Store, with a combined value of $206,
  3. Expanded sets of both washable feminine pads and liners, donated by Naturally Cozy (a $185 retail value),
  4. Two Super Survival Pack seed collections, a $150 value, courtesy of Seed for Security, LLC,
  5. Mayflower Trading is donating a $200 gift certificate for homesteading appliances,
  6. APEX Gun Parts is donating a $250 purchase credit,
  7. Montie Gear is donating a Precision Rest (a $249 value), and
  8. Two 1,000-foot spools of full mil-spec U.S.-made 750 paracord (in-stock colors only) from www.TOUGHGRID.com (a $240 value).

Round 59 ends on July 31st, so get busy writing and e-mail us your entry. Remember that there is a 1,500-word minimum, and that articles on practical “how to” skills for survival have an advantage in the judging.


Inexpensive and Simple Mono- or Multi-Band HF Ham Radio Antennas, by PrepperDoc

One of the distinguishing features of traditional Ham radio, particularly shortwave (high frequency or “HF”) Ham radio, was that you generally had to literally make your own antenna. You could purchase transmitters, receivers, transceivers, microphones, and even Morse code keys, but you likely had fabricated at least one wire antenna. In the event of a national disaster, many people may wish to have effective HF communications for medium- or long-range communications, and they may be faced with the need to construct an antenna. Other forward-thinking preppers may wish to gain Ham radio licenses and experience in HF communications and need to put up such an antenna right now. This article will explain two simple antennas.

Resonant half-wave dipole

The easiest antenna to make at home is a resonant half-wave center-fed dipole.[1, 2] This antenna’s length is selected to work well on one Ham radio band, with an acceptable standing wave ratio (SWR) over about a total bandwidth of about 3% of its center frequency, which is usually enough. It may also work acceptably on the 3rd harmonic frequency. Hence a 7MHz dipole (40 meters) may function acceptably on 21MHz (15 meter Ham band).

Unfortunately, a bit of trial and error is needed to make a resonant half-wave dipole. There are just too many things that can affect the actual resonant frequency for any length formula to be guaranteed. You will need an SWR meter (or alternatively, an antenna analyzer, which is a much more expensive instrument) and considerable patience.[3] The first trial length to use is: total length in feet = 468/(frequency in MHz). For example, an antenna made for 7.2 MHz would have a total length of 65 feet. Add a few inches for loops to connect to both center and end insulators for mechanical support. Cut your wire in half (each end is now 234/frequency), and insert a center insulator in the middle. Insulators can be fancy commercial glass or plastic ones, or simple pieces of suitably heavy PVC, plastic, or even paraffin-soaked wood, about 3″ long and 1″ wide with a hole drilled or punched a half-inch from each end. They just have to be reasonably strong, and non-conductive! Run a wire end through the hole and wrap or tie it back onto the wire. You don’t have to solder the wrap on the end-insulators. You do have to connect your transmission feed line’s two conductors, one to each half of your antenna, at the center insulator. Most people use coaxial cable transmission line to feed this sort of antenna, usually 50-ohm RG-58A/U or similar. (This is because the antenna will have a center characteristic impedance near 50 ohms, and the transmitter output impedance is usually 50 ohms also, so power flows smoothly if the coax has the same characteristic impedance. This impedance is simply the ratio of the voltage to current of energy flowing through the lines.) Solder the shield to the wire on one end of the center insulator and the center conductor of the coax to the other. Be careful not to melt the coax insulation and short it out. (Using pliers to create a heat block is helpful). If you can’t solder, you could try crimping the connection. If you need this antenna to work for quite a while, dab dielectric grease or some other non-conductive water repellant on the exposed portions of the coax at the center conductor.

Pull the antenna up to your desired height using suitable ropes. Do not use the coax to pull the antenna up; you’ll rip the dainty coax conductors. It really isn’t important whether the antenna is sloping or even V-shaped (either up or down) within some reasonable limits. If the antenna is more than half a wavelength high above ground, it will send more energy toward the horizon (favoring longer distance contacts). If the antenna is lower, at 0.1-0.2 wavelengths height, it will tend to send more energy nearly straight up (favoring contacts a few hundred miles away).

Now the fun begins. Chances are good that your SWR will not be a beautiful 1:1, or even an acceptable 2:1, at your desired frequency range. One can use trial and error, cutting or lengthening the antenna until success is achieved. (Reasonable lengths can be added to each end by simply twist-connecting them at the end and allowing several inches to simply drop downwards. It works!) A more calculating approach is to move to the lowest legal frequency (on the desired band) and measure the SWR, then to the highest frequency (on that band) and remeasure the SWR. Depending on which is better, you now have a clue as to whether you are too long (better SWR at lower end) or too short (better SWR at higher end). I can, well, remember tediously measuring an antenna to the nearest 1/16″ and then finding it was feet off of resonance! When you are way way off, the SWR is terrible at both ends of the band, and the best thing to do is to add or subtract 2-3% of your length and try again.

Additional half wave antennas can be connected “in parallel” at the center insulator; use creative supports so that the wires don’t tangle and achieve two feet or more separation at the end of the shorter antenna. Google this for more information.

Non-resonant antenna/tuner

A slightly more complicated but ultimately more versatile antenna, which can be constructed in perilous times without any commercial supplies other than a SWR meter, is a non-resonant horizontal dipole antenna with a very simple L-network antenna tuner. Commercially sold antenna tuners are usually fancier, using Pi- or T- networks. (The letter designation is to indicate roughly the configuration of inductors and capacitors when drawn in a schematic.) These tuners are generally able to match just about any random piece of wire acceptably. If you have a commercial antenna tuner, or can get one, they will work very well. If you can’t, a homemade L-network is not as versatile, but it is easy to build! An accompanying schematic shows that the L-network has only two components: a variably-tapped inductor and a variable capacitor.[4]

Schematic of L-network

The Antenna

The antenna is a horizontal (or sloping, if need be) dipole just as above, with one proviso: its length must be longer than a half-wave dipole would be for the lowest frequency desired. Avoid trying to run a short antenna. This is because shorter antennas have lower radiation resistance and one can end up with very inefficient results where huge currents are flowing in lousy transmission wires and wasting a considerable amount of the available transmitter power before ever reaching the antenna. It doesn’t even have to be a dipole with equal halves. In a pinch, you can use just a single long wire, longer than half wavelength, and use a grounded wire as the other half of your antenna.

Transmission Line

Coax is expensive and will likely have high losses or even develop destructive arcs at various matching situations when used with a non-resonant antenna. I don’t recommend it for use with a non-resonant antenna. Simple “ladder-line” transmission line consisting of two wires held a couple of inches apart (like railroad rails) can be used to very efficiently get your transmitter’s power up to the antenna. (You can even use 300-ohm TV ribbon transmission line with good outcome at lower powers, say up to 100 watts.) Try using wire of at least 16 gauge and preferably 14 gauge. Insulated wire is a bit preferable. Use a spacing of two to three inches, maintaining your chosen spacing by using “railroad ties” made of non-conductive 1/2″ PVC short stubs with two holes drilled and the transmission line threaded through them. It ends up looking just like a ladder or a railroad line. The PVC pipes should be spaced about every 6-12 inches, and can be secured either by relatively tight holes, or a bit of insulating black electrical tape, or even a string tying the wire to the PVC. While it looks inexpensive, this sort of transmission line has virtually zero loss, and unless your wires lose all their spacing, is unlikely to ever have a flashover arc!

Homemade ladder-line transmission line

Here’s some nerdy stuff for the more electrically-minded reader; this sort of air-insulated ladder line will have a characteristic impedance of a few hundred ohms and will be horribly mismatched to the antenna, but because the conductors are hefty and the insulator (air) has virtually zero loss, as long as you can get a “match” with your matching network, virtually all of your transmitter power is going to end up getting radiated!

Constructing the L-network Tuner

First, make a variable-tapped inductor. Wind about 40-60 turns of 14-gauge solid wire around a 1 1/2 inch PVC pipe or wooden (not metallic) cylindrical support. Bare wire would be best, but space the wire out a bit so the adjacent turns don’t short out and so you can grasp individual wires with a small alligator clip. You can use co-wound string to set the spacing and then remove it, and you can maintain the spacing with some epoxy glue drizzled along the bottom. Connect a flexible wire to one end of your homemade inductor, and use an alligator clip to allow the ability to short out (and hence electrically remove) any desired portion of the inductor. If you used insulated wire, cut off the insulation along the top edge of your coil so you have a place to connect the alligator clip.

Homemade L-network
Homemade L-network

The Variable Capacitor

If you can find a variable air-gap capacitor of roughly 250 or so picofarads, that will do for the capacitor; connect it as in the accompanying schematic. You want an air gap of at least 0.01 inches (the thickness of three sheets of paper), or you may have flashover arcs at times. A gap of .02 inches is better. If you don’t have such a capacitor, you can actually make a suitable capacitor by taping about 8×10″ of aluminum foil to one side of dry cardstock or thin cardboard, taping a wire to it, and affixing another 8×10″ of aluminum foil to a fixed piece of heavier cardboard, and a wire connected with tape. With the cardstock kept between the two and sliding the top foil variably over the bottom, you have a fine variable capacitor! I did this as a teenager, and it worked well. Arrange for the wires to be 12 inches or less for acceptably low wiring inductance in the HF bands. An accompanying photo shows a homemade aluminum foil sliding variable capacitor that adjusts from about 40 pF to 500 pF.

Homemade sliding capacitor with cardboard as insulator

Adjusting your homemade L network will require some patience. Keep notes once you find settings that work. Start with your transmitter set for a lower power, so that it can remain on for 5-10 seconds of time without damaging the final amplifier. First set your variable capacitor about 20% overlapped, and successively try shorting out variable portions of your inductor from none to all, seeking the setting where the reflected power on your SWR meter is minimized. (Remember the forward power is probably also changing.) Once you find a possible reflected power null, try adjusting your variable capacitor for a better (lower) SWR. Then jockey the inductance a bit and re-vary the capacitance. Avoid touching bare metal on either the alligator clip or the variable capacitor; otherwise, you may get a shocking or burning surprise! If you get the SWR below 2:1, you’re in good shape!

It is always possible that your combination of antenna length and L network will simply not allow a successful low SWR on one certain frequency, and you find it impossible to get an SWR below 3:1. In my experience, this is rare. However, simply remove or add a few feet from one or both ends of your antenna, and it will likely start to work! (In some instances, you may end up connecting the variable capacitor on the input side rather than the output side.)

Once you find a solution that works, you can cautiously raise your transmitter power, looking for any sign of arcing on your variable capacitor. If you’re unlucky and you have an arc, simply reduce your power below where it happened. Using a slightly different tap on your inductor may also help.

After your have found adjustments that work on each of your desired bands, mark them or even solder in fixed “taps” on your inductor to make it easier to quickly connect to them. To move from one of a particular band to the other may take a small adjustment in your variable capacitor or even a turn or two adjustment in your inductor tap.

Your friends will be amazed that you could make a working multi-band antenna with little more than wire, PVC pipe, a bit of tape, and aluminum foil!

References


[1]ARRL, Single Band Dipoles.


[2] Healy JW. Antenna Here is a Dipole.


[3]PrepperDoc, Understanding the Radio Shack SWR & Power Meter.


[4] An example of a really high-power L network: KC5LDO, L-Network Tuner.


Letter Re: Churches and 501(c)3 Status

Dear Editor, I appreciated DF’s letter on IRS 501(c)3 status and forwarded an edited version of it to my church leaders and friends. This morning, I was doing further research and discovered IRS publication 4220 titled “Applying for 501(c)3 Tax-Exempt Status.” On page 6 of that publication is the following paragraph:

RELIGIOUS, The term church includes synagogues, temples, mosques, and similar types of organizations. Although the IRC excludes these organizations from the requirement to file an application for exemption, many churches voluntarily file applications for exemption. Such recognition by the IRS assures church leaders, members, and contributors that the church is tax exempt under section 501(c)(3) of the IRC and qualifies for related tax benefits. Other religious organizations that do not carry out the functions of a church, such as mission organizations, speakers’ organizations, nondenominational ministries, ecumenical organizations, or faith-based social agencies, may qualify for exemption. These organizations must apply for exemption from the IRS. See Publication 1828, Tax Guide for Churches and Religious Organizations, for more details.

I’m no lawyer or CPA, but to my reading and understanding, based on the second sentence of this paragraph, a church does not need to have a 501(c)3 tax-exempt certificate in order to qualify for tax-exempt status. Having served in a voluntary position with my church on a previous occasion, where such a certificate comes in handy is when the church conducts business with companies, the tax-exempt certificate allows the church to legally avoid paying sales taxes.

Further, in my reading of this paragraph on page 6, I do not see the lack of having a 501(c)3 certificate as a bar to legitimately claiming deductions made to a church from one’s annual income tax return. One benefit of not having such a 501(c)3 certificate is that the religious organization would not be subject to any IRS fines or penalties for having violated the rules under which such tax-exempt organizations must operate.

Reader DF’s letter served a valuable purpose in raising the issue of the restrictions associated with having IRS 501(c)3 status. I hope my research adds to that discussion and is helpful in aiding churches make a decision on whether to keep their 501(c)3 status or not. To my thinking, payment of sales taxes is a minor price to pay for a church to be free of the restrictions on freedom to preach and practice God’s word. – JM in Florida


News From The American Redoubt:

Fellow Patriots and AmRRON Operators,

As you know there are several wildfires in this part of the American Redoubt, with the possibility of dry lighting thunderstorms this week. Currently the Bayview fire is still uncontained, and they are calling for evacuations west and north of Farragut State Park and around Bayview. Clint Cord posted a Facebook page where folks can share information and updates and offer help. There is one patriot who has offered to pick up and board horses for those evacuees who have animals.

  • AmRRON Operators, be prepared to monitor for news and updates and render communications assistance for the next 72 hours:
  • Monitor CH3 and AmRRON Simplex frequency of 146.420

Also, in the Bonner/Kootenai County area monitor the following:

  • Kootenai Amateur Radio Society (KARS) Ham Club repeater at 146.980 (- offset) PL 127.3
  • Kootenai County Emergency Operations Center (KCEOC) 147.080 (+ offset) PL 100

Thank you, and God bless! – JJS

P.S. – If you are not a licensed Ham radio operator, you can still monitor using a scanner, or you can use Channel 3 on FRS, CB, and MURS radios without a license.

o o o

Idaho Residents Fight to Close Refugee Center Importing Syrian Muslims, Possible Terrorists. – H.L.

o o o

What US land is really worth, state by state Thankfully, the American Redoubt region still has affordable land, on average.

o o o

Montana man inspired by same-sex marriage ruling requests right to wed two wives. – D.S.

You knew it was coming. (See also: Pedophiles Call for Same Rights as Homosexuals)

o o o

As usual, the American Redoubt stands out, on a map. Note that the shading for Oregon and Washington are both averaged. The eastern (Redoubt) halves of both of those states have gun ownership rates nearly as high as in Idaho. – JWR


Economics and Investing:

“Greece Is Coming To Your Neighborhood” Marc Faber Warns

o o o

9.3 million Americans went through a foreclosure or short sale between 2006 and 2014: Home shopping in Compton California.

o o o

Items from Mr. Econocobas:

Greece Bailout Referendum: They Voted ‘No’. Now What?

David Stockman- It Is NOT Priced-In, Stupid!

Barack Obama Tells Another Whopper—–He Did Not Create 12.8 Million Jobs

Sugar, Flour, Rice: Panicked Greeks Stock Up


Notes for Monday – July 06, 2015

July 6th is the 20th anniversary of the 1994 Storm King Mountain wildfire that took the lives of 14 firefighters. Weather changes, resulting in 45 mph wind gusts, caused a modest wildfire to erupt into a blazing inferno, which threatened homes in and around the town of Glenwood Springs, Colorado. Firefighters from around the country were called to assist in fighting this wildfire. We will never forget the young men and women who lost their lives battling this fire:

Prineville (Oregon) Hotshots: Kathi Beck, Tamera Bickett, Scott Blecha, Levi Brinkley, Douglas Dunbar, Terri Hagen, Bonnie Holtby, Rob Johnson, Jon Kelso

Missoula Smokejumper: Don Mackey

McCall Smokejumpers: Roger Roth, Jim Thrash

Helitack firefighters: Robert Browning, Jr., Richard Tyler

o o o

SurvivalBlog suffered the annual holliday hacking attack over the weekend again. Kudos to our hosting provider for helping us recover.


Scot’s Product Review: Alien Gear Holsters

I am kind of crazy about holsters for some reason and love to study and experiment with different ones. Someone recently mentioned Alien Gear Holsters to me, and when I checked out their web site I was very surprised at their prices, which start at $29.88. They even have a special where your get two holsters starting at $49.88. I am used to spending quite a bit more for holsters, expecting a Kydex one to cost $75 or more. Leather costs even more. My all-time favorite leather concealment holster, the Sparks Versa Max 2 I reviewed a while back, goes for $122, and I think it is worth every penny.

My initial thought after checking the prices was that they couldn’t be any good. However, I respect the person who suggested them and figured it would be a good idea to check them out.

Besides price, another attractive feature of Alien Gear Holsters is that they have a modular system. You get a half shell that holds your handgun and a choice of backers for it. With a few parts and the time it takes to assemble them, you can have a lot of different holsters.

Revolvers and semi-autos use different backers and there are outside the waistband (OWB) ones as well as inside the waistband (IWB) ones for both types of handguns. Since there are so many types of semi-autos, they offer four sizes of IWB backers for them, while one size suffices for OWB. While you can use a shell for a small pistol on one of the large backers, you don’t want to carry a large pistol on a small backer since the slide will project past the backer and dig into your body. They, therefore, warn you to buy one for the largest pistol you expect to use. The shells are interchangeable, so you can swap guns in a couple of minutes. They even have a deal where you can send back a shell and exchange it for a different gun for free.

Additionally, you get a choice of leather or synthetic for the IWB backer. The synthetic one costs $6 more and is composed of three layers of material. The layer next to the shooter is a thin layer of Neoprene followed by a thin layer of a somewhat stiff plastic material to give it some structure, and finally there is a layer of vinyl next to the gun. The layers are glued and then sewn together. The stiff layer allows it enough flex to curve around the body while not letting it collapse vertically. While leather will eventually let sweat soak through, the synthetic appears impermeable to moisture. I spent a very hot, long sweaty day in the southeast using it on the range, and nothing got through the pistol, which was very pleasing since sweat is highly corrosive.

The OWB backer is about 6.5×4.5 inches and comes in tan leather, though for $5 more you can get it dyed black. That would be a good option if you wear dark pants most of the time. There are loops on the back at the front and rear edges that allow the use of a belt up to 1.75 inches wide. I wouldn’t go any narrower than a 1.5-inch belt, though, as that would allow the holster to move about more than it should for a consistent draw stroke. I got one of these for revolvers with a shell for the S&W K frame revolver. Oddly, they listed two barrel choices for the shell– one for a two inch and the other for a five inch. I know there have been 5-inch K frames, but they aren’t common and since mine is a four inch, I ordered the five inch one so that the barrel would be covered. It turned out to be a perfect fit for the four inch. So, there you have that. I suspect there was an error in the selection menu.

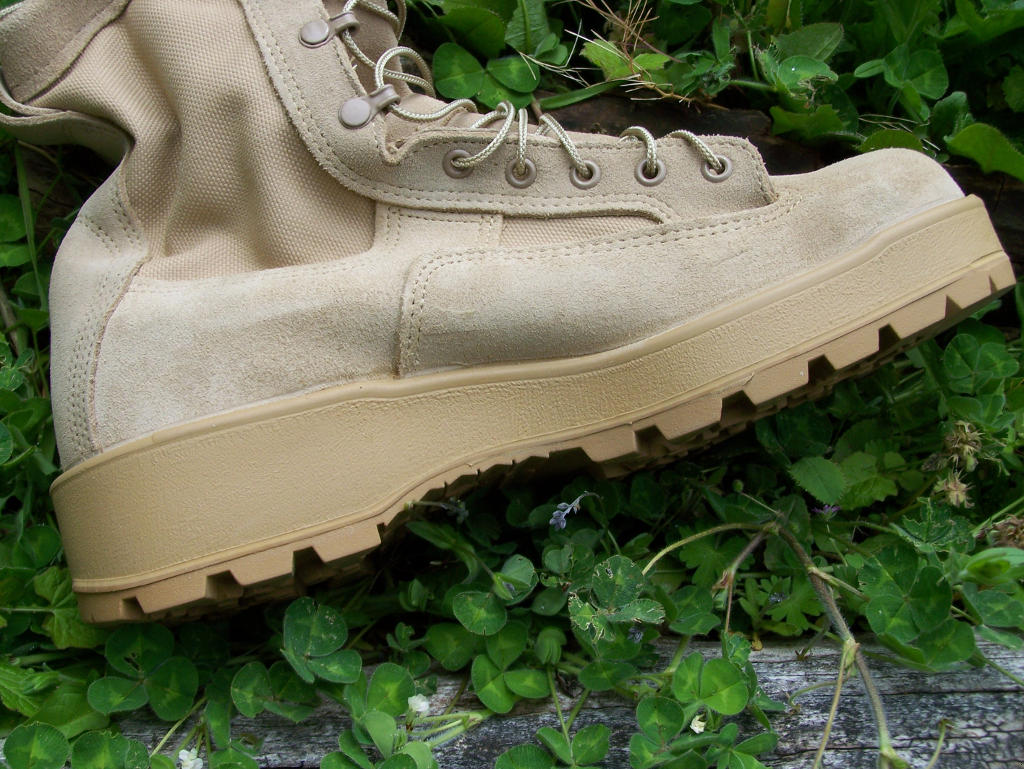
I also got the IWB synthetic backer for semi-autos; it is called the Cloak 2.0 and is 9.5 inches wide and 2.5 inches high at each end. The shell I got was for the 5-inch 1911, and the backer is 9.25 inches tall where the pistol rides. The ones for smaller pistols would be narrower than mine at the tall part.

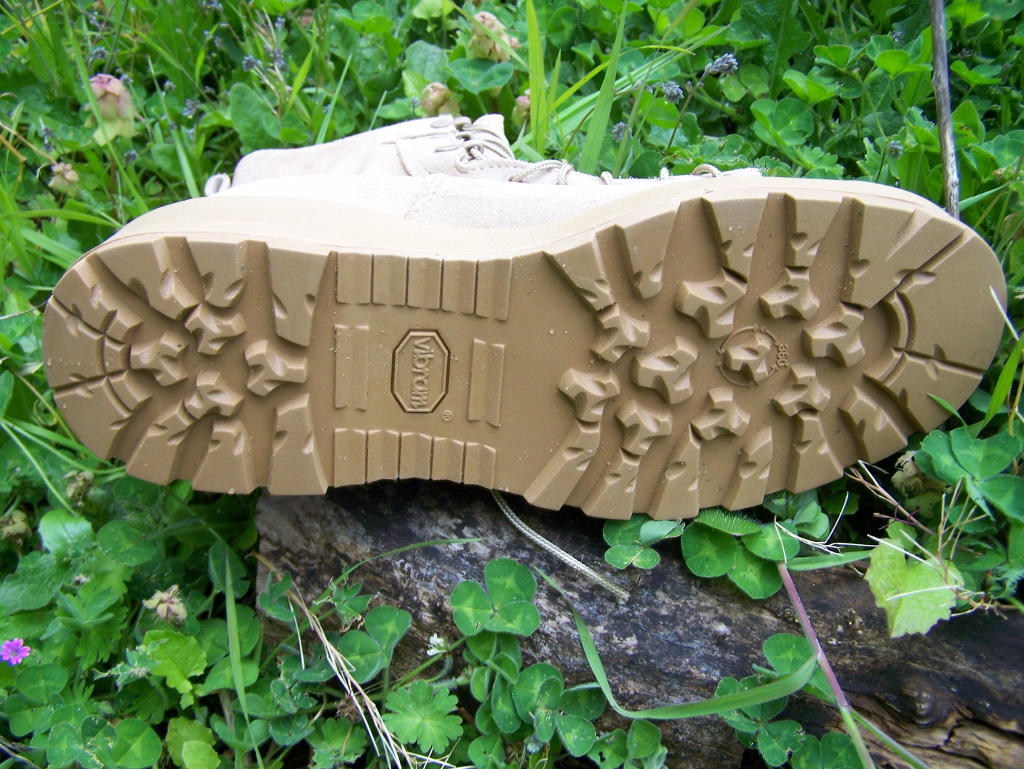
The plastic shells are a material called Boltaron, which is a thermoplastic that is molded to the shape of the weapon. Alien Gear argues it is better than Kydex and has a video on the subject. The shells are attached to the backers with four screws that thread into T-nuts crimped into back of the backer. The shells look solid and durable. There are rubber-like spacer washers between the shell and backer that allow you to adjust how much retention the holster applies to your weapon. Alien Gear makes a point of having the shell cover the entire barrel, slide, and front sight of the weapon, and I think that’s a good idea, both for the weapon and the user. An uncovered gun can abrade clothing and dirt can get into the weapon easier.

One great touch is that they give you replacement parts and an Allen wrench to turn the screws with. I would have preferred Phillips screws, but so it goes. At least they give you a wrench so you don’t have to claw through your tool box to locate one the right size. The replacement spacers are in several thicknesses, which is good to have in case you need a different spacing than the stock ones. They use hideous neon green ones on the IWB, but at least no one will see them. The OWB, thankfully, uses a tasteful black. I suspect the green is in keeping with the alien motif. There is also a spare T-nut, and everything is attached to a nice plastic holder, though the Allen key kept falling out of mine giving me something to grouse about.

The basic design of this sort of holster is sometimes called a hybrid in that one side of the holster is a shell in one material shaped to hold the handgun and the other is a flat piece of some other material. We often see a piece of leather with a Kydex shell attached to it in this style, though there are other patterns such as the Alien Gear IWB I am reviewing which has a plastic shell and synthetic backer.

I did quite a bit of research on these holsters, and I found a number of positive reviews as well as some hostile ones. My review is generally positive with the caveat that you can’t expect a $30 holster to be as good as one that costs three or more times as much. I will admit, however, that the margin is far closer than I expected. I sort of expected to send them back for a refund, as I wasn’t expecting much, but I’m keeping them despite the fact the bin o’holsters is overflowing.

The two biggest concerns I saw in the negative reviews were about durability and safety. I’ve only had these for a few weeks and plan on reporting back on how well they hold up, but they appear reasonably sturdy to me. One complaint was over the belt loops on the OWB backer not being strong enough, but they look plenty tough to me. I used similar construction to carry much heavier camera equipment without problems. I didn’t fail test them, but I pulled as hard as I could and loops stayed on.

Another durability complaint was over the IWB synthetic backer, and I will grant that I have more concern about that point, though it looks okay to me. I’ve worn it for a couple of weeks and done a lot of draw strokes, and it looks like new. I saw a photo of one that had been torn up after a few weeks use, but I wonder if the pistol in question had some sharp edges on the front of the slide. Colt 1911’s are notorious for that, and they will rip up a holster if you don’t take a file to the pistol as I have done to mine. The only thing that will tell, though, is using it for several months and seeing what happens. I’ll report back on that.

I saw some complaints about the hardware rusting. Mine have been soaked with sweat and look fine, but I will keep an eye on them and report problems.

Safety is a concern, and the complaints I saw centered on holstering being more difficult than it should be. I found it to more troublesome than with my JM Custom Kydex or the Sparks Versa Max, but I was able to do it without looking and with one hand. With both the 1911 and the revolver, I found I had to wiggle the weapon a bit to get it in. With the IWB, most of the problem is that when the holster is empty, the flexible backer fills in some of the space in the pocket the pistol fits into and you have to push it out of the way as you holster.

One problem some semi-auto users have that I don’t, since I use a 1911, is that the slide can be pushed back and out of battery when putting the pistol into a holster with very much resistance. The safety on a 1911 locks the slide in place so it won’t move out of battery. Most semi-autos, like the Glock, don’t have that feature. One reviewer noted that he met with so much resistance he could actually unchamber a round. If that’s a problem, the Massad Ayoob technique of placing one’s thumb on the back of the slide can work well. This keeps it in battery as you push the pistol into the holster. I recall that he also recommends that we do this with the 1911 as it can block the hammer should there be any shooter error during holstering; it is a procedure I use. The short take on this point is that good technique can probably prevent the problem.

With the revolver, there were a couple of problems getting it into the holster, one of which I was able to help a bit. The front of the cylinder can catch on both the shell and the backer as it goes in. The leather backer had a square cut edge, and rounding it over with a beveling tool helped the cylinder slide in. Wiggling a bit got it past the shell. The frame of the revolver where the yoke for the cylinder hinges also caught on the part of holster that covers the trigger guard. By working with it a bit, I was able to come up with a motion that allowed the revolver to slip in with reasonable ease, though not as smoothly as with an old leather Alessi I own.

One other complaint I saw was that the holster shells are larger than necessary. I fear that is largely a function of the interchangeable nature of the design. I generally find that plastic holsters are often bulkier than leather, though some designers beat that. I didn’t find, however, that it caused any issues with concealing a 1911 or S&W K frame revolver under an untucked polo shirt. It is also a fact that spending the time to reduce the shell to the minimum size will take time-consuming handwork. That equates to money, and unless I miss my guess Alien Gear is trying very hard to hit a price point.

The OWB backer offers no adjustments, but the IWB ones do. You can change the cant of the holster as well as how deeply it rides from your belt. The cant will vary depending on where on your belt you carry your pistol. The farther towards the back of your body it is, the more cant of the muzzle towards the rear is required for you to be able to get a get grip on it during the draw. The reverse is true as the pistol is moved forward on the body, the muzzle cant moves down and then forward. The idea is that we want to have our wrists as close to straight as possible during the draw, since cocking the wrist is awkward and awkward makes for a bad draw.

The Alien Gear backer gives you enough options to cover most carry modes from about the three o’clock position to the middle of the back, assuming a right-handed shooter. I am not a fan of appendix carry for reasons of comfort (mental and physical), and I didn’t try it for that style carry. I don’t think, however, that it can provide the optimal cant for appendix or cross draw carry.

You get a choice of methods of how to attach the IWB backer to your belt, all of which allow you to tuck your shirt over the pistol and holster. This was one of my primary justifications for buying the holster. I can do this with my beloved Sparks Versa Max, but I hated what summer sweat in the southeast does to fine leather, so I wanted something synthetic for summer wear. I actually dislike the process of tucking the shirt in over the gun and holster, but it is a workable method when leaving the tail out is socially unacceptable.

The standard attachment is a nylon clip that slips over outside of your belt and has a small hook that catches on the bottom of the belt to make sure it stays there when you draw your weapon. It will fit over a 1.5-inch belt. You can also get a leather loop that will probably work over most 1.75-inch belts, though if the belt is thick, it may not snap over the it.

There are two other options that are appealing to use if you use the tuck your shirt over the holster method. The leather loop or nylon clip are visible if anyone is paying attention, but you can get a J clip that goes under the belt, and it only shows a small nub, which makes it almost invisible if you are wearing a black belt and dark trousers. It should work with most any normal pants belt width. The disadvantage is that the holster is not supported by the top of your belt, so it may want to slip downward. That’s more of a problem, of course, with heavier guns, like my 1911. Fixing that issue at the cost of a little more visibility is the C clip that hooks over the top and bottom of the belt with nothing over the middle. This is the one I like best, though it slightly compromises concealment. It works with 1.5-inch belts. It is hard to get some 1.5-inch belts into it, unless you slide them through as they are too stiff, so you just put the holster on and then slide the belt through the loops.

I found both holsters worked well for concealment. The IWB, of course, was better since more of it is hidden and one’s belt and pants pulls it tighter to the body. I normally wear an IWB as it gives the gun less leverage to pull away from the body than an OWB, but I found this OWB did a good job of keeping the gun close to the body for concealment. The revolver I was using is the same gun that most police agencies issued for patrol use up through the late 80’s and early 90’s and has full-sized stocks on it. In other words, it was not designed for concealment, but it hid nicely under a polo style shirt with this holster. The 1911 disappeared just as well with this IWB as with the best of my other IWB holsters, so I was very satisfied with it.

Comfort was fine with both holsters. Neither had any projections that hurt and both shielded me properly from the guns. I have usually found this style IWB to be hot as the backer is covers more skin than holsters like my Versa Max, but this one was acceptable. I suspect that the neoprene-like layer next to the body wicked away a lot of the moisture rather than trapping it next to the skin as leather or Kydex can.

Getting the IWB on is more trouble than something like the Versa Max. The first issue is that there is more holster to get into, and the second is that the neoprene-like material offers some friction as you try to slide it in. It might be best to mount it on your belt and pants before fastening the button or snap and then completing the process of fastening and belting your trousers.

One can certainly ask the question about the concept of carrying an expensive gun in an inexpensive holster, but these holsters worked well for me, which was something of a surprise. They aren’t my first choice, but they do the job quite well. Some of my problem, of course, might be my love for custom holsters, and these holsters don’t provide that sense of craftsmanship. If one is short funds (or snobbishness), this is the best choice I’ve seen in this price range. It is also a great option if you have pistols you don’t have holsters for. Many of us accumulate an odd handgun or two, and we should have holsters for them. Alien Gear offers a solution for this problem that won’t break the bank.

Another nice feature of Alien Gear Holsters is the instructions they provide. They discuss how and where to wear them, how to set retention, and their instruction contain everything from pointers to videos with more details on using them. I haven’t seen instructions with this level of detail provided with holsters before, and I thought it was great. I was pleased to see that they also included a membership application for the National Rifle Association.

One thing I did find curious is that they don’t offer carriers for extra ammunition. Perhaps that’s something to come.

Alien Gear holsters are made in the U.S., and the company is based in Idaho and Arkansas. It started in 2013. They offer a “forever” guarantee on the holsters, a 30-day trial period with no questions asked refund if you don’t like them, and a shell exchange if you get a different gun. They say the warranty is good even if your dog chews it up. My order took 18 days from the time I placed it to delivery, which is really quick for holsters these days. They even have a blog on their website about concealed carry, and I found it both interesting and useful.

– SurvivalBlog Field Gear Editor, Scot Frank Eire


Pat Cascio’s Product Review – Wellco USGI Boots

I’m very particular when it comes to footwear. I’m not one to go to one of the big box stores and buy a cheap pair of shoes or boots. I wear hikers on a daily basis, and I demand waterproof hikers because we get a lot of rain in Oregon, and I’m out in the rain, sunshine or snow, when I do some shooting or hunting. By “waterproof” footwear, I mean with a waterproof lining, like Gore-Tex, not a spray-on sort of thing that some companies are attempting to pass off as “waterproofing”. That stuff doesn’t last, and it simply will fail you. Even shoes and boots that come with a waterproof lining of some sort will lose their ability to repel rain after a year or two.

One of our local discount grocery store chains carries all manner of stuff, not just food. Some time ago, they had purchased a close-out deal on genuine USGI military boots and were offering them as a deal of buy one pair for $29.95 and get the second pair free. I was sure it was a misprint, so I went to check the deal out for myself. Sure enough, it was buy one and get the second pair free. I picked up several pairs of these boots for myself and other family members, including my wife and oldest daughter. How can you pass up a deal that great? I checked around on the ‘net and through some catalogs; these same boots were selling for $129.95 and up. Once again, they were genuine mil-spec boots; they even have the NSN (National Stock Number). To be sure, there are several different makers of genuine mil-spec boots. The brand I obtained were made by Wellco.

When my youngest daughter joined the U.S. Army, fresh out of college, and headed off to her Basic Training for two months, she was not the least bit pleased with her USGI issued boots. One pair was too big, and one pair was way too small. She tried explaining to the powers that be, but they wouldn’t allow her to exchange those boots for the correct size. Luckily, the too large pair was just slightly too big, so she wore those all through Basic Training. When she entered her Advanced Individual Training, for a Combat Medic, she was allowed to pick just about any sort of boots she wanted so long as they were either mil-spec or close to it. We got her a pair of Blackhawk Products boots that were light-weight and desert tan in color. Unfortunately, those boots have been discontinued for some reason, but our youngest went through two pair of them in four years. Also, everyone she worked with bought the same exact boots because she raved about how comfortable they were.

100_5943

Let’s get back to the Wellco USGI boots. These are the same exact boots our youngest daughter wore in her Basic Training. We are talking super tough boots that are extremely well made. The lowers are flesh out suede, and the uppers are ballistic nylon, which is breathable! There is a pull-on tab on the rear top of the upper. It has five eyelets on the lower, and the upper has four speed lace eyelets. It also has a fully gusseted tongue. The soles on these boots are truly something; they are more than an inch thick in the toe area and close to two inches thick in the heel. The bottom of the soles is Vibram lugged for all-terrain use. Of course, the boots are desert tan; however, the military is changing that and going to either a greenish color or even camo colored boots, depending on which branch of the military we’re talking about.

Now for the bad news, at least in my case. These boots are extremely heavy. I’m used to wearing hikers most of the time, but I do have some Rocky insulated and waterproof boots that I sometimes wear when I go hunting if it is very cold out with lots of rain or snow. My Rocky boots are much lighter in weight compared to these Wellco boots. I wasn’t able to weigh these boots, but I’m sure they are a couple of pounds each. They do have a nice insole, so that’s good news. However, I wear prescription insoles because of high arches, and I simply place them over the insoles in any boots or hikers I wear.

100_5944

When I joined the military, way back in 1969, we were issued all-black leather combat boots. Every branch of the military wore the same exact boot. Once broken-in, they were extremely comfortable. The best way to break in those new all-leather boots was to put them on, go in the shower, soak them, and then wear them until they dried on your feet. Then they were broken in; it was just that simple. However, it was supposedly an Article 15 offense if you did that, but the drill sergeants told us, with a wink and a nod, to not to it. I wore those boots for many years and had them resoled several times. Today, it’s hard to find any type of boots that you can resole. So it is with these Wellco USGI boots. Once the sole wears down on you, you have to toss ’em in the trash. You can’t have ’em resoled.

I note that these boots have single, double, and even triple stitching on them, depending where you look, so there isn’t much chance of these boots failing you, even under the worst conditions. The ballistic nylon uppers are very heavy-duty nylon, too. It’s not cheap and thin. I’m not sure what the inner lining is made out of, but it’s comfortable to slip the boots on and off without much trouble. These boots stand slightly over nine inches tall, too. The upper lip of the boots also have a suede collar for comfort, which is nice!

100_5945

I wore these boots, on and off, for several weeks, and they still look brand new, other than a little dirt on the soles. I even wore them on gravel logging roads as well as in the dirt. The boots are comfortable. However, they are very heavy, and I mean they’re HEAVY! I’m used to wearing hikers most of the time, so putting on these boots really gave my feet and legs a good workout. Quite frankly, I wouldn’t care to wear these boots every single day. They cause your legs to get tired in short order. I took no long hikes on any roads, but even short hikes found my legs tiring from the heavy weight of these boots. My youngest daughter also complained of the same thing when she was in Basic Training.

I would suggest that, if you buy a pair of genuine USGI boots of any sort, you wear them quite a bit so your legs and feet get used to the heavy weight of these types of boots. If you’re looking for heavy-duty boots for the end of the world situations, these would be hard to beat, assuming you’re in the type of climate conducive to these boots. If you live in a cold climate, like Alaska, where it gets very cold, I would pass on these boots; they aren’t going to cut it. However, for moderate or hot temps, these boots would be great for your survival needs. In my case, where we get a lot of rain eight months out of the year, these boots are okay at best, so long as you don’t get them soaking wet. While we do get a lot of rain, we don’t usually get downpours. We get moderate to light rain. Still, if these were the only boots I had, I could get by just fine in my neck of the woods. However, they wouldn’t be my first choice.

100_5946

I’m a bargain hunter. I have to be on our family income. So, I shop around for the best deals I can get on quality-made products. Yeah, I could go to a big box store and buy “similar-looking” boots, for fifty bucks, but they wouldn’t be the real deal, genuine mil-spec surplus. Sure enough, they will look like the real-deal, but they aren’t. They are light-weight, poorly-made boots, that you’d be buying. They wouldn’t last you very long, nor would your feet appreciate the cheap knock-offs, either. There is one mail-order catalog company, and many of you probably will know the one I’m talking about without me mentioning the name of the company. They always advertise and sell “military surplus” clothing and footwear. However, if you read the ad copy carefully, you will note that it says “military-like” or “military-style”, not the genuine article. Steer clear of them! You are NOT getting your money’s worth by purchasing look-alike products. If you’re serious about survival, long-term survival, then buy the best products you can. When it comes to footwear, you should always without hesitation, buy the best footwear you can afford. Save your money until you can get the best.

100_5947

I have no doubt in my mind that with a little care these USA-made Wellco USGI desert tan boots would last me for years and years, worn on a daily basis, in a survival situation, where I was exposed to the elements in my area. I would just need to make sure I have them completely broken-in and build up those lower leg muscles a bit more so the boots don’t feel so heavy when I’m walking. Still for the price I paid, I’m extremely pleased with my purchase. Where can you find brand new USGI boots for $29.95 at buy one pair get the second pair free? Like I said, I’m a bargain hunter, and I know a deal when I get one. I got one great deal on these boots, for myself, my wife, and oldest daughter.

– Senior Product Review Editor, Pat Cascio


Recipe of the Week: Mrs. Smith’s Buckwheat Cake

Ingredients

  • 2 c. buckwheat flour
  • 1 c. white flour
  • ½ – 1 tsp. salt
  • ¼ yeast cake (about 2¼ tsp. of modern, bottled yeast powder)
  • 6 Tbsp. corn syrup (or use molasses)
  • water to make batter

Directions

  1. Mix all ingredients, and let stand overnight at room temperature.
  2. If necessary, add more water and salt before cooking to create a fairly thin batter.
  3. Traditionally cooked on cast iron griddle that has been lightly greased with bacon fat.
  4. Cook on first side until holes stay open and the gloss is off. Then, flip and cook until the steam abates.

o o o

Useful Recipe and Cooking Links:

Do you have a favorite recipe that would be of interest to SurvivalBlog readers? Please send it via e-mail. Thanks!


Independence Day

Dear Editor,

I noticed something creepy this year about Independence Day coverage, besides the constant fear mongering. The term “Independence Day” was hardly used. It was replaced with “July 4th” or “4th of July”. Fox News had a running theme of veterans, where they were thanking veterans for our freedom, et cetera. NBC used a theme of veterans and immigrants, as in being proud to be American. This has nothing to do with Independence Day. Shouldn’t we be celebrating the breaking away from a monarchy? Really, it’s about a bunch of guys fed up with taxes. I can’t tell if I am reading too much into this. – F.R.

HJL Responds: I don’t think you are reading too much into this. It is apparent that the average person in the United States is far more concerned about partying than they are about government intrusion into their lives or that there is a looming economic crash that is going to severely impact their lives. Witness this video from Mark Dice (pulled from today’s quote) asking California beach-goers what the 4th of July is all about. (Warning: There is inappropriate language in the comments section and you may want to bang your head against a wall after viewing the video.) This is not an isolated phenomena. We now have Cinco de Mayo as a major celebration in the southwest U.S. Really!?! It’s not even that big of a deal in Mexico, but it is here. Christmas, Thanksgiving, New Years, Valentines, Easter, and others all have become subject to the mass hysteria and commercialization. They’ve become just another reason to spend money, increase your debt, and forget the consequences by drinking yourself stupid. As long as the average person is this disconnected from what is happening around them, it will be exceedingly difficult to change the direction the country is heading. Perhaps yesterday’s post on the Odds ‘n Sods about Americans not deserving to celebrate July 4th is true after all.


Odds ‘n Sods:

Pound Sand, Your Honor! More Americans Want States to Ignore Federal Courts

o o o

SurvivalBlog reader T.P. sends in a warning about newswatch33.com. Apparently they are reporting fake racial violence stories attempting to agitate the issue. Beware anything that traces its source back to them!

o o o

Training, training, training!! In this video (from last year) a pawnshop in Springdale, Arkansas is robbed at gunpoint by two men. Watch the bad guy in the red hoodie after the store owner shoots his partner. He has already drawn his weapon and pointed it at the other store employee (presumably with one in the chamber). He then reaches up with his left hand to jack the slide, ejecting a live round, and moves closer to the man lying on the ground. He then realizes the threat to him is not coming from the man in front of him but from the little old lady at the end of the counter. He proceeds to fire a round at her and then uses his left hand to jack the slide again, ejecting another live round onto the ground.

Another version of the video found on facebook shows a better angle of that person, and it appears that he fired twice and ejected three live rounds onto the ground. I can’t tell what sort of firearm he is using, but if it is a 1911 type, he now only has two or three rounds left in his clip and has wasted three live rounds. I guess that’s what happens when you train with airsoft or pretend. He isn’t even thinking as he ejects those live rounds onto the ground. So much the better for him, but don’t let that be you. Train like you are going to use it! – HJL

o o o

Dave Hodges interviews expert, Bob Griswold, On Resupplying After the Coming Economic Collapse

o o o

A Word To President Obama About “Gun Violence”. – A.L.


Hugh’s Quote of the Day:

“The obvious lack of an educated citizenry in this country is likely the single most important contributing factor to the overt tyranny being implemented across this once free nation.” – Mac Slavo