


As the title indicates, my wife and I are outlining our family’s move to the American Redoubt. In part 1, we explained why we made the move to the American Redoubt and now we are getting into the nuts and bolts of our process.
Finances/Budget
| Milestone | Cost – USD |
| Property Search/Travel to locations | $4,000.00 |
| Land Purchase | Classified |
| Log Package Kit | $37,000.00 |
| Foundation | $15,000.00 |
| Subfloor | $5,000.00 |
| Gables /Roof | $7,000.00 |
| Roof foam/frame | $8,000.00 |
| Tin roof | $4,000.00 |
| Porches | $1,500.00 |
| Stain/log jam | $3,500.00 |
| Temp Stove/Chimney | $3,200.00 |
| Septic Tank/chambers | $3,000.00 |
| Propane Tank/Filled | $4,000.00 |
| Grading Property | $3,500.00 |
| Interior walls/Insulation | $2,000.00 |
| Plumbing | $2,500.00 |
| Electric | $3,000.00 |
| Vents/interior wall | $500.00 |
| Tile Floors/board | $5,000.00 |
| Interior Wall/wood | $4,000.00 |
| Labour/Day help | $5,000.00 |
| Light fixtures | $1,000.00 |
| Washer/Dryer | $1,400.00 |
| Hot water Tank | $800.00 |
| Water Tank | $500.00 |
| Shower Kit | $1,800.00 |
| Move to AR w/wares | $2,500.00 |
| More to do…. See FUTURE section… | ???? |
| Grand Total w/o Land | $128,700.00 |
The Property
(It took one year to find the property that met our desired metrics.) After traveling from all corners of the United States from places such as California (for its farm land) to New York, Texas to Arizona, Montana to South Dakota, and Idaho to Utah we settled on this American Redoubt location. It was selected after careful planning through building a robust spreadsheet outlining regions of heavy lightening strikes, earthquakes, tornadoes, Tsunamis, hurricanes, sunshine, growing seasons, population density, crime, political affiliation, defendable property, gun laws, mountains vs. plains vs. beachfront, et al. All in all, there were 44 tabs in the spreadsheet and even one for best area for looking at the night sky through a telescope, as we’re both into astronomy. We truly believe the American Redoubt should be Idaho, Montana, Wyoming, and the western portion of South/North Dakotas (nixing the eastern portions of Oregon and Washington, which are way too liberal for our likings).
A Piece of Property Purchased Without Ever Seeing It Physically
We first purchased a piece of property in Montana without ever seeing it physically. It looked so good on Google maps with all the trees lining the side of the mountain. The real estate agent illustrated it was drivable through a BLM road. However, when we actually traversed the road, there were such boulders that the car bottomed out and the sheer cliffs on one side with high loose boulders on the other winding through a mountain pass was not going to foot the bill for us. In addition, we did give it a shot in the winter by renting a snowmobile and traversing up the mountain 8-miles to our property. It was not very practical for the winter months with family life.
We sold it. Then, we purchased another set of acres after walking the property.
Excavating
(The process of excavating required 16 hours.) The key to excavating is to mark off all boundaries of the foundation prior to digging. This is done by carefully looking at the blueprint and then spray painting the pattern onto the unblemished property. Once done, take a step back, and review your picture to ensure all measurements are according to plan.
Extra Feet Around the Foundation Measurements
It is recommended that you give yourself an extra two feet all around the foundation measurements so you can walk around the walls after they are poured with concrete. I actually re-spray painted an extra four feet all around the initial sketch onto the soil. That was enough for me to do my future work in the hole.
Where You Will Start Digging
Next, is to figure out where you will start digging as you won’t be able to position the excavator over an already excavated hole. It sounds obvious, but you’ll be surprised that you need to be able to hit all four corners with the excavator and then place mounds of dirt all around the perimeter outside the hole. If you dig a full basement you will use the entire perimeter to amass dirt around your crater.
Face South
It is best to have the front of your home, or the side with the most light-gathering potential, face south. Use a compass prior to outlining your foundation on the ground with spray-paint to ensure the correct format. In addition, if you are going to place solar panels on the roof of your home, you must have them facing south to gather as much of the sunlight throughout the day as possible. (It’s important even to have the correct angle of attack towards the sun as coupled with the degrees of latitude to place each panel. Watch for that!)
Equipment Rental
(This equipment rental step required three days.) Once your foundation is spray painted into the earth, leaving the desired clearances on all sides, it’s time to break ground. You might want to say a prayer thanking the Lord for what’s about to transpire for your new found freedom and family heritage up on the mountain, even freedom in homeschooling your children, absent of any Leftist indoctrination. It’s a safe space in a wide open expanse of God’s country!
A word of caution: There might be a backlog in equipment rental, so be sure to order yours in advance of the days you need them.
Excavator
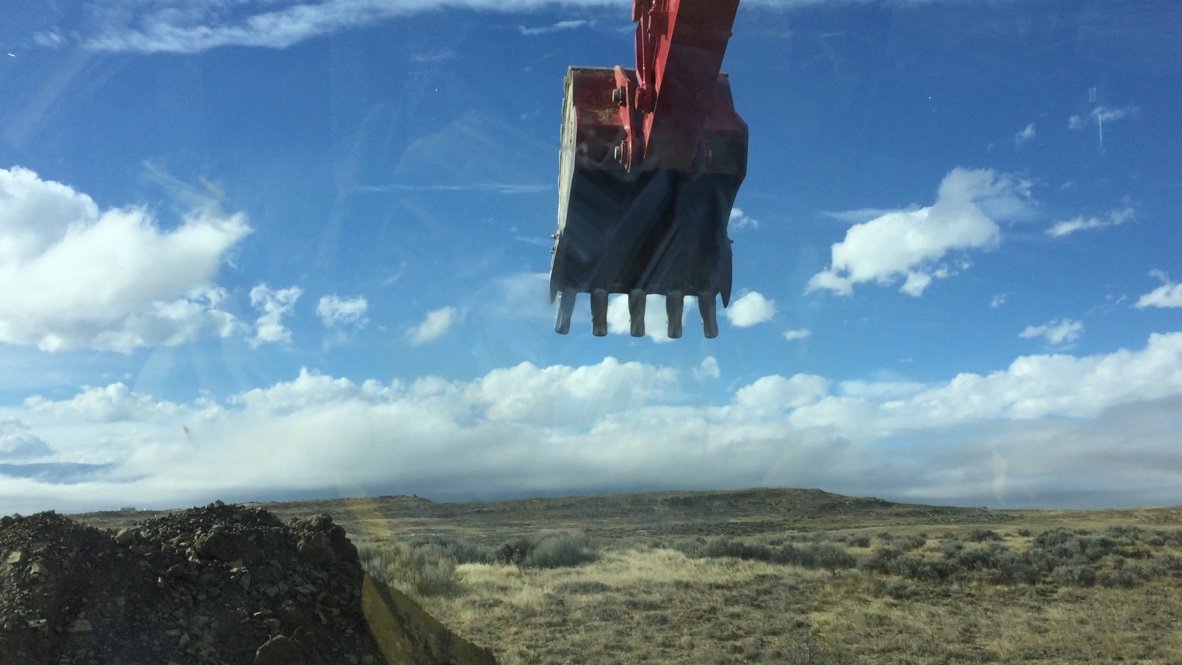 The semi-truck arrived and unloaded the Linkbelt 210 (largest excavator). The bucket was so large that I could just stand in it and squat down to hide. For proper operation, the night before I reviewed YouTube videos on how to operate this behemoth wonder. To my surprise, they were narrated in the language of Spanish, which I don’t speak. So I wrote down the joystick movement based on the bucket, arm, boom, rotation, and excavator track movements, all from the narrator’s hand movements in his cockpit.
Practice Runs
After a few practice runs in midair of all the different configuration movements [bucket curl, arm extension/detraction, boom elevation/delevation, swiviling, and forwards and backwards], I was ready to break ground. After 16 hours of digging, it was all complete.
Leveling the Crater Floor
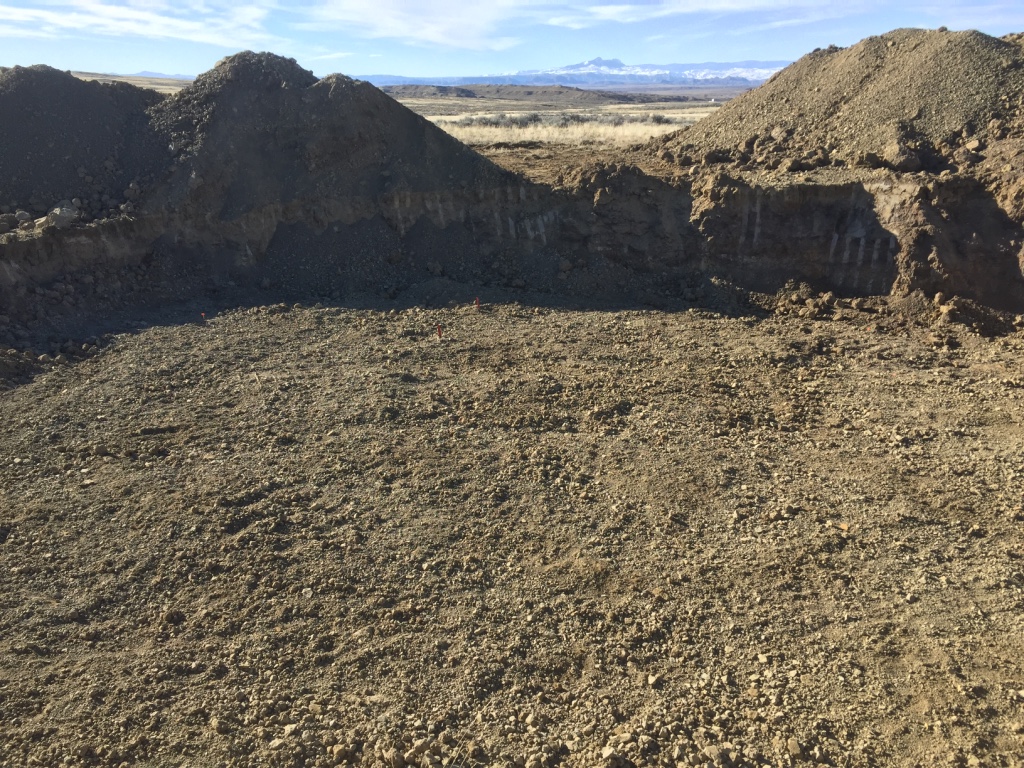 (It took about four hours to do the leveling of the crater floor.) Once the hole was dug and all the dirt removed, creating the boundaries prescribed from your spray painted exercise above, there are considerable divots in the ground. Some spots had a four foot difference in elevation. This needs to be leveled and smoothed out to within an inch or two all across the base of the crater floor.
When concrete is poured in to create the crawlspace/basement floor, there will be much less hassle and even pour with a smooth floor. For the proper grading technique, it is best to place the entire excavator into the hole instead of stretching out the boom/arm causing an unsafe workspace so high up. You might need to create a makeshift driveway into the crater on one side, and drive the excavator into the hole. Then, after leveling is completed, drive back out and replace the driveway with dirt.
Spray Painting Again
Once the hole is dug according to plan, with your allocated margins on all sides (to walk around the footer), the next step is spray painting again.
Now re-spray paint lines back on the excavated ground for the exact dimensions of the structure (without the margins for walking around). Use the blueprint in order to have correct and exacting details. The footer is two feet wide, so spray paint two feet according to your footer plan. Take a step back. Now you have what looks like the footer spray-painted all around the leveled crater.
Place Stakes Around All the Corners and Tie String
Lastly, place stakes in the ground around all the corners and tie string to it. Now retake all measurements. This time one more step is needed and that is to square the structure. Measure diagonally across all squares and rectangles to ensure that their diagonal measurements all are equal to the opposite side. Remember even though you have the correct length and width measured, you can actually have a rhombus instead of a square. Once you’re square, you’re now done with this segment.
Footer
(The footer required three days.)
So you’re as square as you can be? No pun intended. The footer forms must be constructed next. This is the trough-like trench you will build to pour the footer concrete, creating the foundation of your new log home. This step is crucial, so don’t get it wrong, or the entire project could be scrapped.
Since the plans illustrated a one-foot depth and two-foot wide footer, I used 2x12s raised up ¾ of an inch (because a 2×12 is really 1½ inches by 11¼ inches). I tucked dirt under the ¾ inch gap on the floor to seal it off.
Stand up the boards, as in the picture, and nail a stake into the footer board, but first pound the stake into the ground. The stake must be deep enough to withhold the oncoming stress of the concrete pour.
Boards Are Level
Now that the trough of the 2x12s footer is constructed, the next step is to level the boards. Remember that if these boards are exactly level, then all you need to do is smooth over your footer with a masonry trowel right after the concrete is poured. It will automatically be leveled.
Place a level on top of one corner of your 2x12s trough and level it. Walk around and level the entire perimeter of footer boards by either pounding in stakes or elevating them. If you elevate a stake too much, it’s okay. Just be sure to pack dirt around the bottom of the outside of the footer boards. It will hold the concrete from spilling over.
Rebar
Once leveled, I would use a laser or a construction surveyor tool if you have one handy. Now before you leave for the evening, place #5 rebar around (two at a time—doubled up) the entire inside of the perimeter, but not inside the trench, readying them for the next days pour. The plans show to elevate them five inches from the bottom of the footer trough, but construction guys I chatted with at the cement factory told me not to fool with that as they never stay in place, but to simply pour the concrete footer and place a #5 rebar in on top of the cement and push it in about five inches with your masonry trawl.
Tomorrow, we’ll continue with the concrete pour and more.
See Also:
- 1 – A Memoir On One Family’s Move To The American Redoubt- Part 1, by X. Liberal & China Doll
- 3 – A Memoir On One Family’s Move To The American Redoubt- Part 3, by X. Liberal & China Doll (Active 6/20/18)
- 4 – A Memoir On One Family’s Move To The American Redoubt- Part 4, by X. Liberal & China Doll (Active 6/20/18)
- 5 – A Memoir On One Family’s Move To The American Redoubt- Part 5, by X. Liberal & China Doll (Active 6/20/18)
- 6 – A Memoir On One Family’s Move To The American Redoubt- Part 6, by X. Liberal & China Doll (Active 6/20/18)
SurvivalBlog Writing Contest
This has been part two of a six part entry for Round 77 of the SurvivalBlog non-fiction writing contest. The nearly $11,000 worth of prizes for this round include:
First Prize:
- A $3000 gift certificate towards a Sol-Ark Solar Generator from Veteran owned Portable Solar LLC. The only EMP Hardened Solar Generator System available to the public.
- A Gunsite Academy Three Day Course Certificate. This can be used for any one, two, or three day course (a $1,095 value),
- A course certificate from onPoint Tactical for the prize winner’s choice of three-day civilian courses, excluding those restricted for military or government teams. Three day onPoint courses normally cost $795,
- DRD Tactical is providing a 5.56 NATO QD Billet upper. These have hammer forged, chrome-lined barrels and a hard case, to go with your own AR lower. It will allow any standard AR-type rifle to have a quick change barrel. This can be assembled in less than one minute without the use of any tools. It also provides a compact carry capability in a hard case or in 3-day pack (an $1,100 value),
- Two cases of Mountain House freeze-dried assorted entrees in #10 cans, courtesy of Ready Made Resources (a $350 value),
- A $250 gift certificate good for any product from Sunflower Ammo,
- Two cases of Meals, Ready to Eat (MREs), courtesy of CampingSurvival.com (a $180 value), and
- American Gunsmithing Institute (AGI) is providing a $300 certificate good towards any of their DVD training courses.
Second Prize:
- A Model 175 Series Solar Generator provided by Quantum Harvest LLC (a $439 value),
- A Glock form factor SIRT laser training pistol and a SIRT AR-15/M4 Laser Training Bolt, courtesy of Next Level Training, which have a combined retail value of $589,
- A gift certificate for any two or three-day class from Max Velocity Tactical (a $600 value),
- A transferable certificate for a two-day Ultimate Bug Out Course from Florida Firearms Training (a $400 value),
- A Three-Day Deluxe Emergency Kit from Emergency Essentials (a $190 value),
- A $200 gift certificate good towards any books published by PrepperPress.com,
- RepackBox is providing a $300 gift certificate to their site.
Third Prize:
- A Royal Berkey water filter, courtesy of Directive 21 (a $275 value),
- A large handmade clothes drying rack, a washboard, and a Homesteading for Beginners DVD, all courtesy of The Homestead Store, with a combined value of $206,
- Expanded sets of both washable feminine pads and liners, donated by Naturally Cozy (a $185 retail value),
- Two Super Survival Pack seed collections, a $150 value, courtesy of Seed for Security, LLC,
- Mayflower Trading is donating a $200 gift certificate for homesteading appliances, and
- Two 1,000-foot spools of full mil-spec U.S.-made 750 paracord (in-stock colors only) from www.TOUGHGRID.com (a $240 value).
Round 77 ends on July 31st, so get busy writing and e-mail us your entry. Remember that there is a 1,500-word minimum, and that articles on practical “how to” skills for survival have an advantage in the judging.
Concrete footings are supposed to be completely below ground level in undisturbed ground. They are supposed to be below the frost line which is different in different states. This helps to avoid freezing ground from pushing the concrete back up. Around here the spec is 12″ below grade for footing for wall or slab. For a slab house house the footing should raise above grade level with 2″s of concrete extra in footing with a 4″ slab on top so your finished concrete is at a min. of 6″ above grade. Using a tall form board allows you to get lazy and not dig a proper footing! Always use metal chairs, or bricks to hold up rebar. Pushing rebar back into the concrete is a BAD plan. All rebar joints should lap and be tied with at least 2 ties each and a 15 to 18″ lap. Carry on with the article it is a good read. Thanks.
Probably common knowledge, but crossmeasure from opposite corner to opposite corner to square things up. A square, or out of square building starts at the foundation.
I’ll assume log jam is the chinking between logs.
Why the big secret on the cost of land?..
@LO,
OPSEC. Land information is filed with the county and is often available online. If you know the cost, you can research where the land is.
John Doe is correct in regard to the rebar placement. You must have the overlaps , usually based upon a formula related to the diameter of the bar itself, wired together for no slippage or separation, and then held up above the bottom of footing grade with wire “chairs” prior to pouring the concrete. Take NO shortcuts.
Good reading. Some of us have lived and experienced already what you are describing and it brings good memories of the adventure. Others are sharing in your process that may not have done it and the way you describe things is very thorough and accurate in the way you explain it all.
Good article. Though IMHO I would be hesitant to do this without some experience in construction. I get the desire to save money by doing things yourself. But sometimes paying for that experience can save you money in the long run.
We left Calif. over 10 years ago for several reasons… we came there for a much higher paying job, but eventually realized those big pay checks come with higher cost of living, higher real estate prices, and higher taxes. It was a wash.
When we first arrived they had implemented an “assault rifle” registration scheme. However, we moved in state after the deadline. I naively wanted to obey the law (yes, I know, dumb as a box of hammers , but lesson learned) , and so, after writing the state a letter asking for permission to register them legally, I was grandfathered in… when the next regime (virulently anti-gun) took power they promptly sent me a letter saying the previous regime was legally wrong, and I had to either turn the guns in or send them out of state. Fool me once shame on you, fool me twice shame on me… I’m a big fan of 80% receivers now.
I worked in a field that employed a lot of VERY Left wing young people… California is a magnet for out of staters who hate the “conservative, religious, red necks” back home and wanted to relocate to the Socialist Land of Fruits and Nuts (SLOFAN). Typically you’d have 20 something kids making nearly 100 grand a year, but identifying themselves as marxists, driving $60K sports cars. These are the ones you see wearing the Antifa masks looking to beat up people wearing MAGA hats. It wears on you after a while. You can’t waste all day arguing with idiots.
Few people realize just how corrupt the California state government is. I mean “abuse of power” corrupt. There are many people elected AND unelected pushing the gay agenda, abortion, gun control, and illegal immigration. It has become a one party state. We put our kids in a religious school because I could not abide the gay oriented “sex ed” the government schools were pushing. Eventually I could not justify living there and paying taxes that work against just about everything I believe in.
It seems to me that many (liberal) white women are intent on committing suicide. Many would rather kill their unborn children or sacrifice a family rather than give up a “career” wearing a “power suit ” and working as a high paid government lawyer. This has apparently been the ideal portrayed on TV for the last 30 years. A woman needs a man like a fish needs a bicycle. Yeah, Hollywood values, go figure.
Having said that, I blame many men for the destructive path the society has taken. Tired of your wife? Divorce her, that desperate girl at work will give it up for free… oh, she got pregnant? Abortion… you might not even have to pay for it. Planned Parenthood is glad to kill your child for FREE… well, not exactly free… they are getting your tax money. Go have fun… TV and video games and sports stars and street gangs will raise your children for you. Your wife doesn’t need a husband… the government will be her surrogate husband. Big Brother will force you to pay child support anyway, AND take away your rights… what’s not to like?
The single most important thing you can do is to raise your children to become competent, intelligent, civilized adults. Just too hard? Look at the alternative. Just can’t get along with your wife?… grow up, little boy.
Interesting. Except for the fact that is way to close to the Yellowstone volcano. For all the alleged perfection of the redoubt, y’all are at ground zero for an eruption.
Bret, it’s time to stop reading the hype and learn about geology. Just because the caldera collapses on average about 640,000 years, and because it has been approximately 640,000 years since the last eruption does not mean it will happen again, like a train leaving the station. No one was here to document the previous eruptions so all dates are approximate. Even Old Faithful doesn’t hold that closely to a manmade schedule.
By your reasoning the Ozarks are unsafe because of the massive earthquake on the New Madrid fault, rule that area out. The Midwest is prone to tornadoes, rule it out. The coasts have storms, File 13 for them too. Most of the country is in the vicinity of nuclear power plants or high-value missile targets, better rule them out too. Eventually you have to decide what risks you are willing to accept. For those of us here in the Redoubt we feel like we have someplace we can live with. The ugly reality is that we here will be the lucky ones if Yellowstone blows, everyone else in the northern hemisphere will slowly starve to death because the heartland of America will be under at least 3′ of volcanic ash all the way to the southern Appalachians.
“The Midwest is prone to tornadoes, rule it out. ”
I have lived here for 40+ years and have only caught glimpses of 3, several years apart.
It’s sarcasm, Toto. Did you only read one sentence?
Could the author elaborate on why the home should face south? His example was for solar panels but if doesn’t have or want them, what would his reasoning be for this decision? My home faces east. The sun comes up through our living room windows and goes down with sun shining in our kitchen, which faces west. To me this is the best use of light since it pours into the home pretty much all day. Considering the living room and kitchen are usually the two most used rooms in a home (in daylight hours), I consider this setup best. If our home faced north or south then we would miss out on this light. I’m wondering what I am missing in the authors explanation. Thanks.
LSM: In northern climates you want to maximize your passive solar heating during the short winter days. The long side of your house should be positioned to achieve that. Likewise, the short side should be oriented north to reduce exposure to winter winds and the resulting heat loss. When I was planning mine I found a website that helped me plan roof overhangs so that I could shade my living room through the heat of the summer days until late afternoon, which has made a huge difference in keeping my house cool in the summer.
Thank you so much for answering. I hadn’t thought about the aspect of passive heating in northern states. I’m in Texas where all I care about is staying cool. Interestingly enough, I have made the connection to the sun hitting a portion of my home to where it stays coolest, just never thought about the need for heating a home during long winter months. Thanks again, something to consider if we make the move North.
I’m a native Texan and understand the summer heat all too well! Can’t say I miss it, or the fire ants.
As the saying goes, I wasn’t born in Texas but I got here as fast as I could. I have lived here since I was 20, now almost 43. The only thing that ever makes me consider moving is the heat.
Thanks again.
I believe the house to face south so the solar panels on the south side of roof would get most of the light for power all day. If your house faces east to west, and your solar panels are on one side, then they would only get half of the days energy. Depends where you live, being in the south, during the winter months the sun stays lower on the south side and close to straight up over E to W in the summer.