
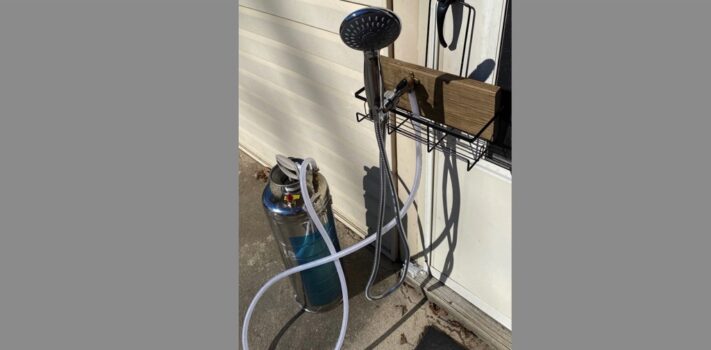


My wife and I were sitting in the living room last winter, our fireplace insert was cranking out the heat, our spark screen was on, and the Eco-Fan was blowing a mile a minute. She had a glass of wine in her hand, and we were enjoying the moment. We were discussing our preparedness. (Like all couples do — right?) The sun was very active that week, with plenty of solar wind and a moderate CME. She asked, “if the power grid goes down, how are we going to take a shower?” I kind of sputtered, “I have at least three solar showers in the shop, I was thinking of rigging a hose into the house, and putting the solar bag on the roof”… She chided: “It is 20 degrees outside and there is no sunshine.” Doom on me.
We have a whole-house generator with 1,000 gallons of propane, but that is not going to last forever, and we needed a backup plan. We both wanted an option better than a sponge bath. Now I have used solar showers years ago when camping, these typically have 5-gallon black rubber bags, gravity fed, sunshine-warmed, and run about $20,. They work great in summer, and if handled carefully they will last many years.
I got to thinking… One of the guys who I watch on YouTube is Dave Whipple on ‘BushRadical’. He is a great builder and homesteader, usually in Alaska, and he did a video on an outdoor shower. So, I watched it again. I don’t need an outdoor shower, but I do need the shower parts that he used or something similar to make an indoor shower that will go along with the bathroom/shower that we already have. His video is found here. Making the shower itself starts about the 16-minute mark.
My First Build
Now, Dave Whipple used an antique sprayer, that I searched for on eBay for a while, until I finally started to search online for a new one. This is what I found: Stainless Steel Sprayer
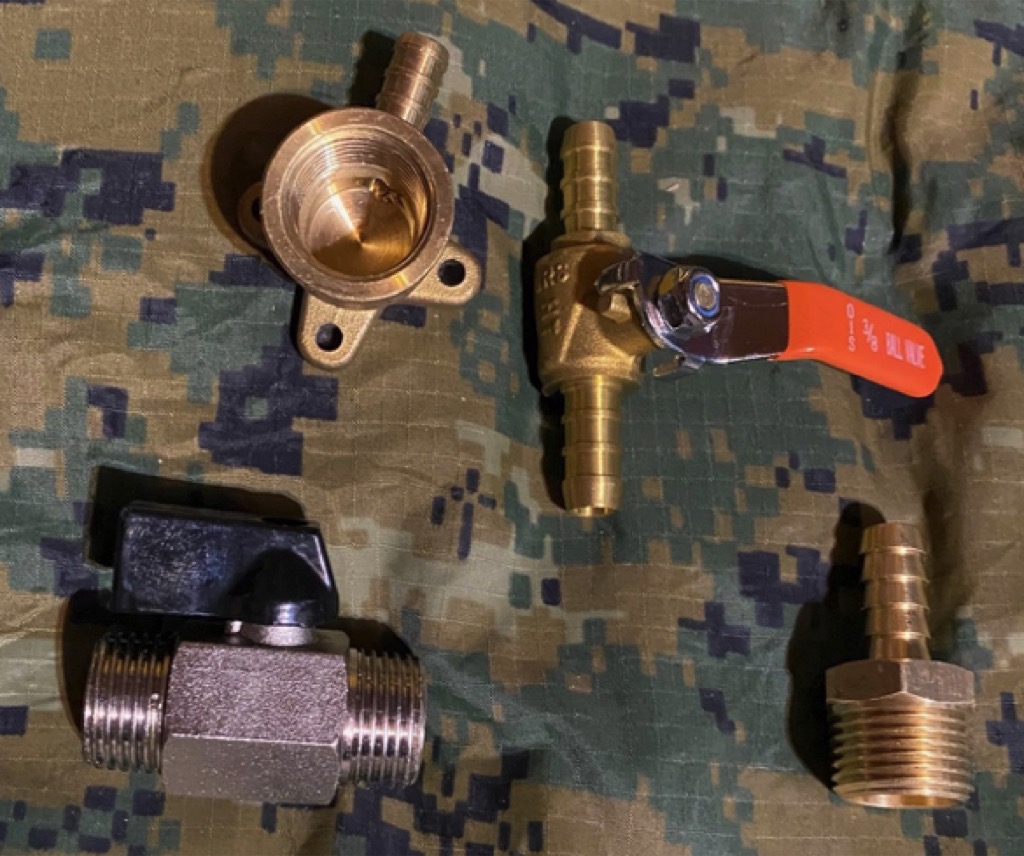
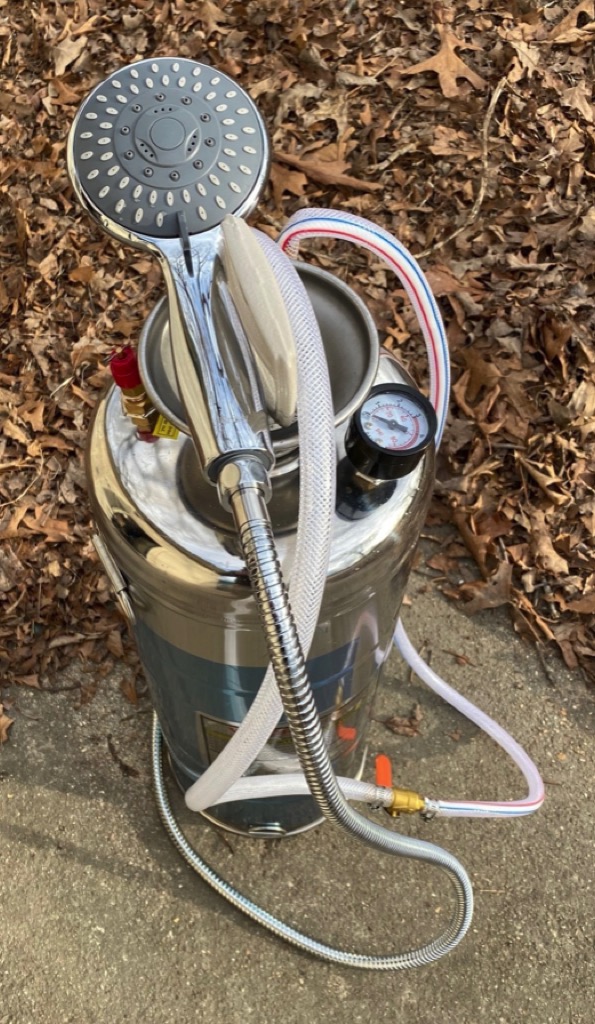 The sprayer has a 3.5 gallon capacity and it is sturdy and durable. For my first build I started by cutting the hose right where the handheld sprayer unit is attached. The hose is a 3/8”, so next I attached a 3/8” brass mini shut-off valve with barbs on both ends, to one end and secured with a pipe clamp. I also purchased a 10’ section of 3/8” high pressure, braided pvc clear tubing. I connected the other end of the mini shut-off valve to a section of the new tubing with a pipe clamp. Next I used a brass fitting that had a 3/8” barb on one end, and a male ½” threaded end on the other side. The 3/8” barb end I attached to the new hose (3 feet) and secured with a pipe clamp. The male ½” threaded end I screwed into the hose that came with the shower head.
For the shower head I ordered a Briout brand shower head that came with a 59” stainless steel hose. It is described as “High Pressure Handheld Shower Head Briout 5-Settings Powerful Water Spray Shower Head against Low Pressure Water Flow with Stainless Hose and Adjustable Mount”, and it cost just $16. This build was just a handheld shower, that is not mounted and very portable.
The stainless steel sprayer has a pressure gauge on the unit, and the directions say to pump it up to 45 psi (the red line), which takes about 50 strokes. After filling the unit about ¾ with water, I tested it, pumped it up to the desired pressure. Opened the shut off valve and watched the water flow from the shower head. The flow was pretty good, and would be enough to rinse your body, get your hair wet to shampoo, etc. About half the tank emptied and the water pressure dropped to zero. I pumped it up and finished emptying the tank. The water stream lasted for 1 minute 30 seconds for each run. It would be a little awkward to have to pump the tank, half-way through your shower in a small shower stall, but if you had someone outside the shower curtain, it would make it easier.
My Second Build
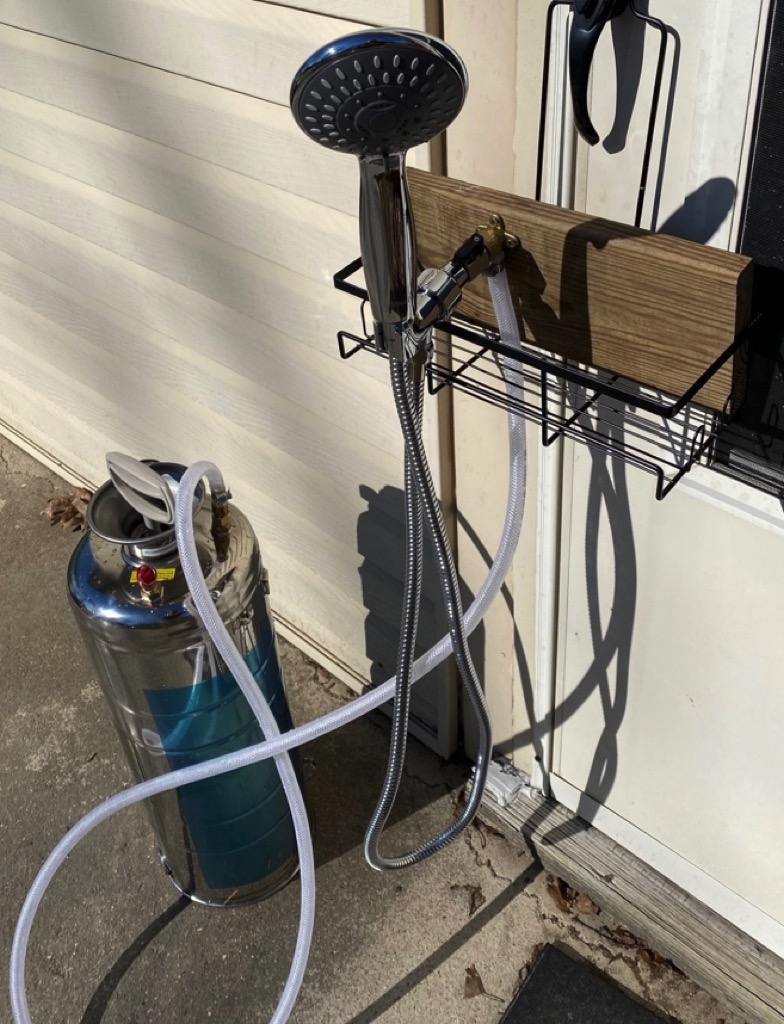 For my second build, using JWR’s advice, “two is one and one is none”, was designed to hang from the existing shower unit. My wife commented that we wanted to use both hands, and have it be more like a conventional shower. This time I cut the existing tubing off at the sprayer and used the 7 feet left of the braided PVC clear tubing. I used a pipe clamp to secure it. I purchased a shower caddy that hangs on the shower pipe coming out of the wall, when I put it together, I only used the bottom larger basket (see picture). I used a piece of treated deck lumber, gave it a shellac coating, and mounted a brass 3/8″ Pex x 1/2″ Female Elbow with Drop Ear with some brass screws I had. For the shower head, I ordered another Briout shower head and used the mounting bracket that came with the unit. I secured a shut-off valve to the mounting bracket, and then screwed that into the brass fitting, that was mounted on the board. The board was cut so that it fits securely in the basket.
It did fine in testing, but I will probably use some zip ties and make it a little more secure. Next, I attached the hose to both the shower head and to the mounting bracket. I only used a little Teflon tape (which was included with the Briout shower head) on the brass fitting that screws onto the board to allow the fittings to all line up.
It was time to test it. I had no leaks in testing. This time I filled the tank, 95% up with water. I could only pump about 10 times before the pressure value released some pressure after I pumped past the red line. Starting the stopwatch and releasing the on-off valve the spray was steady, but only ran for 30 seconds. After turning the on-off valve I pumped about 30 times, this time it ran for 1 minute and 10 seconds. Lastly I pumped about 60 times to reach the desired pressure, and it ran for 1 minute 40 seconds and emptied the tank. This set up definitely had more pressure and more capacity than the solar showers.
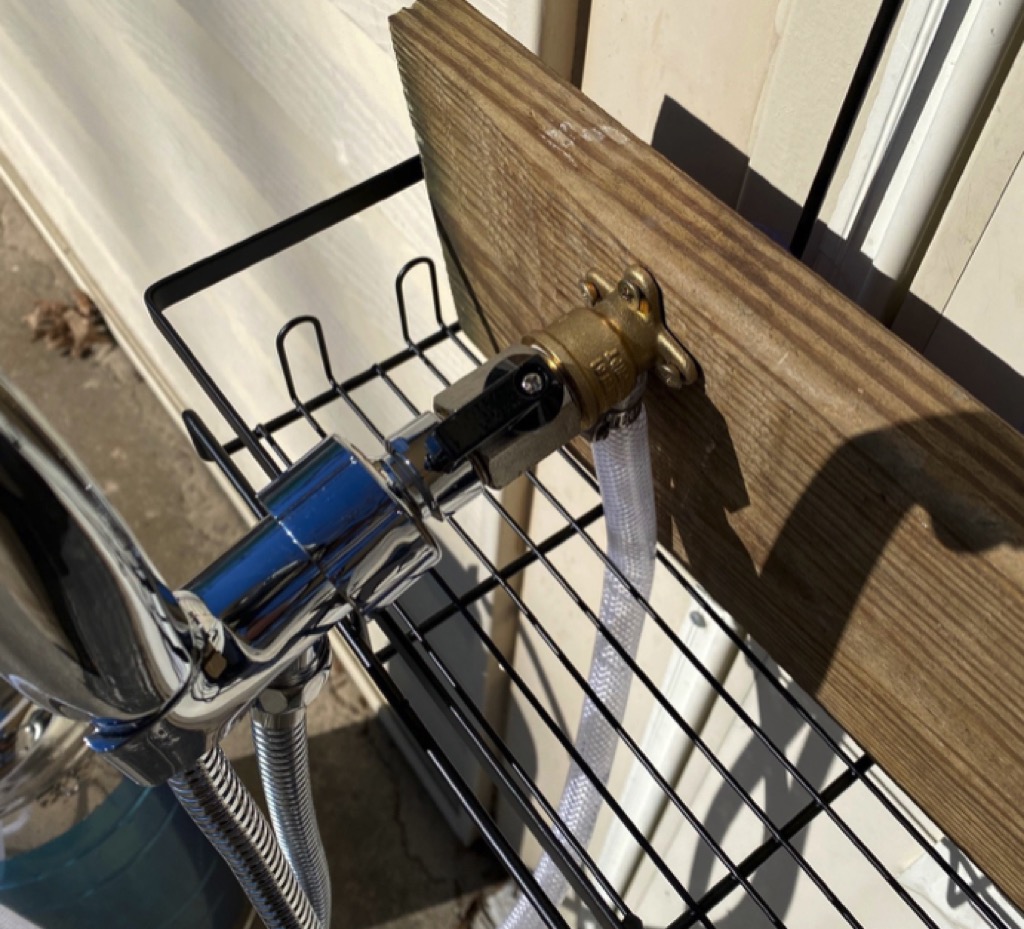
Here is a close-up of the connections and attachment to the board:
The Necessary Parts
I’ll share some costs and purchase options on the parts: As I mentioned the sprayer unit is from Vevor.com and cost $74 (plus shipping) about $80 total. The tubing is listed as 3/8″ ID x 10 Ft High Pressure Braided Clear PVC Vinyl Tubing Flexible Vinyl Tube, Heavy Duty Reinforced Hose Tubing, BPA Free and Non Toxic, it was $15. Next: 3/8 inch brass mini shut off ball barb valve for water fuel hose gas line rv air tubing, straight inlet manifold petcock 3/8 fuel shut off valve (2pcs with pipe clamps), it was a two-pack for $12. Next: SUNGATOR Hose Barb Fittings 3/8 Inch Barb × 1/2 Inch NPT, Brass Air Hose Fittings, 3/8″ to 1/2″ NPT Male Air Line Repair Connector Kit, $8 for a two-pack. The Briout shower head was $16. Final cost for the first build was $131 with some left-over pieces.
The second build I used another sprayer unit, $80, the rest of the tubing $0, 2 Pcs. XFITTING 3/8″ Pex x 1/2″ Female Elbow with Drop Ear, $9. (This piece was screwed to the board). Next: ChillWaves Brass Mini Ball Valve, Shut Off Switch Ball Valve 1/2″ NPT Male x 1/2″ NPT Male Thread Pipe Fitting (2-PACK), $15 for two-pack, this piece screws into the brass fitting and the shower mounting which was included in the Briout box. Another Briout shower head cost $16. I used 2 more pipe clamps that came with the shut-off valve in build #1. Next: “Shower Caddy Hanging Bathroom Organizer: Rustproof Shelf for Inside Shower – No Drilling Racks Over Showerhead – Bath Shelves for Shampoo Soap”, $17. This was the shower caddy that I used.
When I put it together, I only used the lower larger shelf, so it would hang below our existing shower, I also mounted it a little off-center on the board, so that it would hang clear of the existing shower. (See photo, above.) The board was just some free scrap wood, left over from a deck project. So, my total cost on the second build was $137 with some left-over parts. Some of these parts I found locally, and some I purchased on Amazon.com. If you search using the descriptions on Amazon they should pop up for you.
Here is a close-up picture of the key pipe fittings that are needed:
One advantage of the all-metal container is it could be directly heated by our fireplace insert, just setting it on top of the metal stove insert while a fire was going. We planned on just using the water kettle and filling it up with hot water mixed with cold water.
Granted, this is intended as a winter solution for providing a shower. During cold weather it would be set up inside the existing shower stall in my house. But in the summer you might as well use the many solar shower units that are widely available.