


The Benelli M4 is the civilian version of the M1014 semi-automatic combat shotgun that was developed for the United States military in 1998 and taken into service in 1999. The M4 or the M1014 is now used by military or law enforcement agencies in Austria, Belarus, Belgium, Georgia, Ireland, Libya, Malaysia, Portugal, Serbia, Slovakia, Slovenia, Spain, Ukraine, the United Kingdom, and the United States, among others.
Its unique “auto-regulating gas operated” (ARGO) system uses an elegantly simple arrangement of two pistons that push directly against the bolt. The system allows the shotgun to be used with intermixed rounds of different lengths and various power levels without the need for any operator adjustment.
The civilian version that I tested has a capacity of 5+1 in its tubular magazine, in contrast to the 7+1 capacity of the military version. The civilian version is also equipped with a standard buttstock rather than the collapsible buttstock of the military version.
The M4 operated with 100% reliability throughout my testing. It is a rugged and ingenious design that is well executed with absolutely no extraneous tool marks or other blemishes. It was also a lot of fun to shoot.
At the time of this writing, the M4 Tactical Shotgun had a manufacturer-suggested retail price of $2,299 at benelliusa.com . If you need a tactical shotgun and don’t mind paying top dollar for the best, then you should definitely take a look at the M4.
Background
I had often seen the M4 referred to in works of fiction and non-fiction alike. So, as I visited the Benelli website recently to see if they had anything that I would like to write about, the M4 quickly caught my eye. I contacted Benelli to see if they could loan me a sample for testing and evaluation. They were kind enough to agree. Before long, I received a tracking number. Not long after that, the tracking number indicated that the M4 had been delivered to the gun store that handles my firearms transfers for me. I eagerly made my way to the store and picked up the M4.
First Impressions
The weight of the box was quite a contrast to the weight of the box with a Christensen Ranger in .22LR that I recently reviewed. The Ranger box felt empty. The M4 box most definitely felt full.
This was not due solely to the weight of the M4, which weighs only 7.8 pounds. Another significant factor was the weight of the manual, which is written in Italian, English, French, German, Spanish, and Russian. The box also contained a bottle of Ben Oil, and a choke tube wrench.
I consulted pages 28-30 of the manual regarding how to assemble the M4. The two fore-end shrouds on the sides of the barrel were new to me in spite of all my years of shotgun use. The shrouds contain the pistons for the ARGO system.
I removed the choke tube to identify which choke was installed. In the process, I discovered that there are notches on the tube which allow the choke to be identified without the need to remove it. That is a nice touch. The M4 that I tested came with the modified choke tube installed.
There are attachment points on both sides of the buttstock for a sling. The shotgun shoulders well. The trigger is quite acceptable.
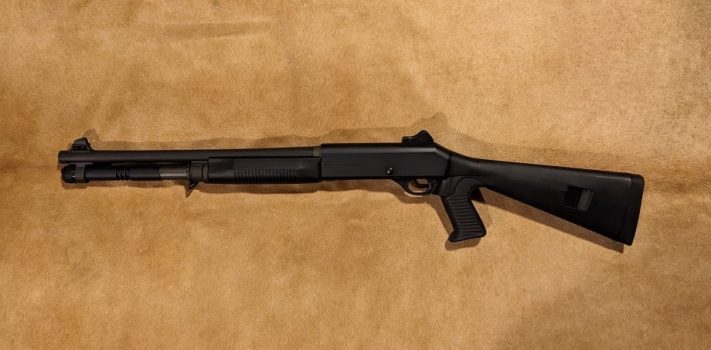
The barrel is 18.5 inches long. The chamber accepts shells up to three inches in length. It comes with black, synthetic furniture. The metal components feature a matte black phosphated finish.
The recoil pad was more firm than I had expected. As I age, I am becoming somewhat recoil-adverse. Much to my surprise, I did not notice the recoil during my testing.
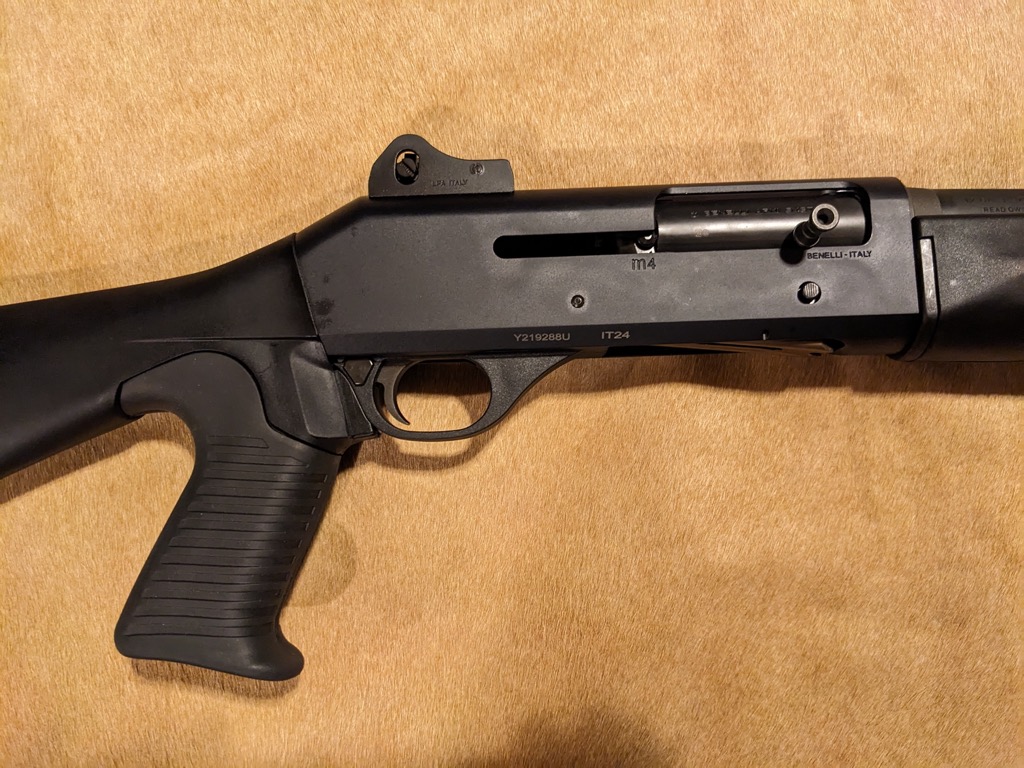
The pistol grip is slightly on the beefy side. I liked the way that it filled my hand.
The M4 came with ghost ring sights pre-installed. The top of the receiver was also drilled and tapped for an optics rail that was not installed.
Overall, I found the M4 to exhibit a serious, task-oriented design with no frills or other decorative touches. It is made to do a job, not to be ornamental.
Reading the Manual
The English section of the manual was printed on pages 23-44. It starts with the basic rules of gun safety. The rules refer to bullets rather than shot or slugs, so they are not shotgun-specific.
The manual notes that a number of military and police forces use the M4. It also tells a little about the twin gas cylinders that operate the rotating bolt. That bolt, in turn, employs two locking lugs. I should note here that the locking lugs are exceptionally rugged.
The manual is well written and excellently illustrated.
The disassembly instructions are extensive. The process is well conceived, requiring no additional tools (with the exception that I found the blade of a Swiss Army Classic SD Knife essential for removing the locking head pin from the bolt).
The manual recommends cleaning the M4 prior to use, after each range session or after every 250 rounds, whichever comes first.
The manual only described the military or law enforcement version that comes equipped with a telescoping buttstock. There was no information about disassembling the civilian, non-telescoping buttstock.
The windage and elevation screws on the ghost ring sight can be adjusted with a coin or the rim of a shell.
Trigger Pull Weight
I measured trigger pull weight using a Ready Up Gear Digital Trigger Pull Weight Gauge. My series of five measurements ranged from a low of 5.7 pounds to a high of 6.93 pounds. The average was 6.09 pounds, and the mean was 5.94 pounds.
Disassembly and Pre-Cleaning
I used the following steps to disassemble and pre-clean the M4:
1. Pull the cocking lever back. If it does not lock open, press the cartridge drop lever.
2. Unscrew the fore-end cap.
3. Slide the barrel forward. Remove the twin forearms.
4. Remove the barrel-breech unit from the receiver.
5. Hold the cocking lever, press the carrier button, and gently ease the bolt forward.
6. Twist and pull off the cocking lever.
7. Remove the bolt assembly from the receiver by pulling it forward.
8. Remove the firing pin retention pin while holding the firing pin and firing pin spring inside the bolt.
9. Remove the firing pin and the firing pin spring from the bolt.
10. Remove the locking head pin.
11. Remove the locking head from the bolt.
12. Use the cocking lever tip to begin pushing out the trigger guard pin.
13. Use the end of the cocking lever to pull the trigger guard pin until it is fully extended.
14. Press the carrier button and extract the trigger guard assembly toward the front of the receiver.
15. Using the cocking lever, remove the gas cylinder plugs.
16. Remove the gas pistons from the front of the gas cylinders.
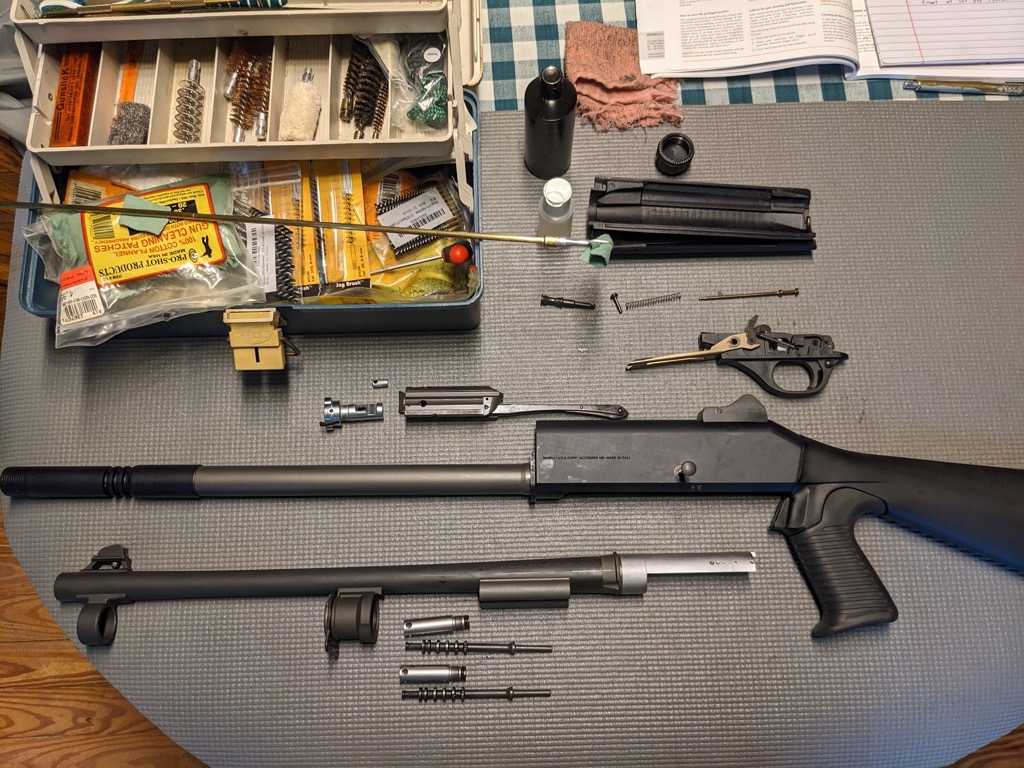 Once the M4 was disassembled, I swabbed the barrel with solvent patches until one came through clean. Then I swabbed the barrel with a dry patch followed by a patch with Breakfree CLP. I repeated this process with the accessible metal surfaces of the trigger guard assembly, bolt assembly, and gas pistons. I used minimal CLP on the gas pistons and wiped as much excess away as I possibly could, since any residue left on the gas pistons will carbonize when the M4 is fired.
I reassembled the M4 with no parts left over, which is always a good sign. I then function-tested the shotgun.
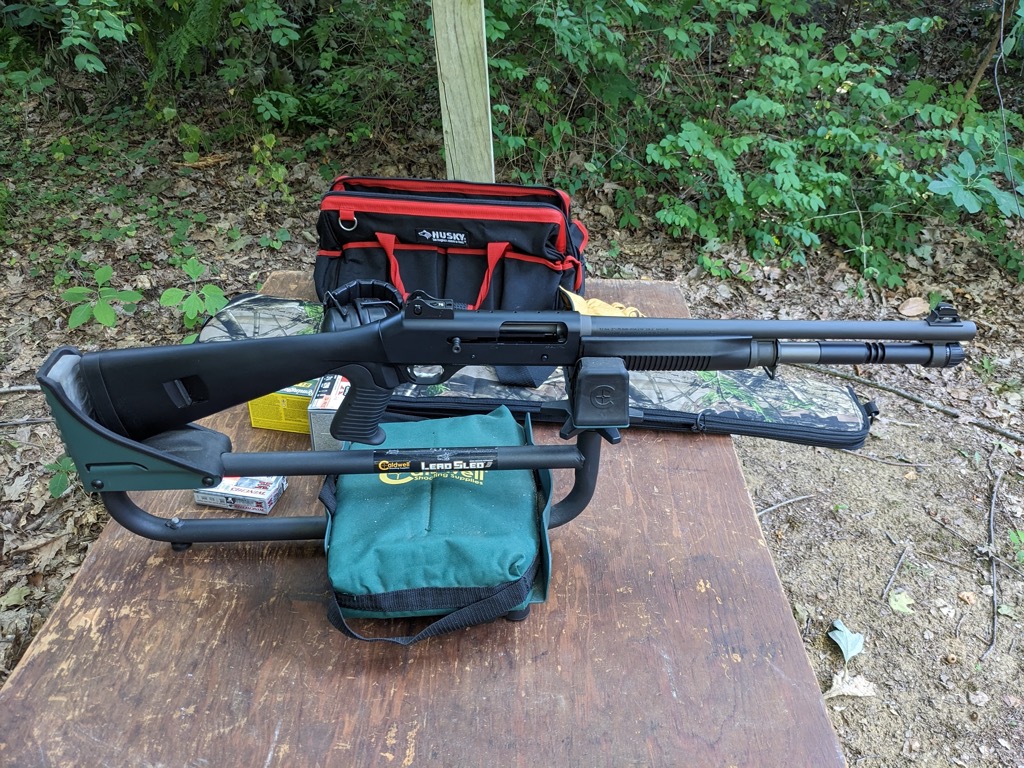
At the Range
It was a somewhat sticky evening in late summer. The temperature was 90 degrees Fahrenheit, and the humidity was extremely high. There was just enough breeze to discourage the mosquitoes.
I made my way to the improvised range behind my pole barn. I set up a target stand in front of the backstop, and then set up a table 25 yards away from the target stand.
 I first verified that the tubular magazine would indeed hold five rounds. I then cycled the bolt by hand to eject the shells that I had loaded. The loading and cycling processes both functioned smoothly. Next, I loaded a single round of Wolf 1 1/8 ounce 2¾ inch rifled slug. I fired at the target. The muzzle flash of the M4 blazed like lightning through the lengthening shadows of the evening. The shot was on paper, so I loaded and fired two more rounds. The resulting group was 2.52 inches.
I found the ghost ring sights to be easy to acquire and effective in use.
Three shot groups using Remington Slugger 2¾ inch 1 ounce 1560 fps and Winchester SuperX 2 ¾ inch 1 ounce 1,600 fps each produced groups that were 1.15 inches in size.
 I patterned the M4 at 15 yards using Winchester SuperX 2 ¾ inch 1 ounce of #8 shot at 1,290 fps. The pattern was eight inches in size. According to Jack O’Connors classic 1961 work The Complete Book of Rifles and Shotguns, at 15 yards modified choke would be expected to produce a 16-inch pattern while full choke would be expected to produce a 12-inch pattern. I am consistently amazed by how much tighter patterns are produced by modern shotshell designs. The plastic wads that protect the shot from deformation in the bore are probably the single greatest factor in this improved performance.
Final Cleaning
The final cleaning followed the same pattern as the pre-cleaning with the exception that the M4 was much dirtier after having been fired.
The final cleaning gave me one last chance to admire the engineering and craftsmanship of the M4. The shotgun is unusually well-designed and well-made.
Conclusions
If you need a tactical shotgun and can afford the M4, then it is the one to buy.
I do have three small suggestions to make this excellent tactical shotgun even better.
First, I would love to see a version of the M4 that has undergone the Benelli Surface Treatment (BE.S.T.). Using nanotechnology and diamond-like carbon particles, the BE.S.T. coating is unusually effective in enhancing corrosion resistance.
Second, I would love to see a version of the M4 in 20 gauge. As I mentioned above, I have become somewhat recoil-adverse over the years. The recoil of the M4 in 12 gauge was not significant, but it would be even less significant in 20 gauge.
Third, I would like to see filler screws in the holes for the optic rail to prevent any damage to the threads prior to the installation of a rail.
Other than that, I can’t think of any way to improve the M4. It is a great tactical shotgun. I highly recommend it.
Disclaimer
Benelli loaned me a sample of their M4 Tactical Shotgun for testing and evaluation. Christensen Arms loaned me a sample of their Ranger in .22LR for a recent review. Ready Up Gear provided me with a sample of their Digital Trigger Pull Weight Gauge for a previous review. I tried not to allow the kindness of these vendors to interfere with my objectivity in this review, and I believe that I have succeeded. I did not receive any other financial or other inducement to mention any vendor, product, or service in this article.