By using a standardized set of tags you’ll ensure everyone’s notes are categorized consistently, which makes it a lot easier to manage a lot of notes from a lot of different people on your home Intel system. Every note should have at least one standard tag in it. I recommend that you use separate smaller notes for each separate observation or thought instead of having a single large note with a lot of different tags in it, which simplifies management. This ensures that each note file will have its own unique creation date/time, which helps with understanding timelines when you’re analyzing the collected information later on.
I also recommend that you create a new Obsidian vault for every trip and delete all previous note vaults after you’ve uploaded them to your central intel system. That way you limit the amount of information a malicious person can find if they get hold of your phone.
Adding new notes in Obsidian is pretty simple – just hit the plus sign (‘+’), give your note a title, add a tag and begin writing. There’s a ton of good help documentation [1] on using Obsidian available online so I’m not going to go into any more detail here. One thing to be aware of is that a lot of the help information discusses with desktop version of Obsidian, which we’ll be discussing in a future article as part of a central intel management system, so be careful of getting into it too deep. For field data collection all you really need to worry about is simply adding notes and tags to notes.
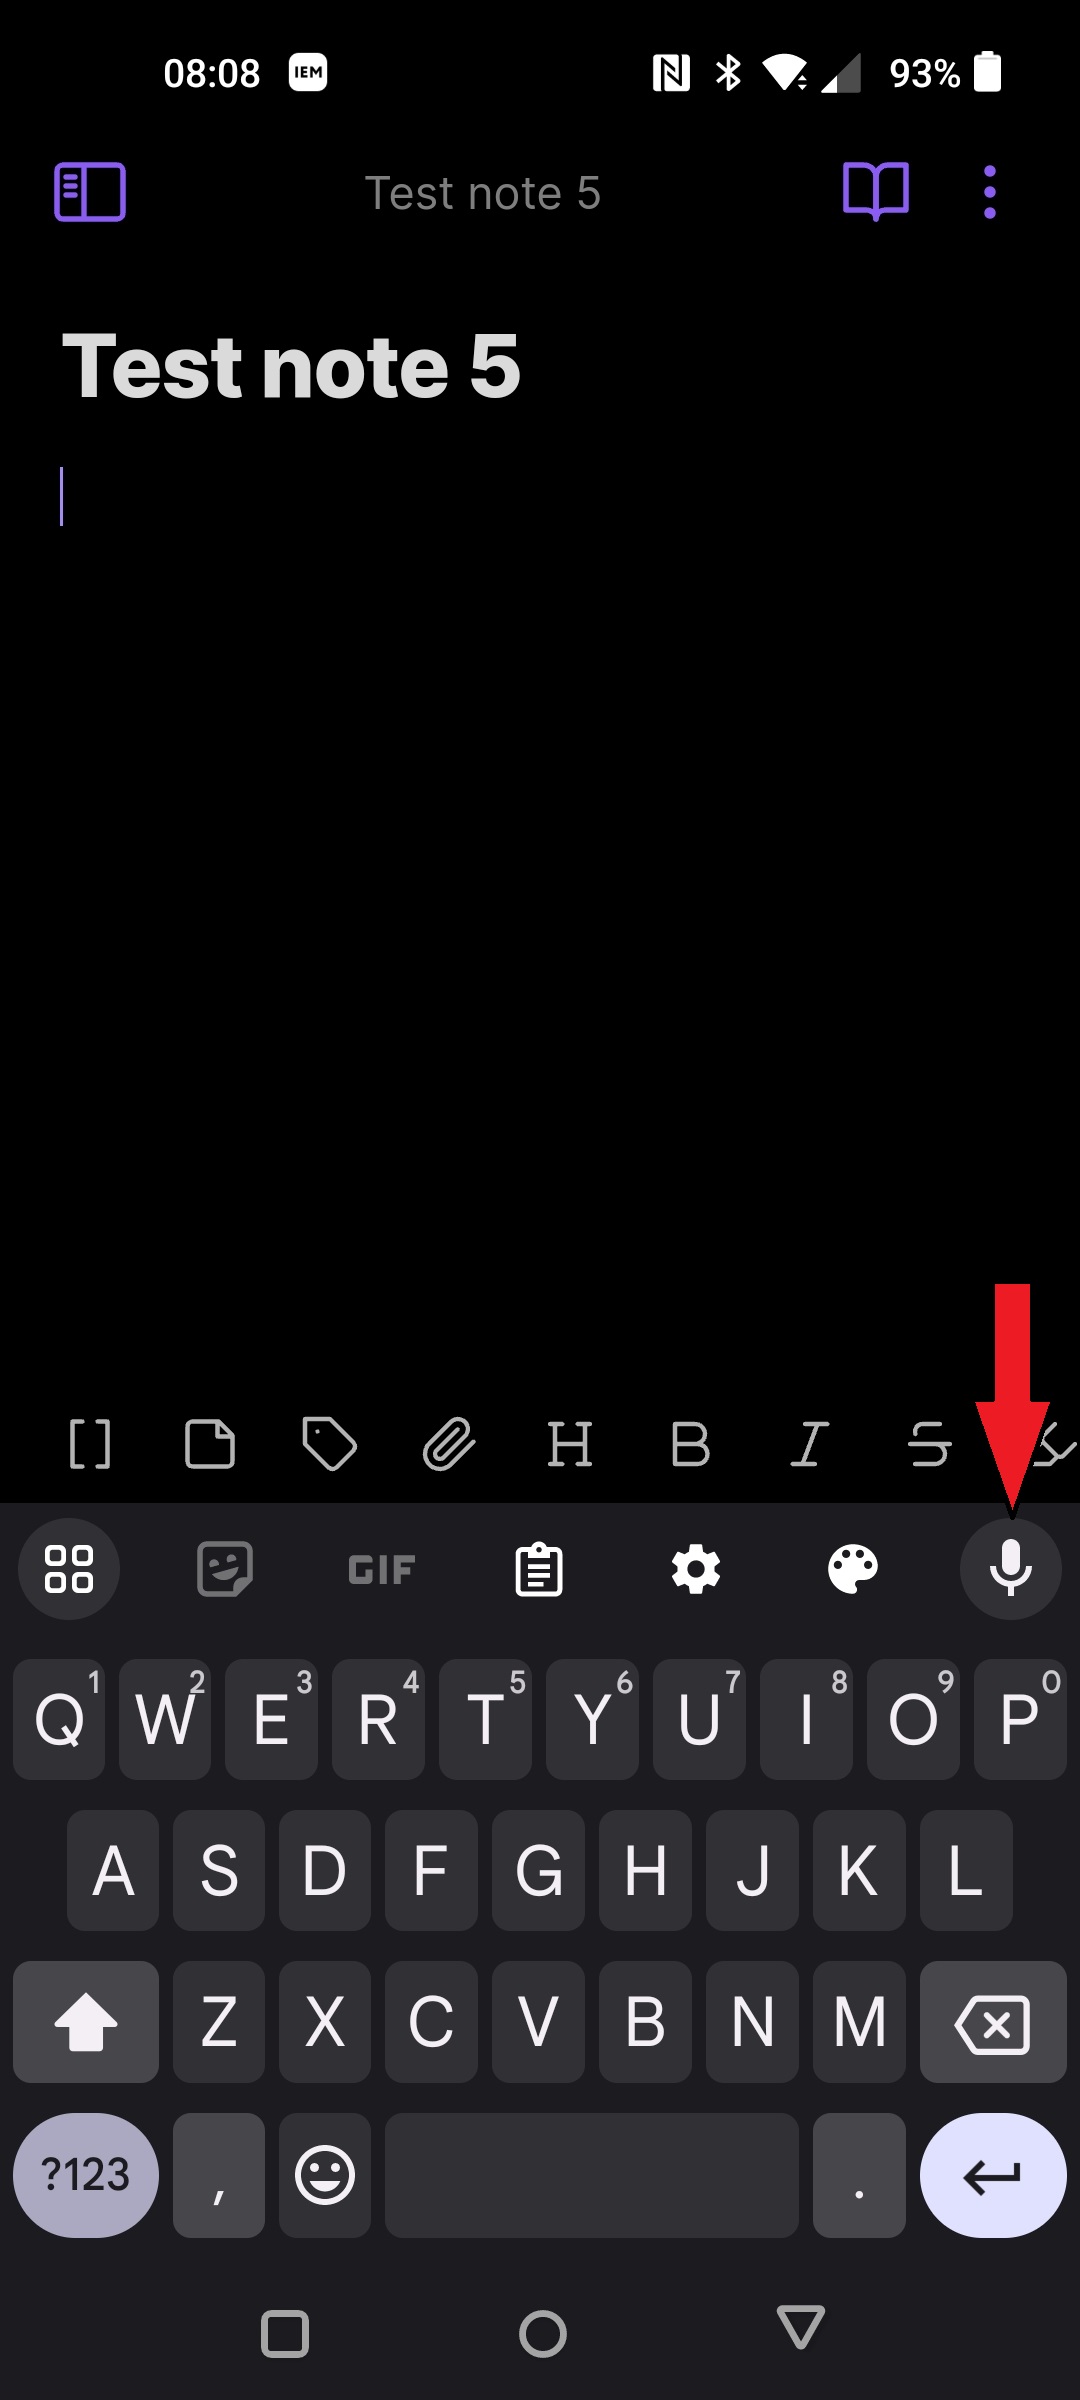
A tip on entering text when creating notes – if you’re over 20 years old or have sausages for fingers like me, typing on the little on-screen keyboard can be an exercise in futility. One feature that the default Android Google Gboard on-screen keyboard provides is the ability to transcribe notes by speaking them, even if you’re offline. If you need to enter a note and you’re somewhere where talking out loud won’t get you into trouble, just click the little microphone icon on the top right of the pop-up keyboard, talk clearly and slowly into the microphone, then click the icon again to stop. Android will transcribe your speech into text in your note. The red arrow in the picture below shows the voice text entry button on the keyboard:
 [2]
[2]
While Obsidian provides a powerful note-taking capability by itself, there are also a lot of additional plugins available for it that can allow you to do even more. One plugin I recommend is Tldraw [3] – it allows you to sketch simple diagrams and handwritten notes, which could be useful for documenting things where pictures or videos might not convey all of the information. Adding plugins is pretty simple – just click on the navigation icon in the upper left corner, click on the gear (Settings) icon in the upper right corner, select ‘Community Plugins’, click on ‘Browse’ and search for ‘tldraw’. Note that you’ll need to disable Restricted Mode in order to install and use community plugins, and you’ll need to manually enable the Tldraw plugin after you’ve installed it. Tldraw drawings are saved in the same markdown format as notes, and each drawing is saved as a separate file in a subfolder called ‘tldraw’ in your vault.
Obsidian is very powerful note-taking app, and as such it can be a little hard to get started. I highly recommend spending some time on YouTube and watching some of the excellent getting started videos – just search for ‘obsidian mobile [4]’ to find an extensive list of options.
OsmAnd
While Obsidian on Android is a great app for taking longer notes, it lacks two feature that I consider critical – the ability to directly generate media like pictures, videos and audio recordings in notes, and the ability to easily add geographical information (geotagging) to notes or embedded objects. While you can import media and files you’ve created with other apps into Obsidian notes, there’s no ‘take picture/video/recording’ button in the app. In order to support these features (and more) I use OsmAnd+ in conjunction with Obsidian. Setting up OsmAnd+ is pretty simple – first download and install the app (as I mentioned the ‘+’ is the premium version – I’ve used it for years but for field intelligence collection the standard free version will work fine). The first time you run it you’ll need to set a few things up:
- Click the ‘three-bar’ menu icon in the lower left corner, click on ‘Settings [4]’, click on ‘OsmAnd settings’, then click on ‘Data storage folder’ – this will allow you to change the storage location to your microSD card in your phone. It will present a list of storage options – the one you’ll want to select should have an icon for a microSD card on the left and be labeled something like ‘Multiuser storage 2’ (it should be one with an icon of a microSD card and contain the ‘obb’ folder). Once you’ve selected it you’ll be prompted to move all files to the new storage location. Write down the last part of the path of the folder you selected on the microSD card, which will typically be something like ‘Android/obb/net.osmand’ – you’ll need to know this folder path later on.
Go back to the main window, click the ‘three-bar’ menu icon in the lower left corner, then click on ‘Plugins’. Click on ‘Audio/Video Notes’ to install that plugin. You can also select any other useful plugins like ‘Topography’. - Go back to the main window, click the ‘three-bar’ menu icon again, then select ‘Maps & Resources’ and download the maps for your local area (this assumes you’re connected to the Internet). I recommend downloading maps for everything within at least a hundred miles around you, since they don’t take much space. Note: when I’m traveling with my intel mobile device I also download all the maps between my destination and home, then just delete them when I get home. You’ll need to occasionally connect to the Internet, run OsmAnd, go to ‘Maps & Resources’, then click on the ‘UPDATES’ tab at the top to update your downloaded maps (typically every month or so).
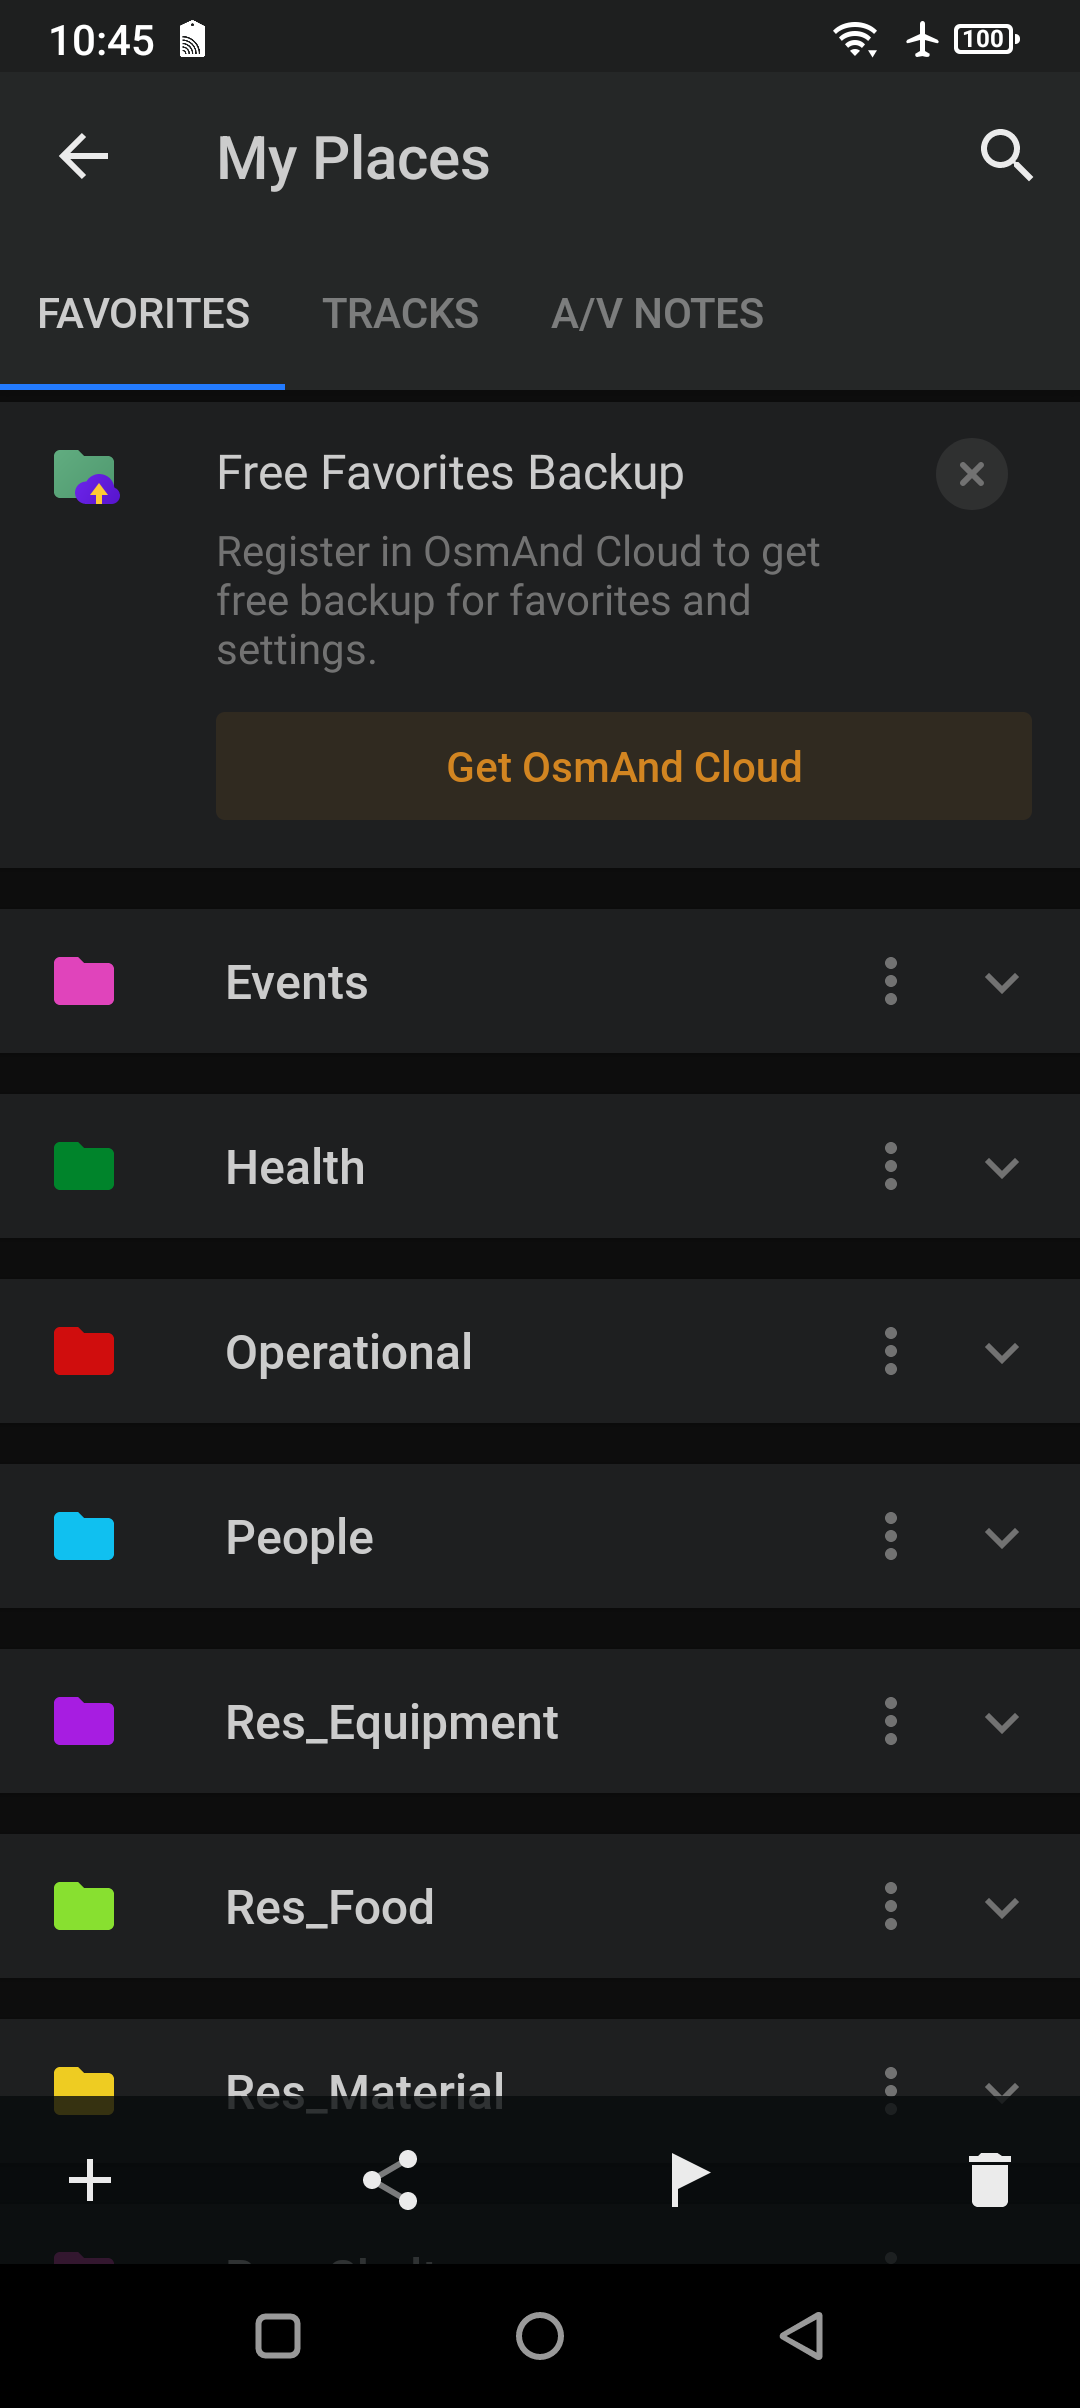
- And finally, go back to the main window, click the ‘three-bar’ menu icon again, then select ‘My Places’ and click on the plus sign ‘+’ in the lower left corner – since there aren’t any favorites yet it’ll show a button to ‘Import’ favorites, which in turn will bring up a file navigation window. Navigate to the ‘Documents’ folder on the microSD card (or wherever you downloaded the two seed files) and click on the ‘osmand-favorites-groups-all-seed.gpx’ file you downloaded earlier. This will import and create the various ‘Favorites’ categories that you’ll assign things to in OsmAnd, similar to the tags you use in Obsidian so things are categorized consistently between the two apps. Note that in order for this to work I had to actually create a favorite item for each category in the seed file – you can’t just add the category names themselves – so I created one fake favorite for each somewhere in the middle of Kansas.
Now that everything is set up we can use OsmAnd to collect, categorize and geotag information, even if GPS is unavailable. To add a short categorized and geotagged note, move the map around the screen until it shows the area you’re in (assuming GPS isn’t already showing your location) and tap and hold the location where you want to add the note – a menu bar will pop up on the bottom of the screen:
 [5]
[5]
Click on the ‘Add’ star button on the left side which will bring up the ‘Add Favorite’ screen:
 [6]
[6]
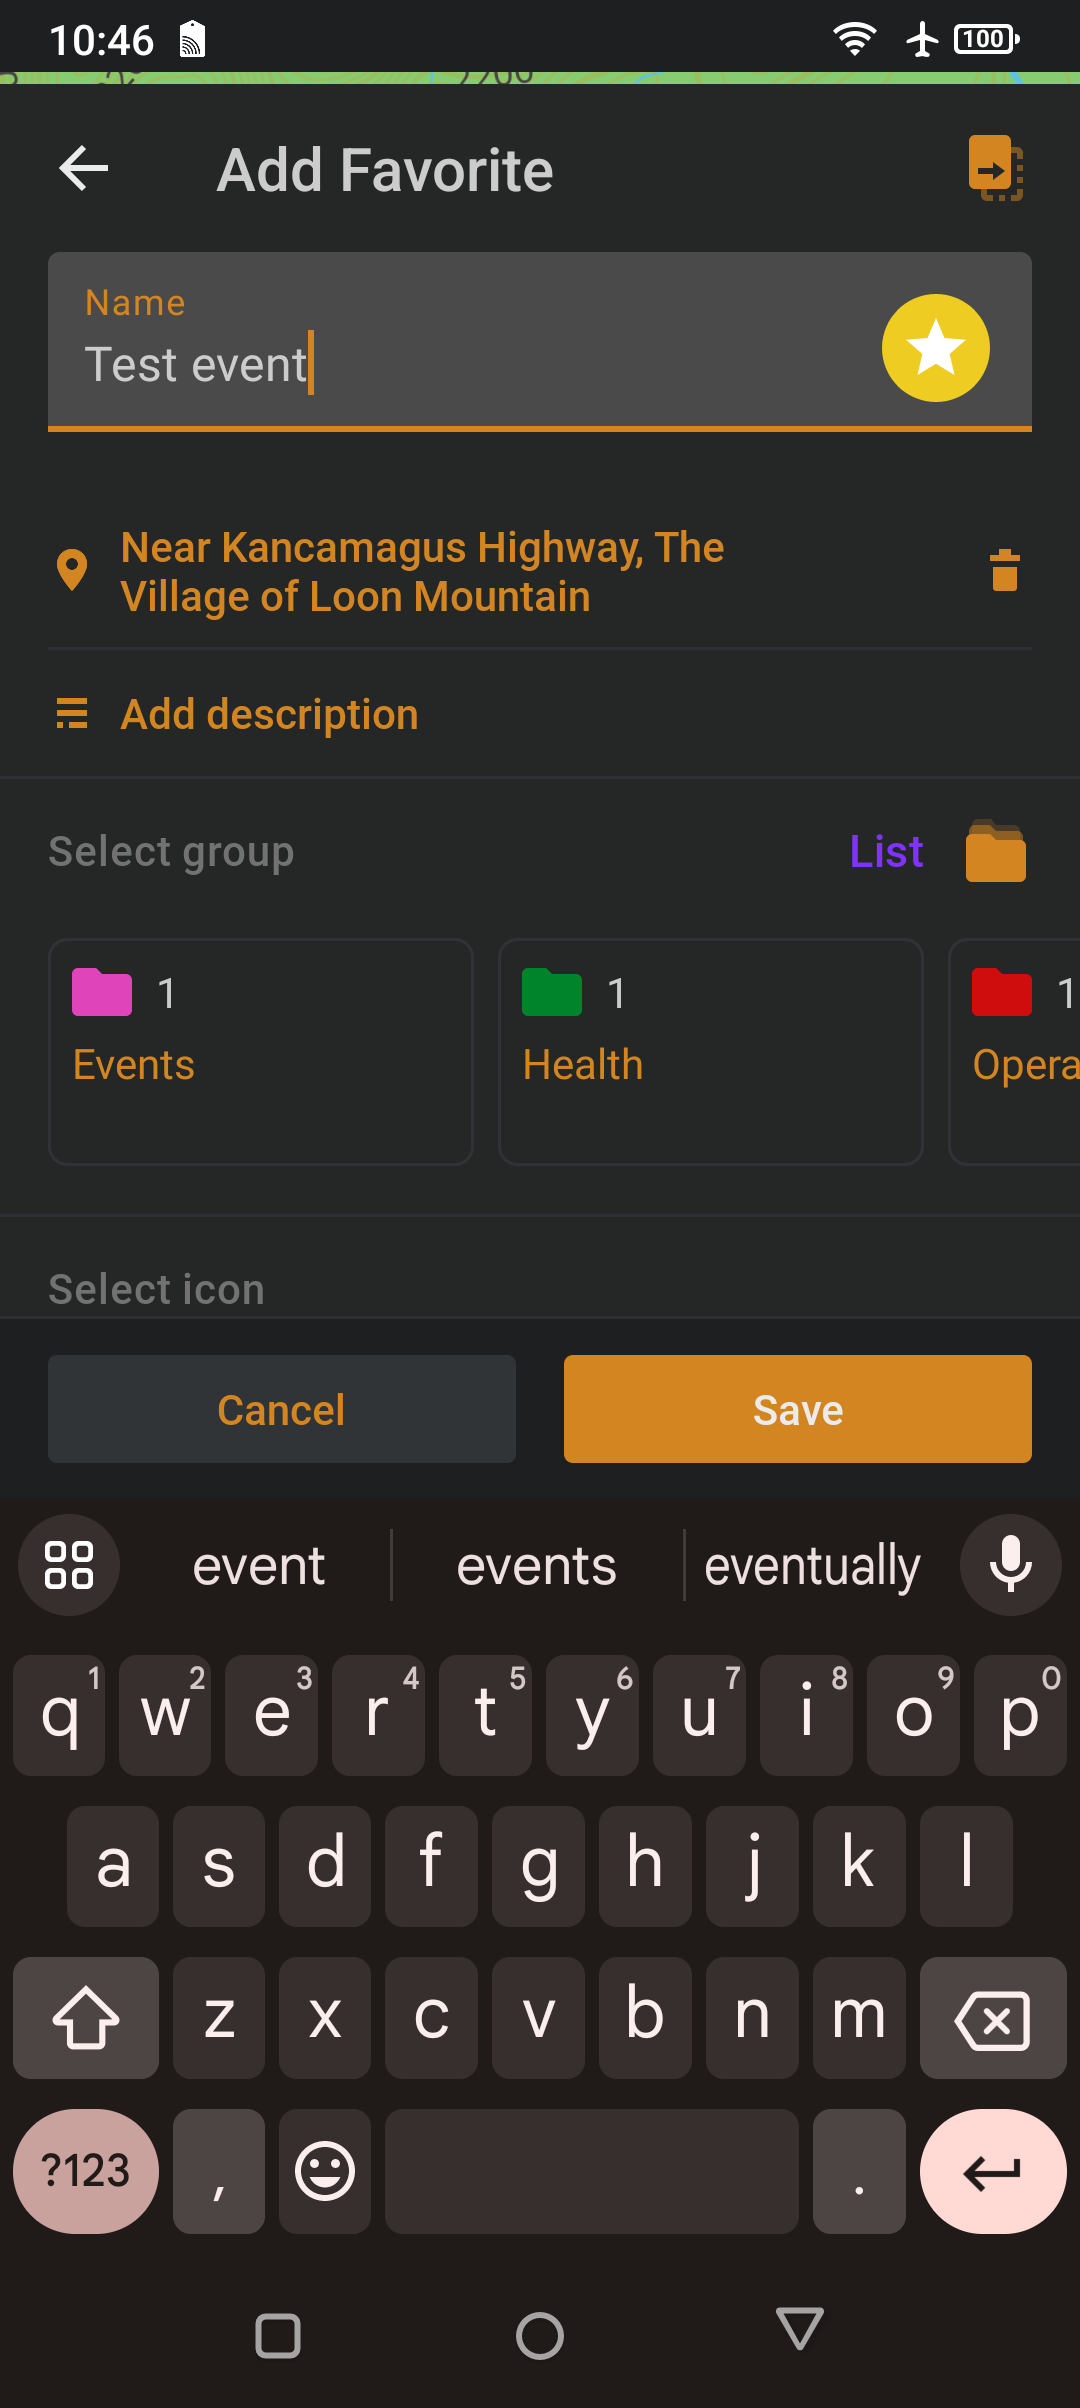
Click on ‘Add Description’ and enter a short note (e.g. ‘Wild raspberry bush’, ‘Heard gunshot off to the east’, etc.), then select the category group from the list (you can scroll side to side to find the most appropriate one). This will add a favorite to your map using the color and icon from the pre-defined seed list you downloaded and imported earlier, which OsmAnd stores using the lat/long coordinates of the location you selected on the map. This only works well for short notes with a few words – if you need to add a lot of detail you’re better off just adding a favorite in OsmAnd with a reference to a longer note you create in Obsidian.
(To be continued tomorrow, in Part 4.)