If you’re reading SurvivalBlog it’s a safe assumption you use a computer of some type, and you probably also use your computer for more than just surfing the Internet. One of the nice things about computers is that they make creating, editing, storing and moving large amounts of information a lot easier than trying to do everything with pen and paper, and a decent laptop with some solar panels for charging can operate for years even after the grid goes down. This allows you to easily create, edit and view things like inventories, maps of cache locations, communications SOPs, defense plans, codebooks, intelligence files, and lots of other useful but potentially sensitive information.
One of the big downsides of documenting any information is that once it exists, it can potentially be discovered and used by bad people, companies or government agencies that want what you have, want to know what you have or don’t want you to have it. This can include things like a burglar holding a gun to your head, a tech company collecting data on your activities ‘for your benefit’, a hacker living in their parent’s basement or a tyrannical government with an illegal warrant. They can either try to break in and steal your information or coerce you into giving it up. With hardcopies you may be able to come up with some clever hiding place to reduce the risk of your information being found or coerced out of you, but once it’s on a computer protecting it becomes a lot harder. The goal of this article is to provide a method of hiding and protecting your sensitive information from a lot of different risk scenarios, as well as providing you with some ‘plausible deniability’ in the event you’re forced to give up things like passwords.
One of the most common methods for protecting sensitive information on computers is encryption, which basically translates your data into unreadable characters; you need to know the secret password (referred to as the ‘key’) to translate it into something readable and usable. One of the biggest weaknesses of this approach is that you can potentially be coerced using either force or other more subtle means into giving up your key, giving the person, group or agency doing the coercing full access to everything you’re trying to protect. The method I’ll be discussing provides a capability to give the coercer a password that provides access to a completely different set of decoy files while still protecting your actual critical files.
For illustration purposes I’m going to be using Windows 10 in my examples, but most of the tools I’ll be discussing are also available for MacOS and Linux. I’ll also be using English for the language, but most of the tools also support different languages.
My goals for this approach were:
- Protect files/data from unauthorized access
- Create plausible deniability for files/data in the event you’re coerced into giving up a password
- Increase the privacy of your files/data by minimizing the amount of information tech companies can gather on your activities
- Be portable so it can be used across multiple computers and stored in a safe or fireproof box for protection
Note that for this solution to work on Windows 10 you’ll need access to a user account that has Administrator privileges – this is because the software has to install a temporary device driver to provide access to the encrypted volume. I haven’t done this on MacOS or Linux, so I can’t speak to what’s required on those operating systems.
This article is fairly long and will probably be spread out over several days, so I recommend that you wait and read the whole thing before you start following any of the recommendations.
Hardware
The actual computer you use for configuring and running this solution isn’t that critical – I’ve used it on dozens of different systems for years and it’s always worked. Note that if you run this on a really old computer you won’t get the best performance, since encrypting and decrypting data is a pretty CPU-intensive activity, so you’ll probably notice some slow downs.
For the storage itself you can just use the local disk already in your computer if you want, but I highly recommend using a removable storage device since that will allow you to easily access your files across different computers, physically hide the removable device to reduce the risk of it being found, and store it in a safe or fireproof box to protect your sensitive files.
For the removable device you have a couple of options – you can use a standard USB flash drive [1] or an external USB Solid State Disk (SSD). If you’re only going to be working with a small number of simple text files infrequently, a regular USB flash drive is fine, but if you plan on having a large number of complex files that you’ll be working on frequently I highly recommend getting a USB SSD. USB flash drives are primarily designed for basic operations like copying files to and from the device, while SSDs have a bunch of intelligence built in that optimizes the types of operations we’ll be doing. The one I currently use is a Nextac 250GB External Solid State Drive [2], which provides great performance and decent storage capacity at a reasonable price. Storage is cheap these days, so whichever option you chose I recommend getting the largest capacity you can comfortably afford.
If you’re going to use the internal disk drive on your computer or re-use a removable storage device you already have, make sure you have enough available storage before you get started. I recommend figuring out what you think is the largest amount of files or data you’ll ever want to protect, then adding 50%. You’ll see the reason for the extra space later on.
Foundations
The foundation for this solution is a free and open source application called VeraCrypt [3], which is an encryption tool. It provides an extensive array of encryption options, and its source code has been independently audited to verify there are no hidden gotchas like government backdoors or data-stealing malware. The version I’m currently using is 1.24. Start by downloading the latest version of VeraCrypt from here [4] and installing it on your computer. The installation process is pretty simple – just double-click on the VeraCrypt .exe install file you downloaded and follow the prompts. Where you install doesn’t really matter, since you’ll probably be uninstalling it once you’re done (more on that later).
You’ll also need to understand the concept of a storage ‘volume’ or ‘partition’ in Windows for this all to make sense. Volumes and partitions aren’t exactly the same thing, but for the purpose of this article I’m going to use the word ‘volume’ to represent both. If you open File Explorer in Windows you’ll see a list of various storage locations in the left-hand column. This will include things like ‘Desktop’, ‘Documents’, ‘Downloads’, etc., followed by a bunch of named storage volumes with drive letters and a colon in parenthesis, such as ‘Windows (C:)’. You may also see some network drives mounted further down the list. Each of those named/lettered items is a storage ‘volume’, which is a defined chunk of storage assigned a name and drive letter and formatted with a file system. Note that a single physical storage device like a disk drive or a USB flash drive can actually have more than one storage volume created on it, and you can have ‘virtual’ volumes, which is what we’ll be doing later on.
Before proceeding to the next step, locate or create a bunch of semi-sensitive files to use for decoys. These files should be anything that someone could reasonably believe you’d want to hide or protect – they could be older bank statements with semi-sensitive financial data, a partially completed book manuscript, something embarrassing like pictures of Hillary Clinton in lingerie, fake communications SOPs, maps with cryptic markings, etc. These files will be analogous to a throw-down wallet with a couple of dollars and some old expired cards in it in case you get mugged, and they have to be enough to convince whoever’s coercing you into giving up your password that they’ve found what you’re trying to protect. If you’re considered to be a prepper or radical (for things like believing in the US Constitution) you should make sure the decoy data contains things that show that but won’t really get you in trouble. I recommend collecting enough files to take up less than 5-10% of the encrypted storage volume you plan on creating or using; I collected around 1GB worth of files. Note where all of the files are stored, or copy them into a single folder for later use.
Install the Application
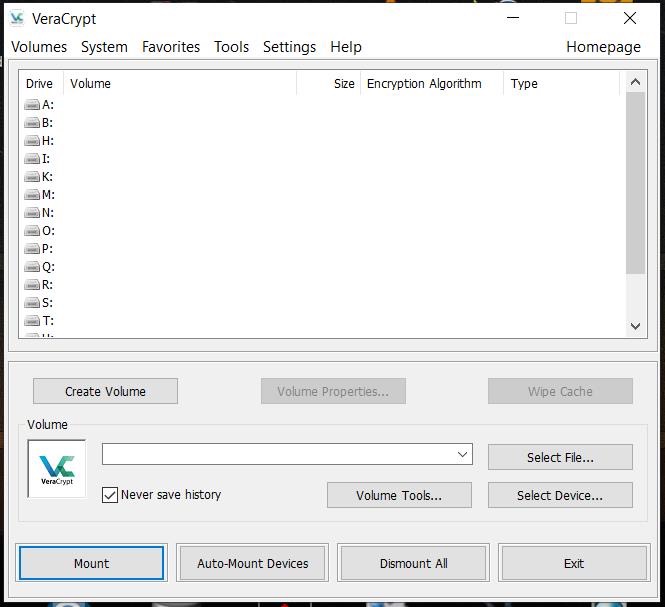
If you’re using a USB flash drive or SSD like I recommended, the first thing you need to do is create a portable instance of VeraCrypt that will run directly from the removable storage instead of being installed on the computer’s internal disk. Plug your removable storage device in and run VeraCrypt (which you installed earlier), which will bring up the main program window:
 [5]
[5]
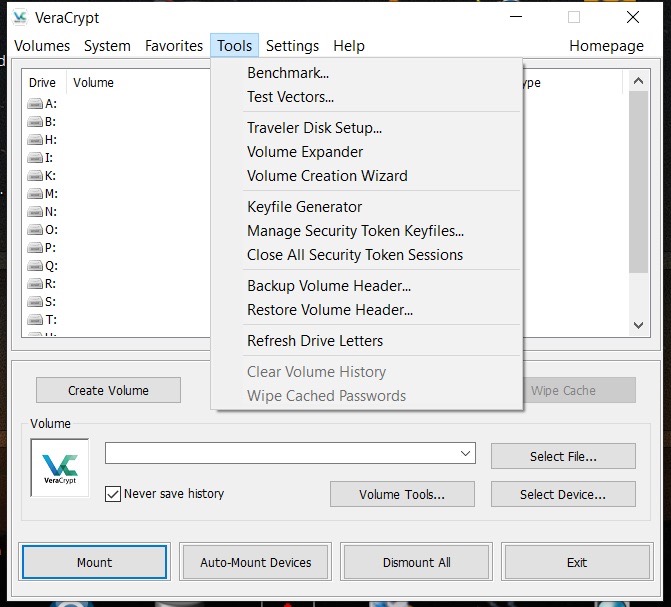
Remember those storage volumes that were discussed earlier? In the VeraCrypt program window you’ll see a list of all of the storage drive letters that aren’t currently being used on your system – these will come into play shortly. Now select ‘Tools/Traveler Disk Setup…’ from the menu bar at top:
 [6]
[6]
 [7]
[7]
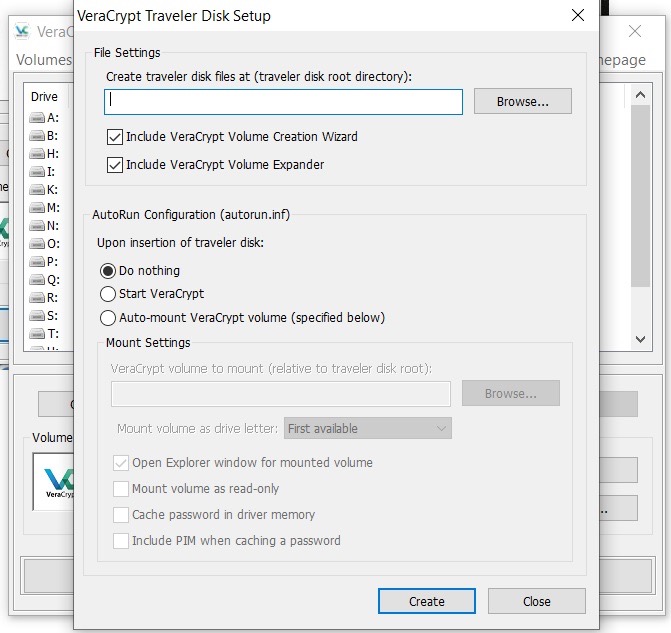
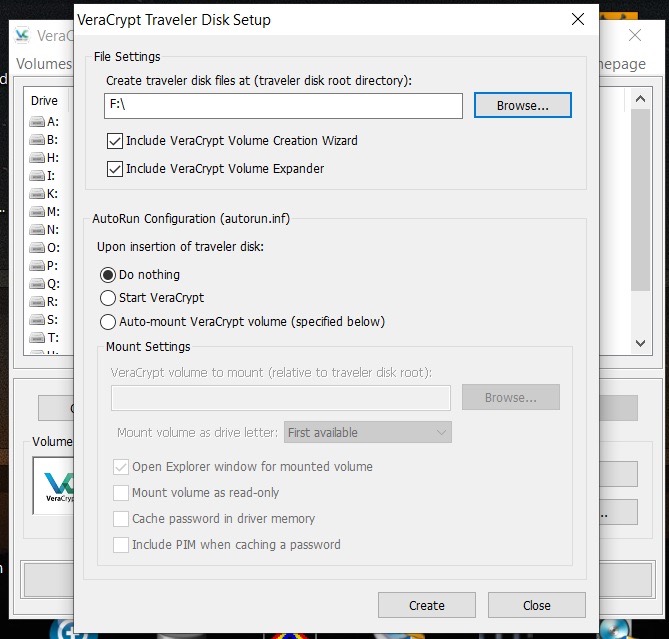
In the ‘VeraCrypt Traveler Disk Setup’ window, click the ‘Browse’ button to select your removable drive that you want to use for your protected files – on my system this was the ‘F:’ drive letter that was automatically assigned to my USB SSD when I plugged it in:
 [8]
[8]
Leave all of the default options set, including the ‘Do Nothing’ under ‘Upon Insertion…’, and then click on ‘Create’ at the bottom. This will go through several status windows to install a portable version of VeraCrypt on your removable drive. Once VeraCrypt says it’s done, click ‘Close’, then close the main VeraCrypt window. VeraCrypt is now installed on your removable storage device in a folder named ‘VeraCrypt’ and can be run directly from that device on any supported Windows system without having to install VeraCrypt locally:
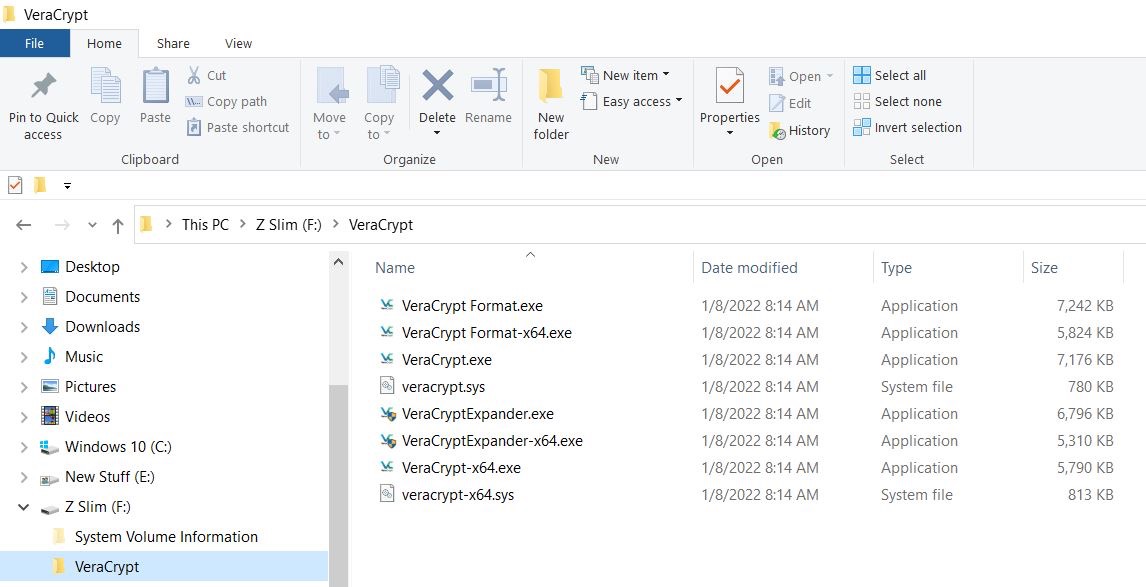 [9]
[9]
At this point, you can play around with VeraCrypt if you want to create some small encrypted volumes on your system and get a feel for how it works, but that’s not critical. If you’re interested, VeraCrypt has a great beginner’s tutorial [10] on their web site.
If you’re using a removable storage device you can now uninstall VeraCrypt from your computer system if you want, or keep it installed to provide some further misdirection. If you’re using the internal disk in your computer instead of a removable disk, you’ll need to keep VeraCrypt installed to access the volume you’re about to create. For the rest of this article I’m going to assume you’re using a removable storage device.
(To be continued tomorrow, in Part 2.)