Some people like to carve this ember notch before the hearth and drill have mated. I do not. The reason I do not carve this ember notch earlier in the process is that you can ruin the ember notch before the drill and hearth have mated. This can happen from applying too much pressure too soon, causing the drill to kick out of the mate and then splitting the hearth or ruining the ember notch. Also, where the mate actually takes place may not be aligned perfectly with the ember notch, which means more carving. If you ruin the ember notch, then you just wasted a bunch of time and need to do it again. So instead, we carve the ember notch after the mate, which increases efficiency and makes the process much easier.
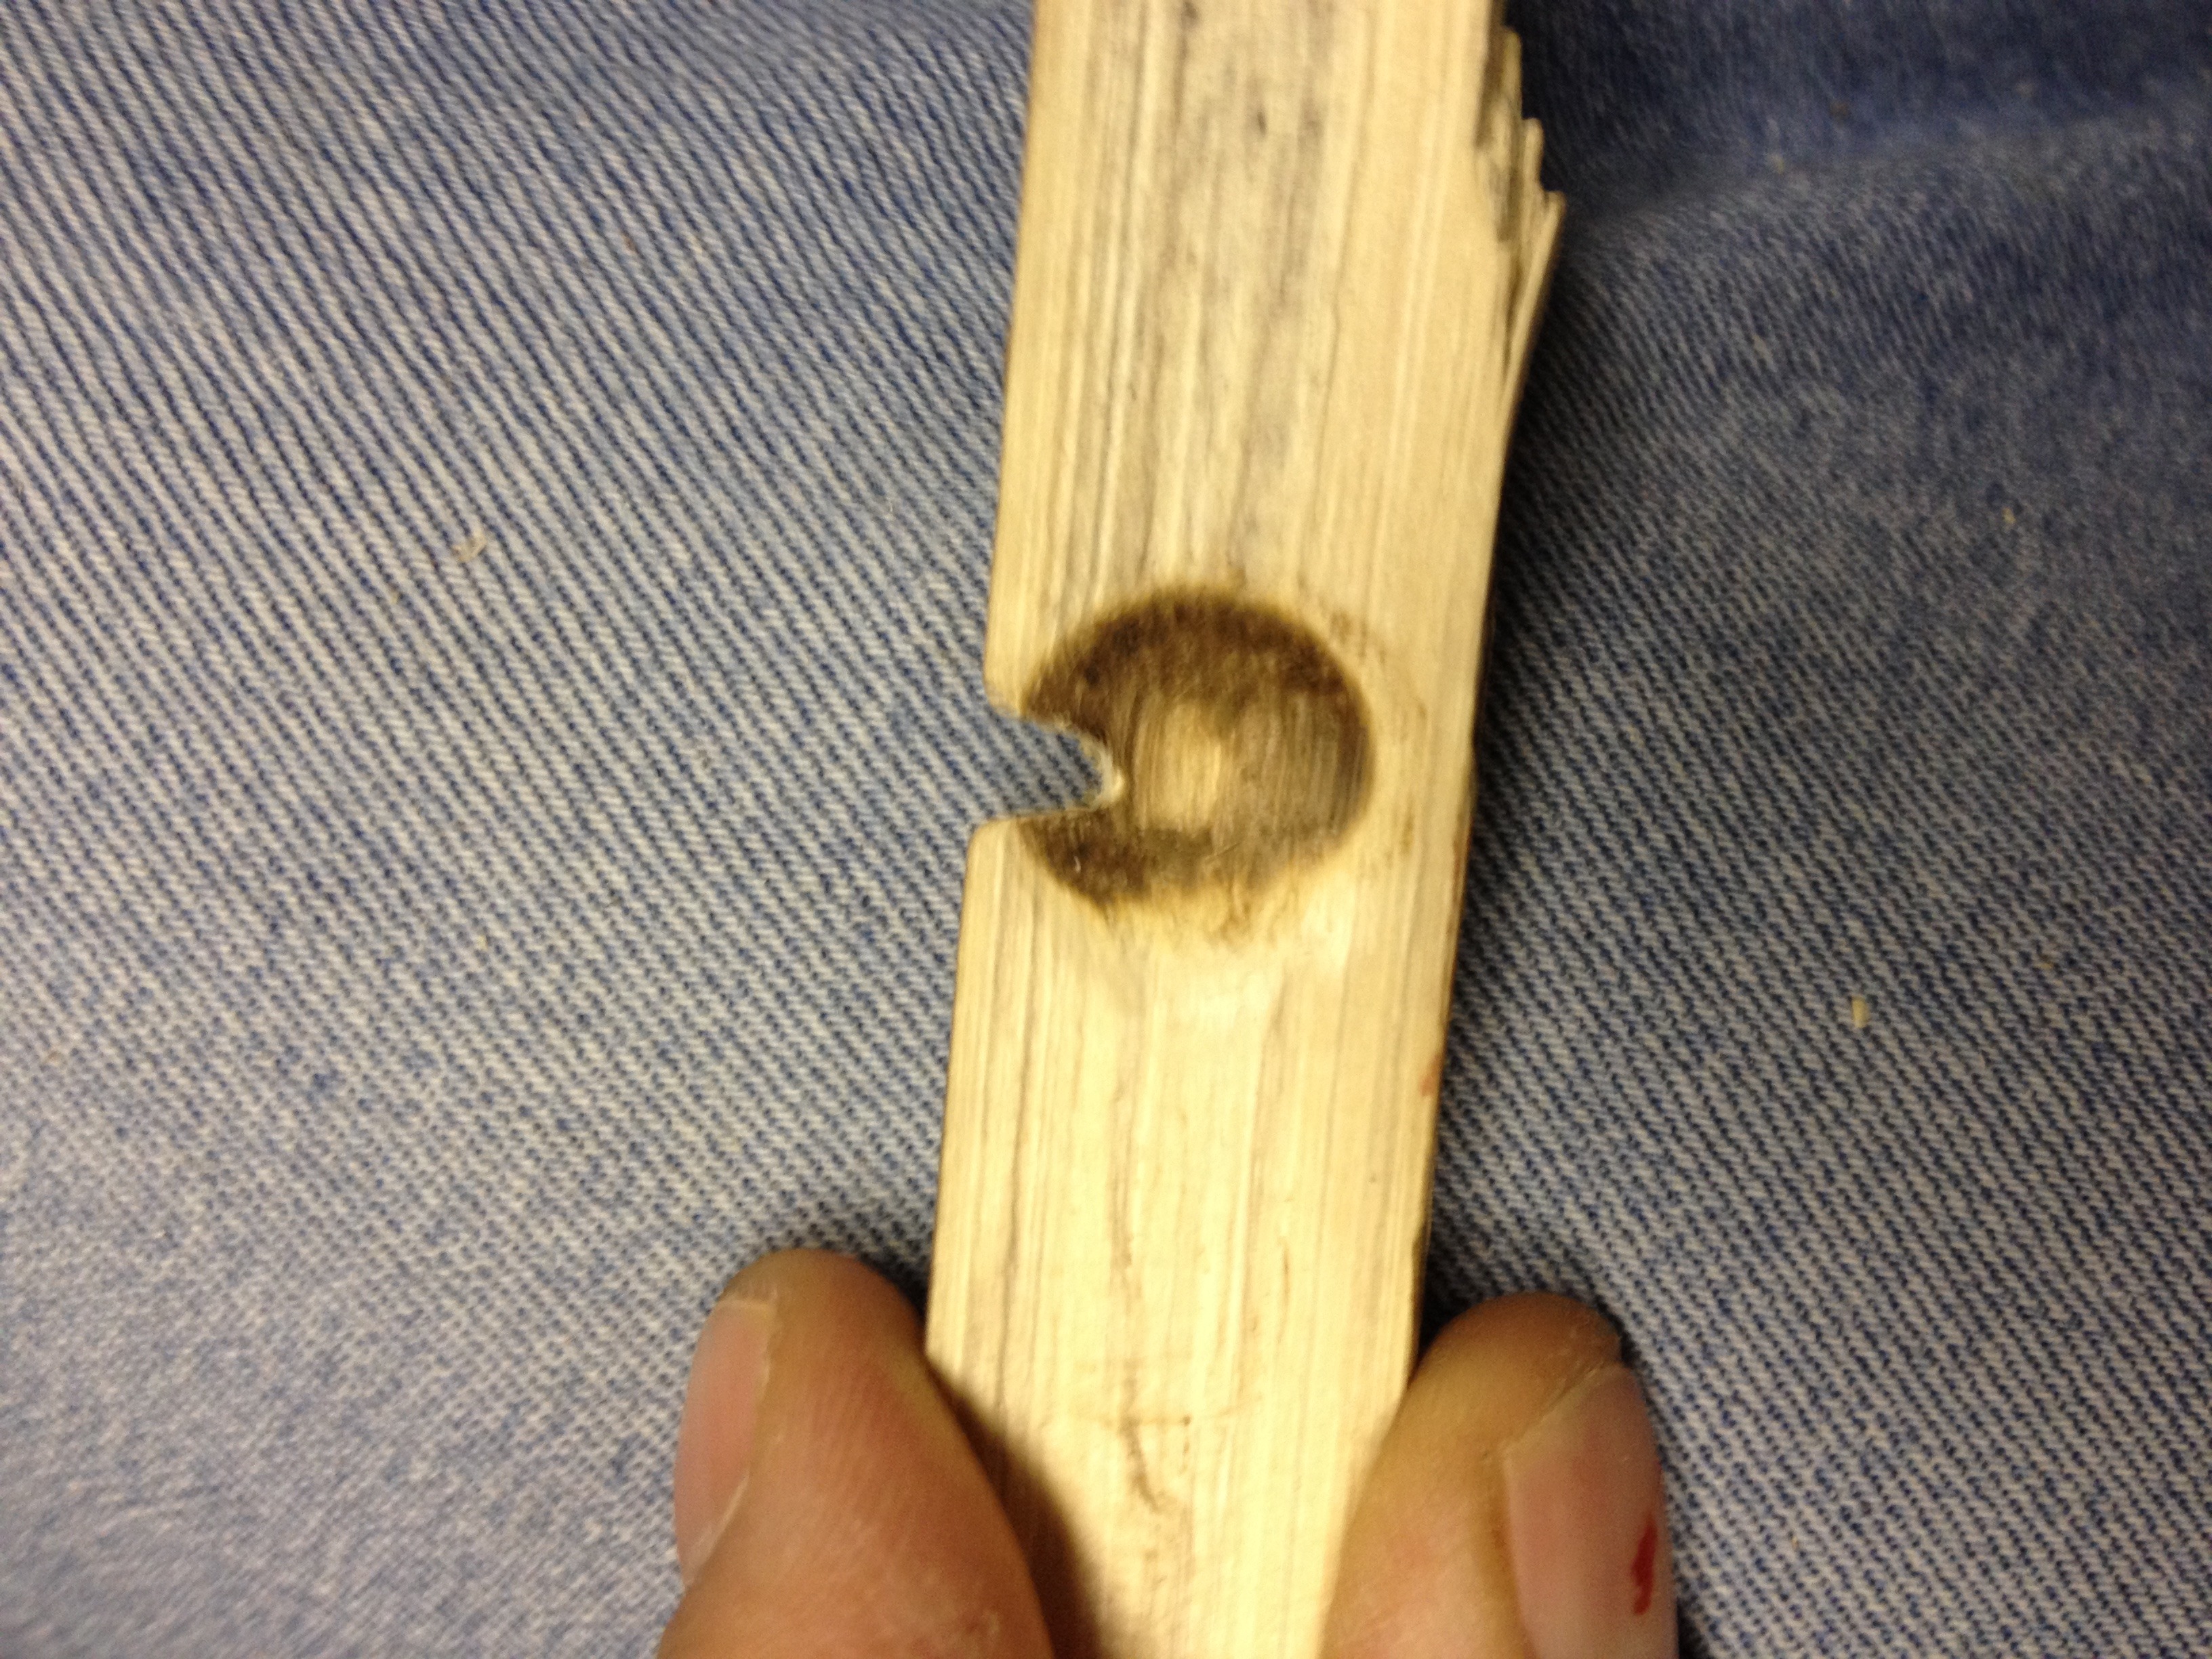
Your ember notch should be a “V” shape toward the middle of where the hearth mate happened (see figure 9). You want to make sure this notch allows the embers to fall out of the bottom of the hearth, but be careful to not make the notch too wide as the drill can kick out and ruin the notch. Pay attention to the pictures as they demonstrate different angles of how a working notch should look.
 [1]
[1]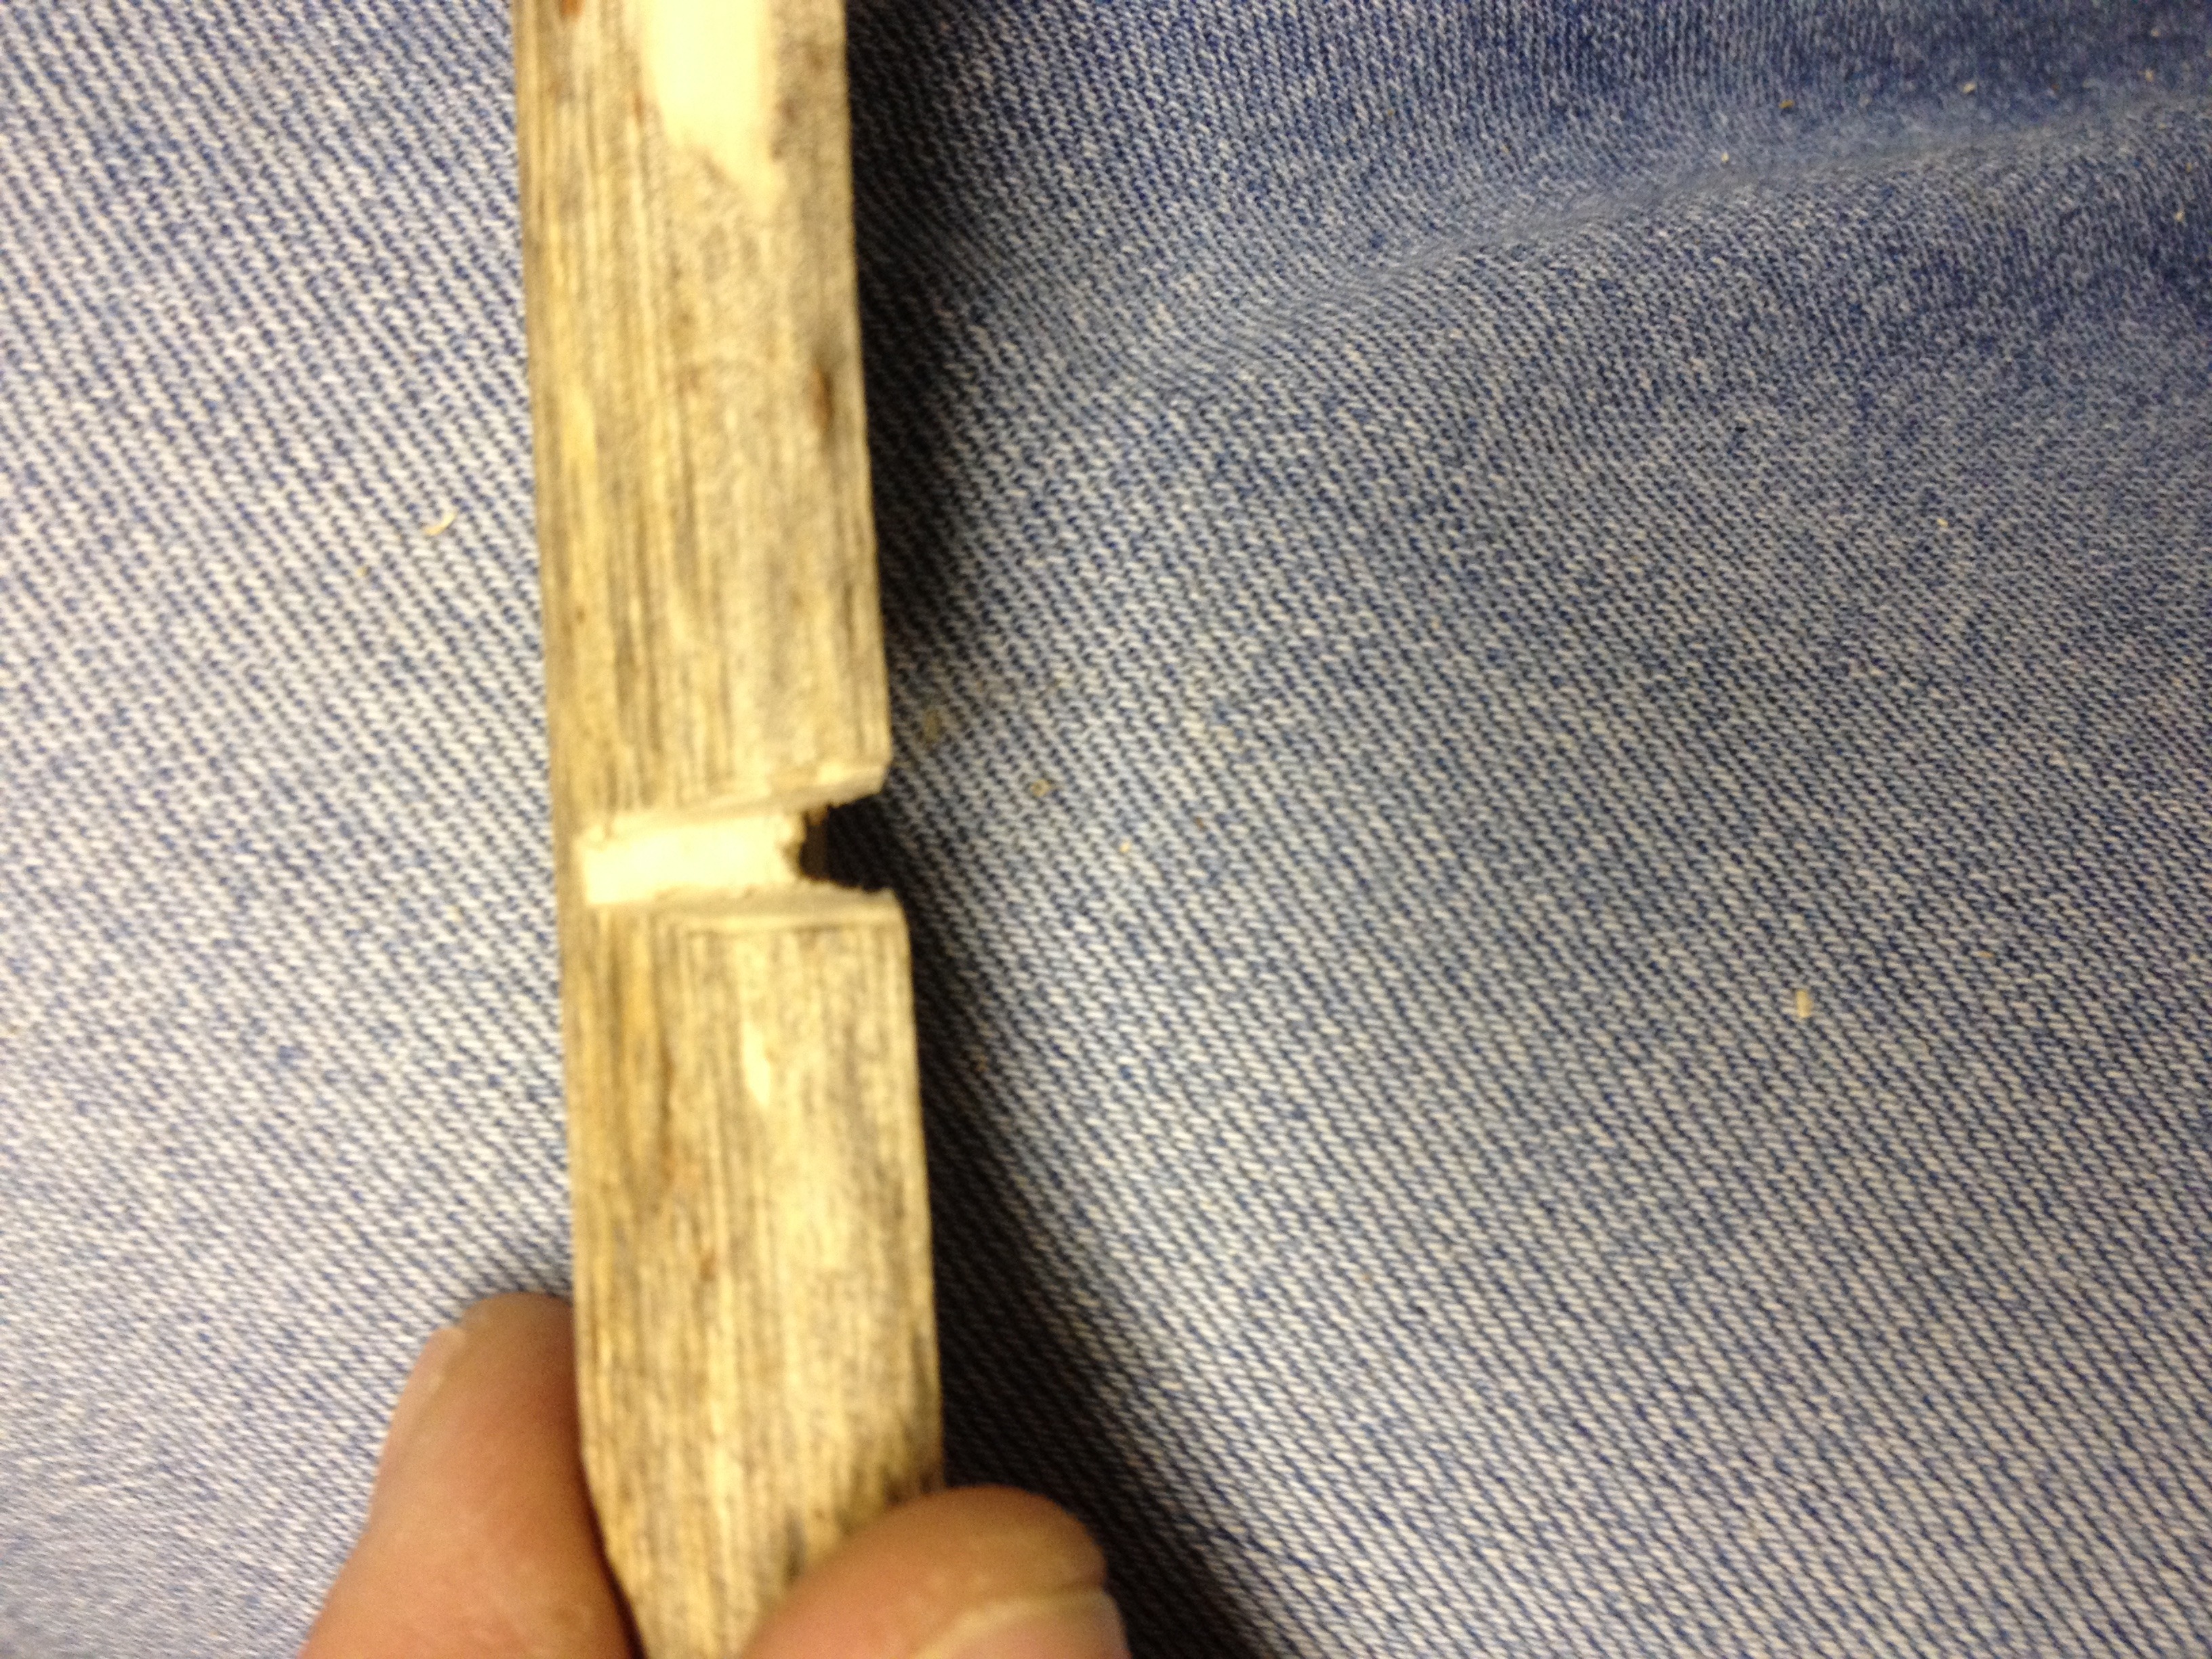 [2]
[2]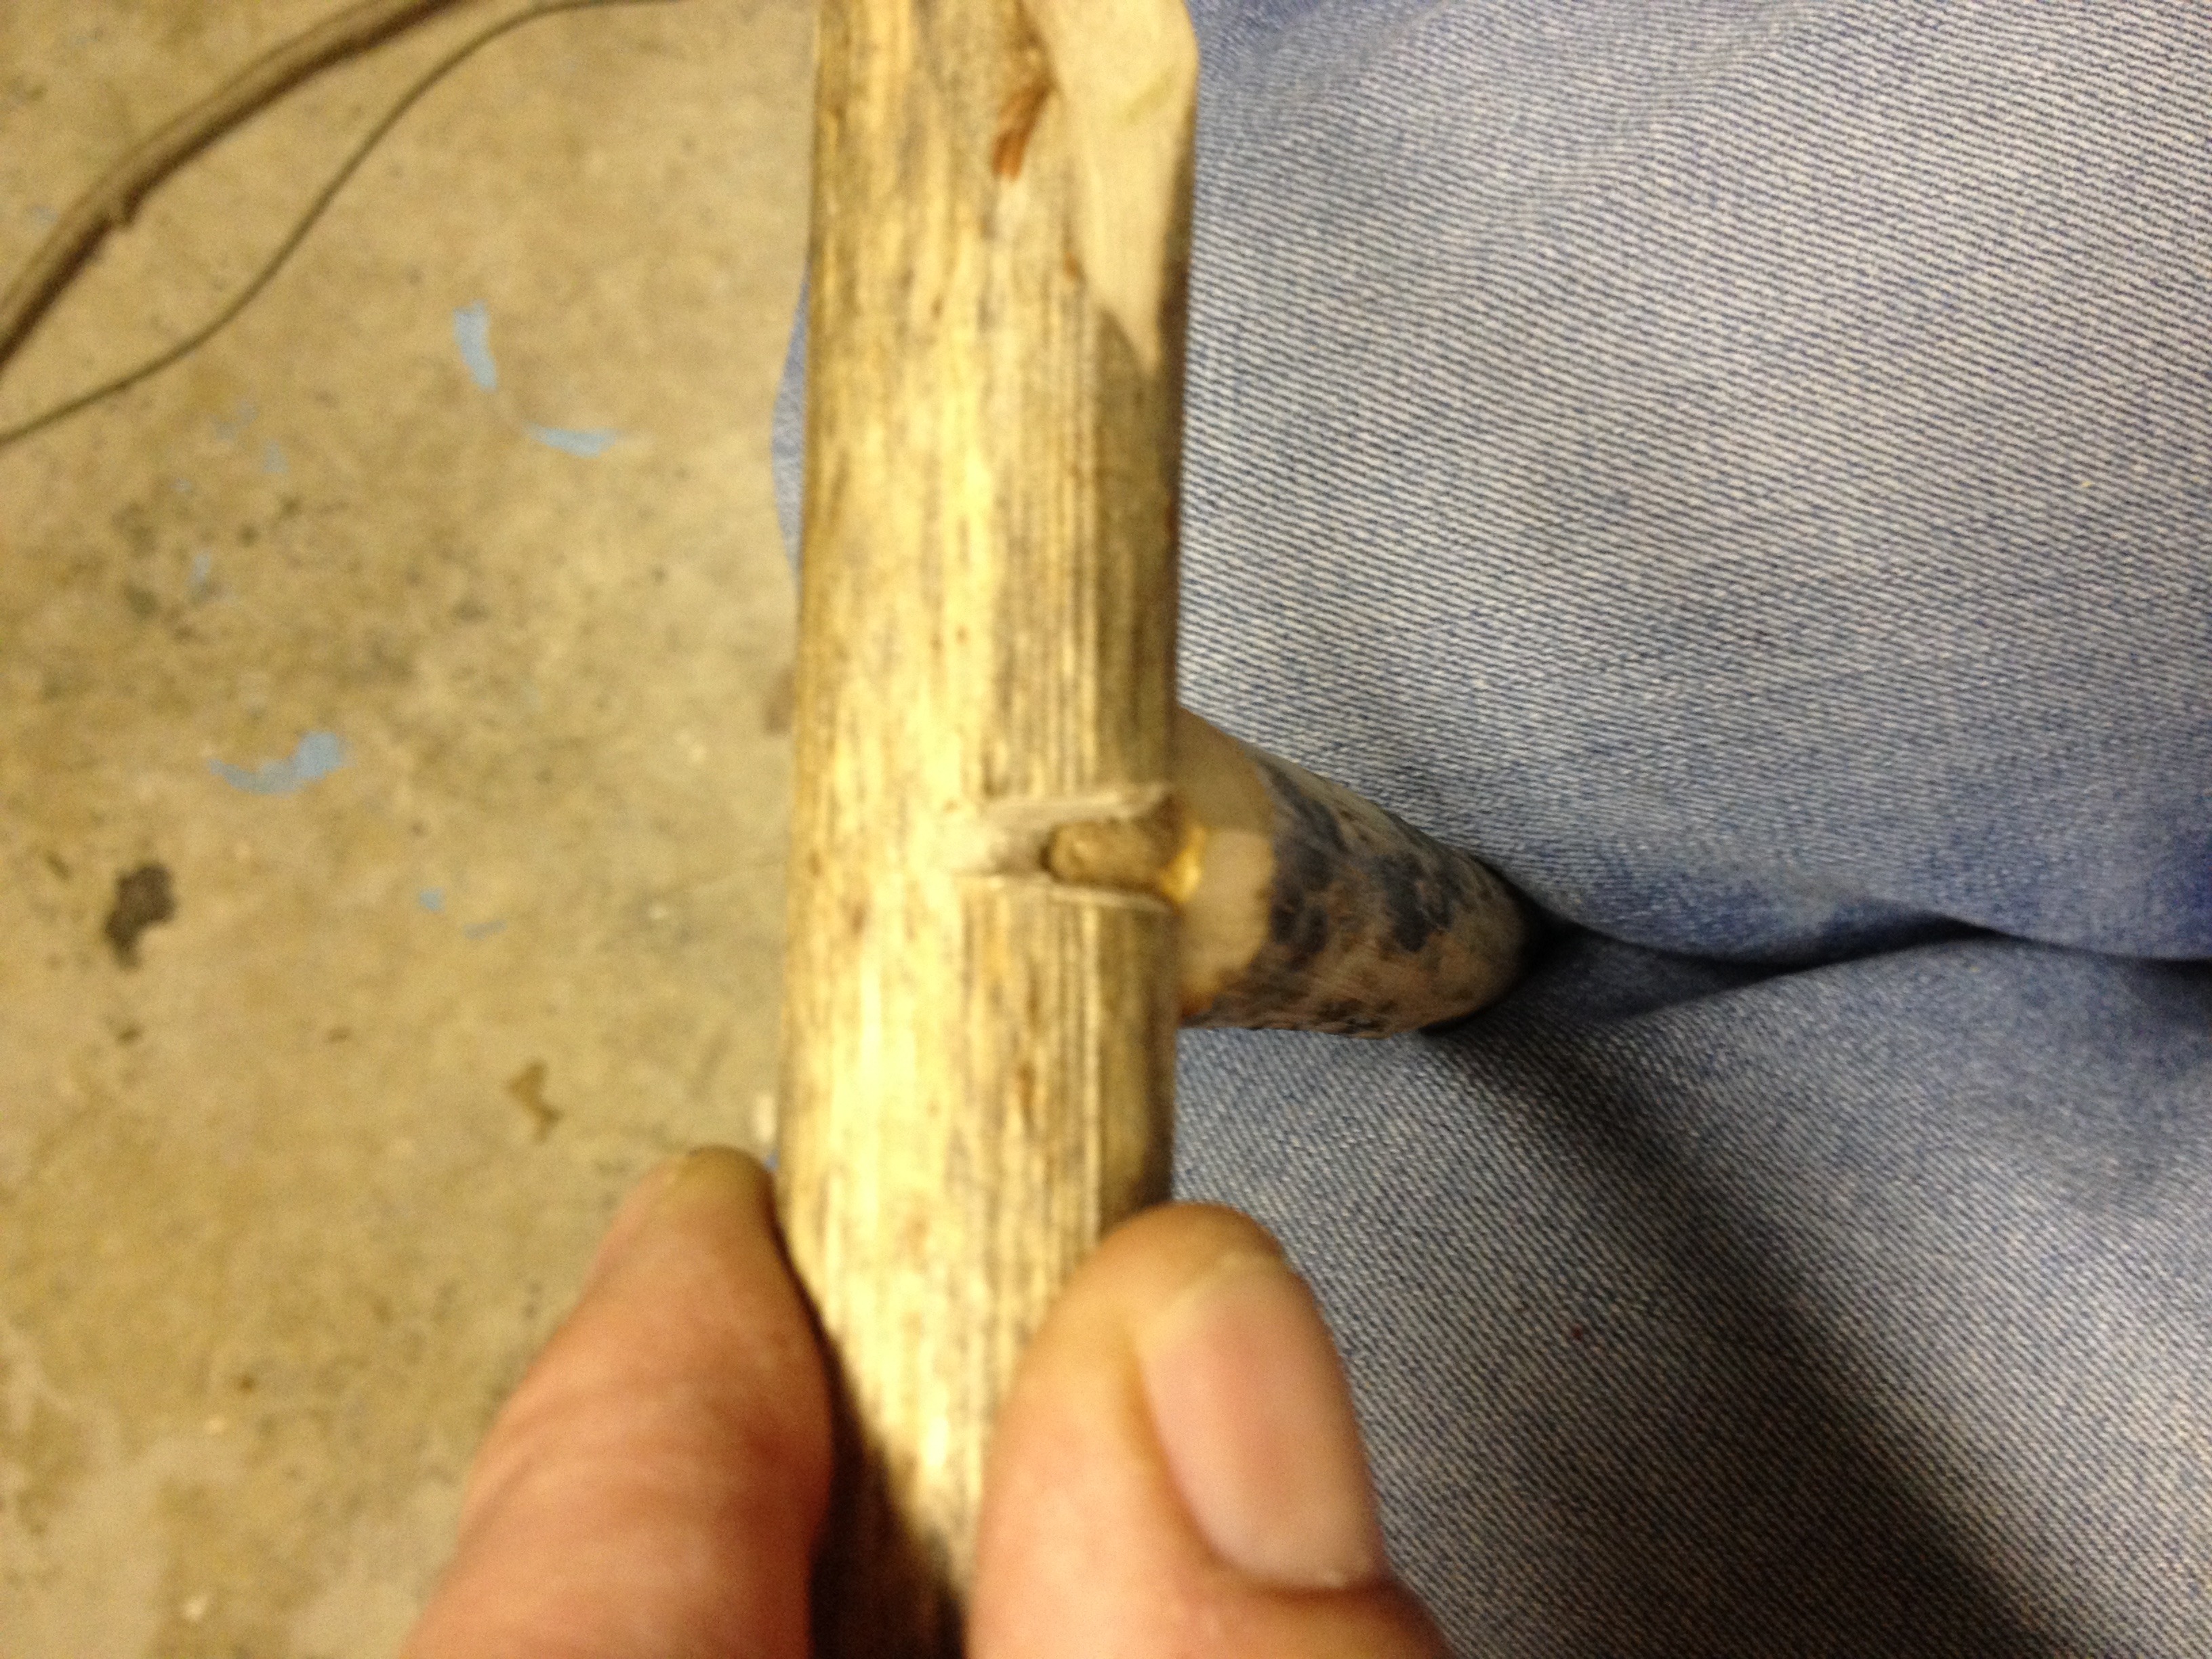 [3]
[3]
Up to this point in the article, the process may sound complex. However, I promise you that within a short amount of time and practice you will have this process down to the point that you can easily do it correctly. Remember, there is no “failure”. There is only learning, and I find this process of learning to be absolutely worth the reward we experience after creating our first friction fire. So, try, try again. You can do it.
Now it is time to make fire.
Start by finding a dry leaf or a flat piece of dry bark that will serve as a plate that our hearth will rest upon. This is to ensure that, once an ember is created, it will fall below onto something dry and portable that allows us to place the ember in the bird’s nest. Just like we did when mating the drill to the hearth, string up your bow with your drill, take a knee, place your opposite foot on the hearth, take your socket in hand and attach it to the top of the drill, lock your wrist in to your shin, take a good posture, and we are ready. Your hand position on the bow is important to maintain efficiency. You will want to choke up a little higher on the end of the bow so the tips of your fingers and thumb are resting on the bowstring. This is done so that once we begin applying pressure while also applying speed, we can apply increased tension on the string of the bow by clinching our fingers and thumb together (see figure 10).
 [4]
[4]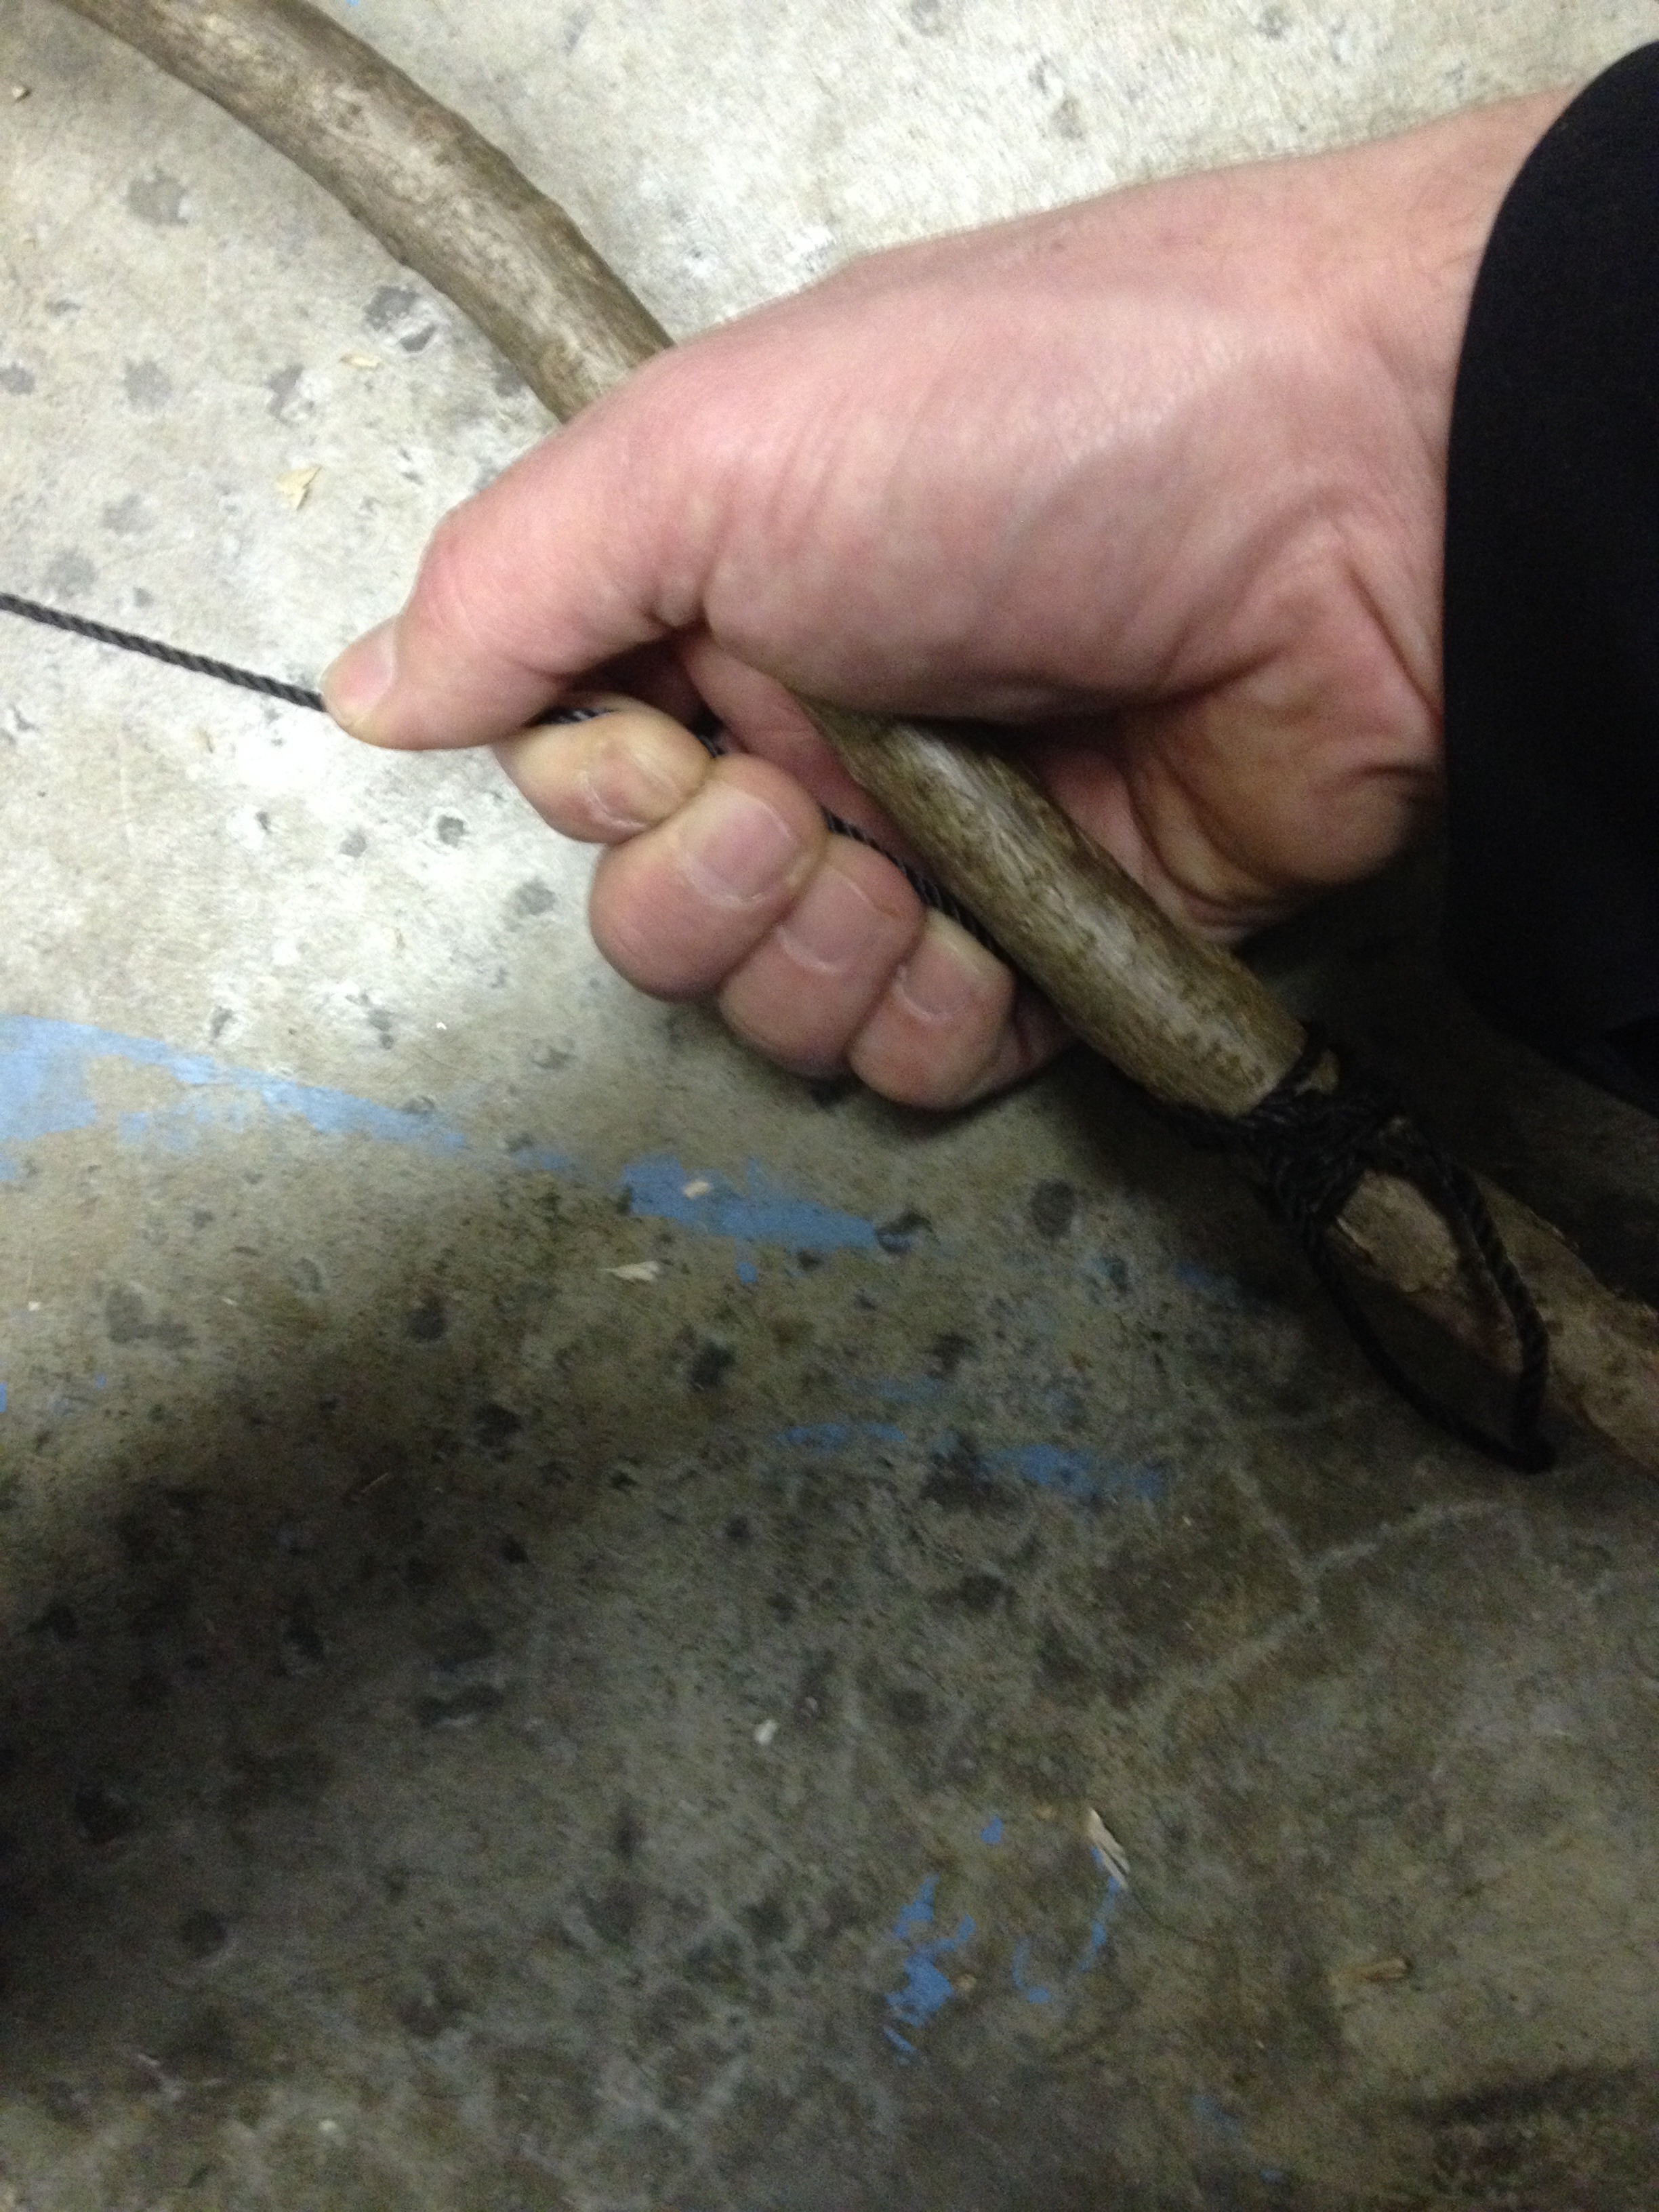 [5]
[5]
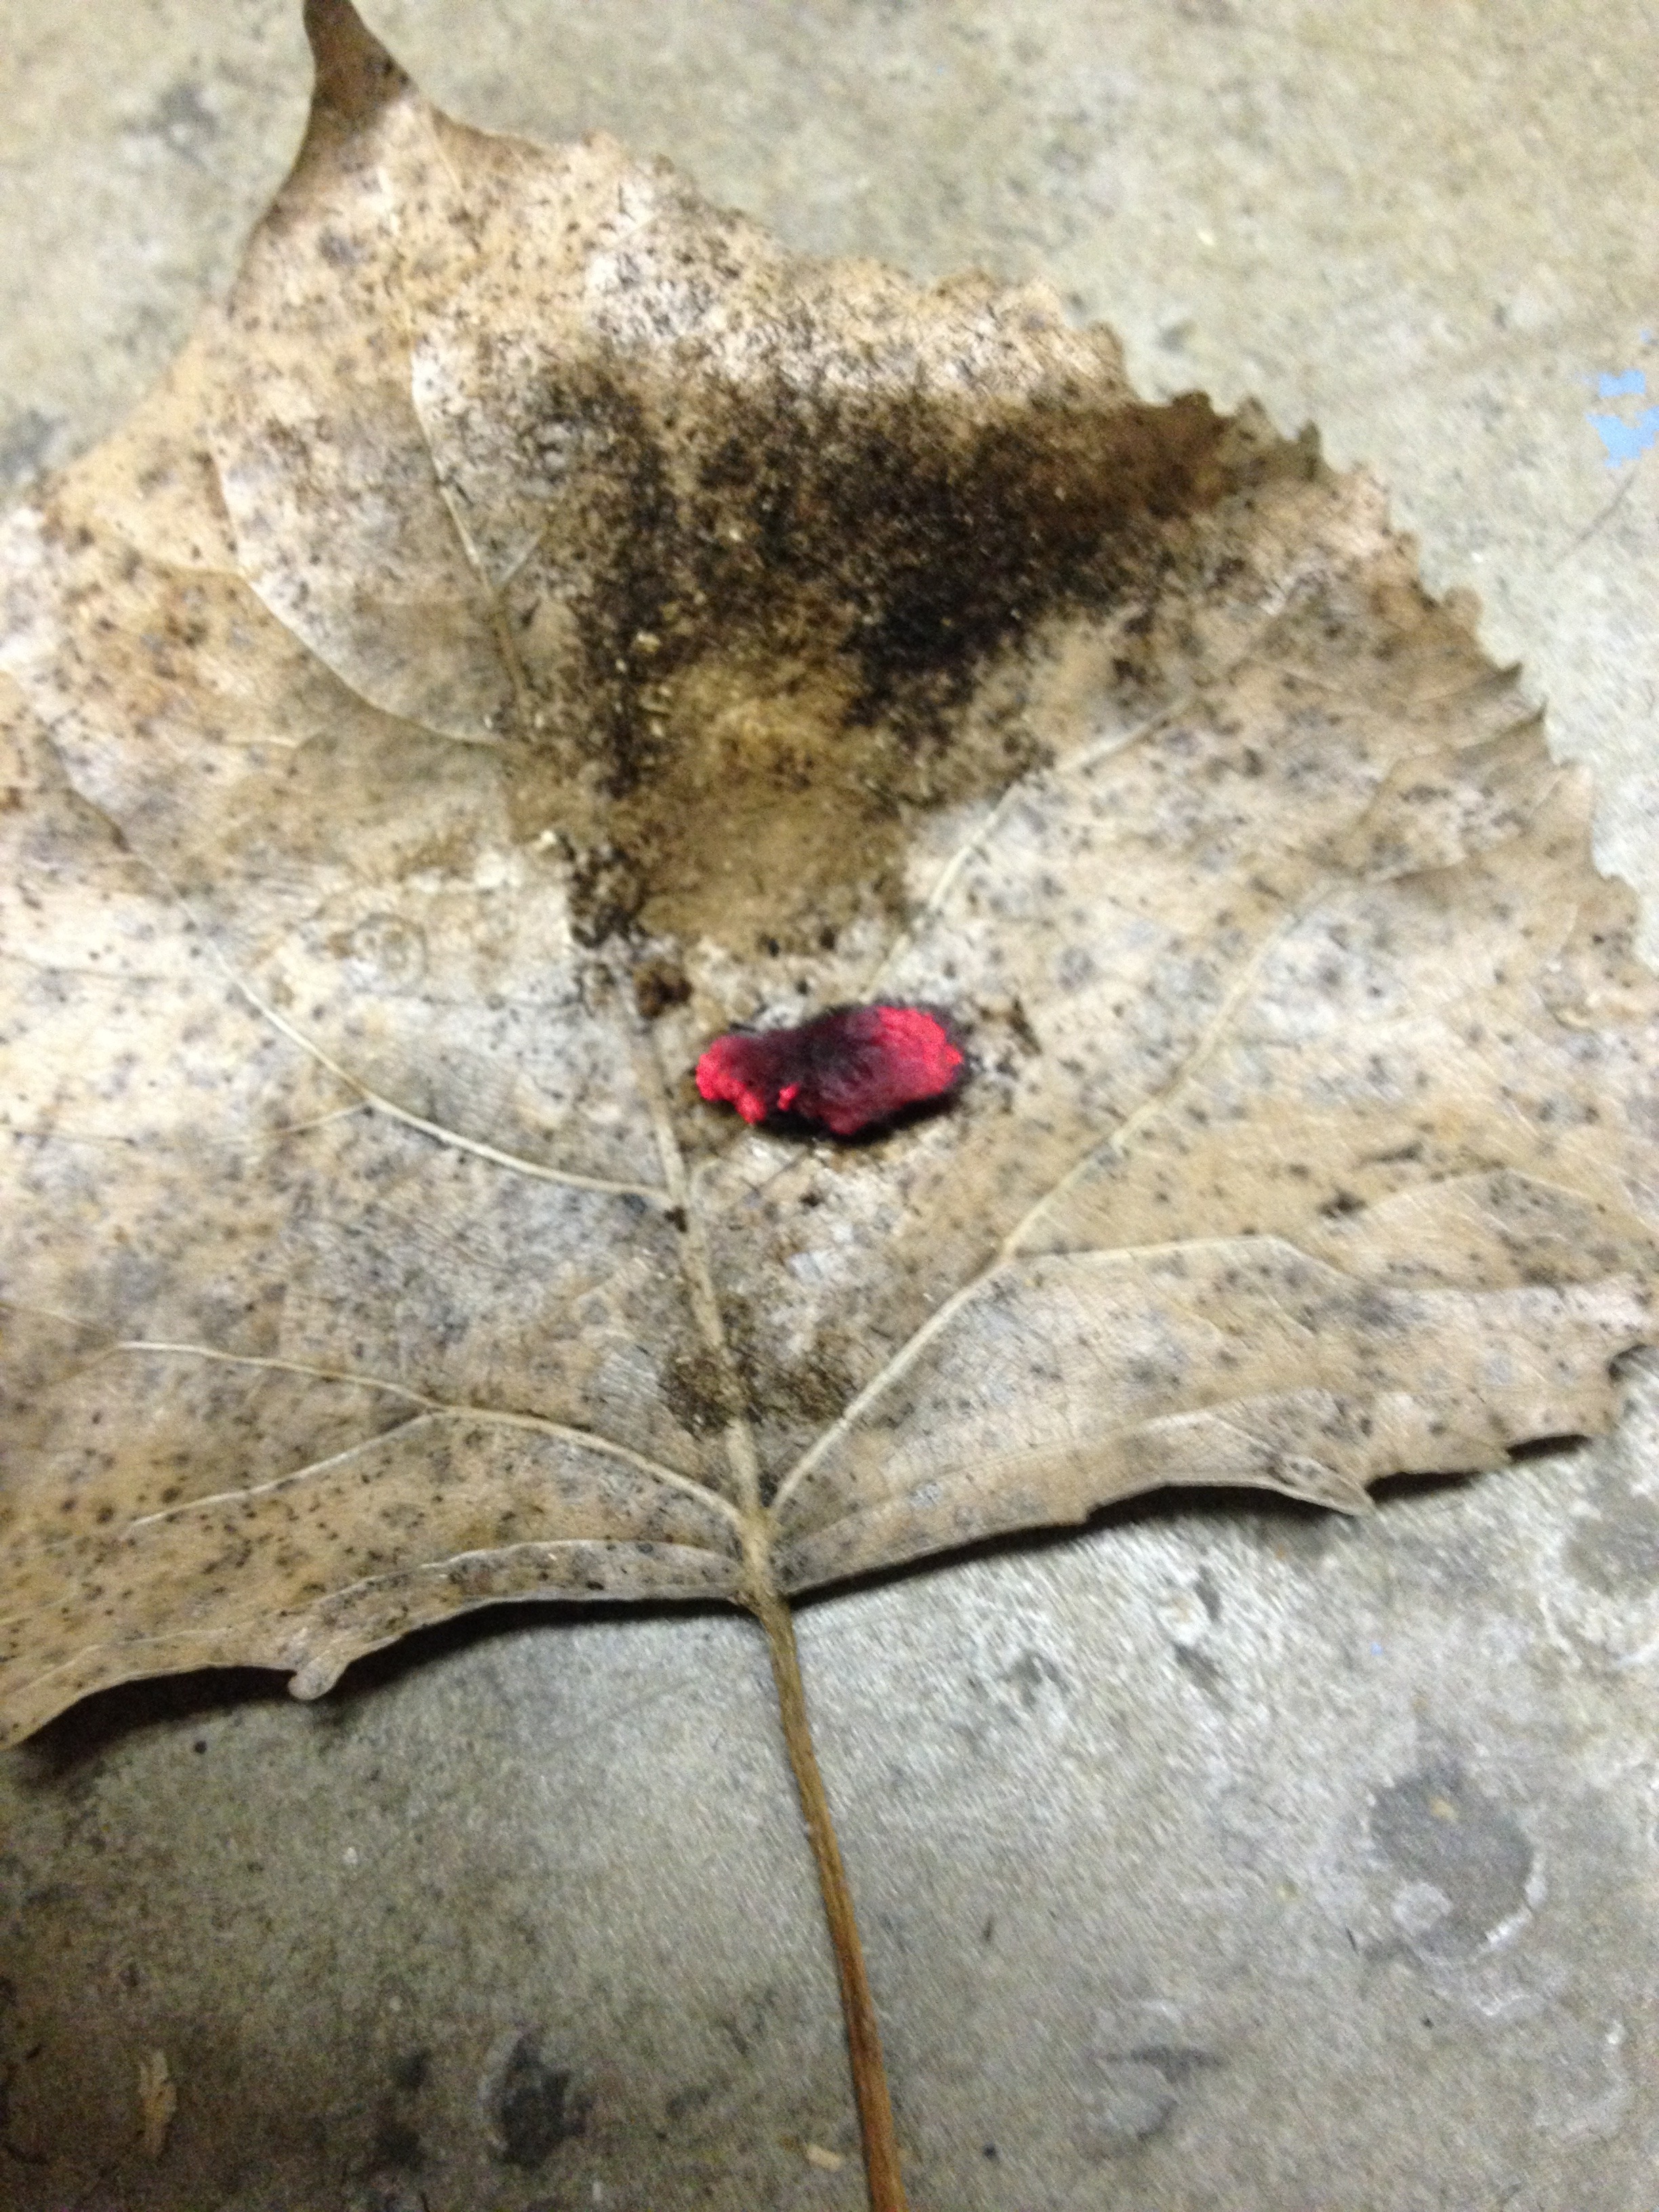
Begin moving the bow slowly and increase the speed over time. This is not a race, so going zero to sixty is not going to help you. Think of this speed acceleration as simply getting a green light at an intersection and you are in no hurry. As you increase the speed, slowly apply downward pressure with the socket hand. The goal is to maintain, as much as possible, an even increase of speed and an increased downward pressure of the drill. Make sure you use long strokes and use all of the string. Very important: Once you see some smoke, keep going while again increasing speed and pressure. Once a decent amount of smoking starts rising (use your best judgment, and the more smoke the better), you may have created an ember. To check if you have created an ember, stop moving the bow. Slowly, pick up the drill from the hearth while leaving your foot attached to the hearth. Place the drill, socket, and bow to your side, again while keeping your foot upon the hearth. If you are confident there is an ember, then maintain your balance and be careful when finally removing your foot from the hearth. This is important, because if you have created an ember then moving your foot from the hearth in a rapid fashion can very easily destroy the ember. Get on both knees and lean down to slowly peel away the hearth from the ember. You will know if you have an ember, because a little pile of dust will be smoking. Softly blow on the ember and it should put out a nice glow (see figure 11). We are in no real hurry here, as that ember will smolder for a little while on its own. Relax, and try not to get too excited.
 [6]
[6]
Make sure your birds nest is very close. Pick up the dry bark or leaf that your ember is resting on and very carefully tap the ember into your bird’s nest. Taking the bird’s nest in to your hand, begin blowing on the ember. A trick I have found that helps during this process is to take a deep breath and blow softly, increasing the pressure of your blowing as the glowing intensifies. As you run out of breath, very quickly move the birds nest away from your face to full arms extension while you take another deep breath. This trick does two things for us. 1) If you are having success, the birds nest will be smoking pretty good and by moving the birds nest away from your face you are able to take a deep breath without inhaling the smoke. 2) The movement also provides more oxygen to the ember.
As the glowing of the ember increases, carefully fold the bird’s nest over the ember, without smothering the ember. This will increase the ember’s contact with dry tinder, helping to make a flame. Repeat this process with care and a flame will appear. Once a flame appears, you may feel compelled to scream “FREEDOM!” Try not to squeal or wiggle about. Also, put the bird’s nest down so you don’t burn yourself. Start applying more tinder and small sticks to allow your fire to mature.
Congratulations, you have just completed a friction fire! For demonstration purposes, I am using a yucca stalk. A yucca stalk is widely regarded as the easiest specimen to use for creating friction fire. As I am certified in permaculture design, which can be characterized as a sustainable form of agriculture that mimics nature with editable foods, I have also incorporated yucca plants [7] in to my permaculture gardens. I believe this is a prudent idea as many of us understand the importance of growing our own food. And, by including yucca plants, we can also grow our own material for friction fire and utilize the leaves of the yucca plants [8] for cordage. Cordage and fire are considered some of the cornerstones of a survival situation and growing them on your homestead is just as smart as growing your food, but it is often overlooked.
Keep in mind that once you have made your bow drill set, you can use it time and again until you have exhausted the hearth. Keep your hearth and drill dry and you can make many fires. Some key takeaways to help with your success are as follows:
- Moisture is our enemy
- Soft woods, fingernail test
- Use sweat and oils from your nose/face as lubrication between the socket and drill (but do not lubricate the drill and hearth mate!)
- Lock wrist to your shin
- Good posture
- Make long strokes with the bow, using all of the string
- Take your time; go slow
Friction fire will work with most woods. However, the required pressure, speed, and length of time will increase with harder woods. Again, I suggest for practice purposes using a dried yucca stalk, if possible. As you perfect your technique, you can obtain an ember in around sixty seconds with a yucca stalk. Another tip: You may be better served to practice your technique on a surface other than concrete. Speaking from experience, your knuckles dragging along the concrete can get bloody when you are close to obtaining an ember.
In closing, when I first sat down to learn friction fire, I was intimidated and I rationalized that flint steel or a lighter is all I needed. Honestly, friction fire is not very hard. It can seem overwhelming during the learning process, but I promise you that this skill is invaluable. I now rank this skill as my second most important skill/item, second only to a proper fixed blade. With fire we can boil our water, make fire burned bowls to hold and transport our water, cook our food, along with many other necessities and comforts. Practice makes improvement, and also serves as a reason to get out in the woods to practice other skills. I find primitive skills to be the best survival skill set we can have—far more valuable than any store-bought item. Importantly, the more knowledge we obtain, the less stuff we need.