One of the favorite things I create over the course of spring, summer, and fall are my Orange Coffee Nut Firestarters for my wood stove. I think my recipe came about because my grandparents instilled their Great Depression mindset of “use it up, wear it out, make it do, or do without” into me at an early age. The stories they told me, of using things up until they were used as fuel to survive winter on the prairies of South Dakota, are ones I still tell my grandchildren today.
With all their gadgets and technology, it is a little hard for children to understand how their great-great grandparents could make do without the benefits of central heat, computers, and technology, much less electricity, indoor plumbing, and cell phones. They were flabbergasted when I told them I didn’t have television in my house until the man walked on the moon in 1969.
A few of my relatives thought I was a little nutty when I first began to save all these bits and pieces. Now my grandchildren love helping me create my Orange Coffee Nut firestarters.
Even though our Missouri winters aren’t as long or as cold as those my grandparents survived, they are cold. I need to be able to start my woodstove quickly each morning to keep propane costs down and to keep my indoor plumbing from freezing if the power goes out. They work great on the hard red oak, walnut, hickory, and ash wood I use as fuel. My eleven year old grandson timed one for me recently and was really impressed that even the smaller ones lasted twenty-two minutes.
Ingredients
The ingredients and quantities of items vary from season to season, but for the most part I reuse, use up, and make do with what I have. Some of the items used include:
- Paper grocery bags, cut in six- to eight-inch wide shapes. Squares, circles, and polygons work great. If I let my grandkids color on the bags first, they burn even better and look great in their bucket. My grandkids love to help draw the shapes and cut them out, too. My favorite bags are the grocery store ones with handles on them. I carefully tear off the handles; they make great wicks or can be used for other things.
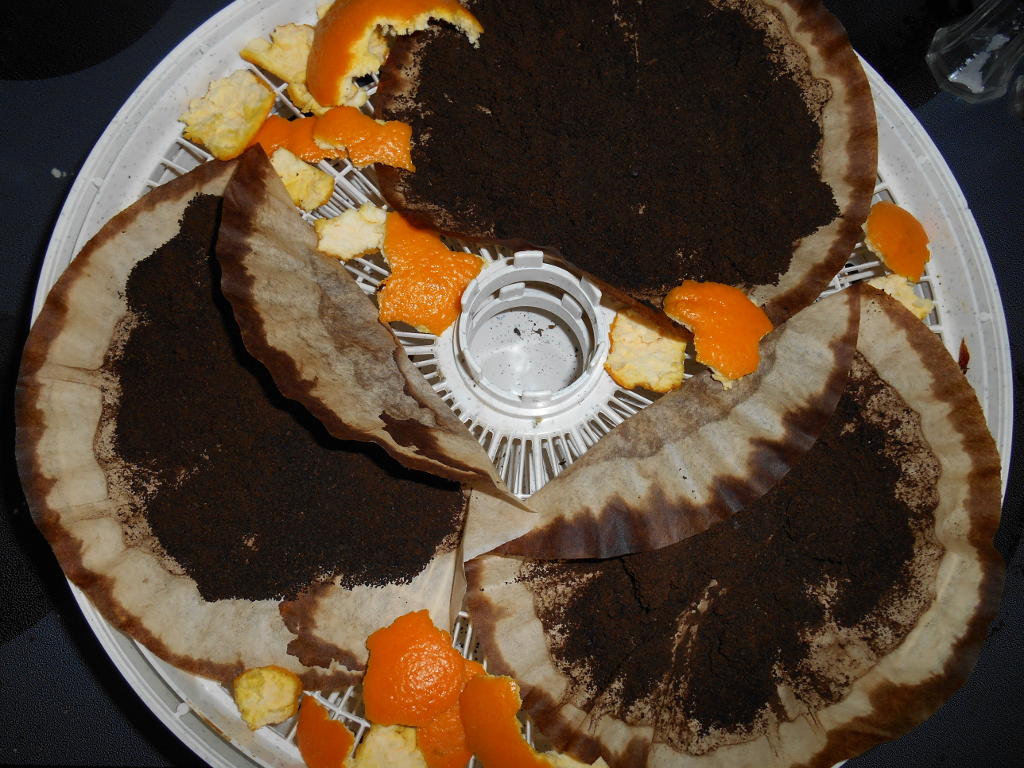
- Used coffee grounds and filters. I use a small 4-cup coffee maker to satisfy my daily need for a caffein fix. I save both the grounds and the filters. Each morning the coffee filters make a great transportation device to move the four tablespoons of the prior morning’s coffee grounds to my dehydrator [1]. Once I get it over to the tray, I flatten it out and spread out the coffee grounds into a layer about ¼ inch thick.
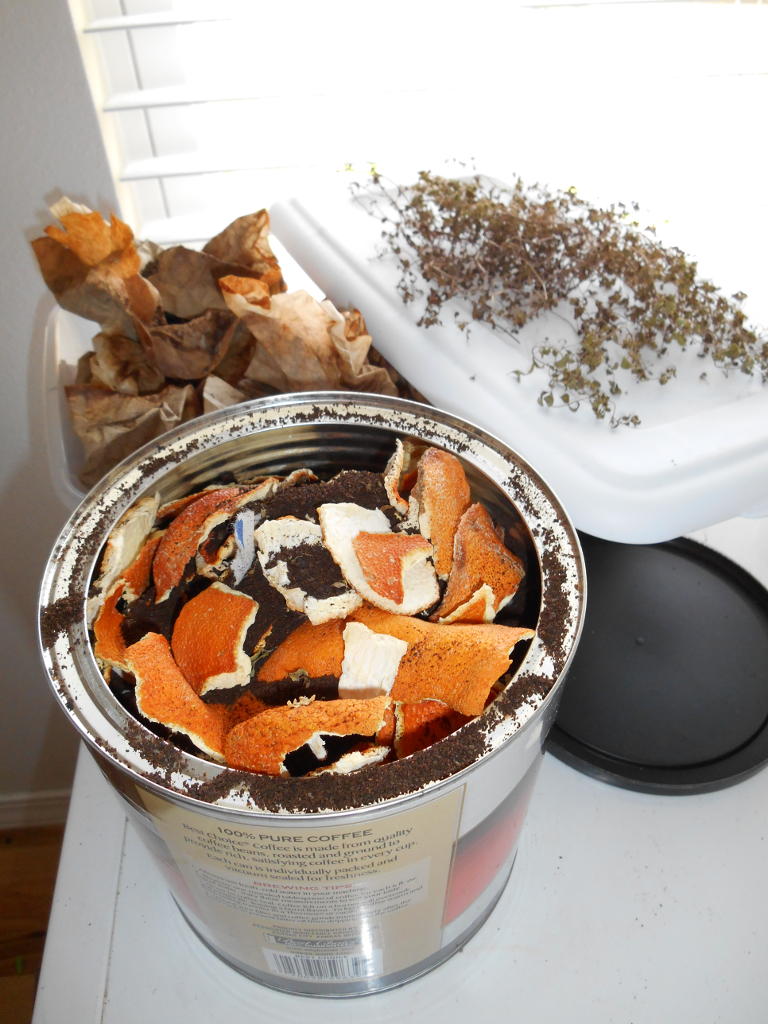
I have a round dehydrator that holds four days of filters/coffee grounds quite nicely on each tray, and to keep the air circulating I usually keep the lid off. With my coffee, orange, grapefruit, and lemon consumption in the winter and my garden dehydrating in the summer and fall, I am usually running my dehydrator once a week or every ten days, so they don’t get moldy or attract fruit flies. Once everything is dried out, the coffee goes back into two old 2-lb. coffee cans that I saved when two pounds was really 32 ounces. The coffee filters are crumpled up and then flattened out and put into a clear shoebox.
- Citrus peels. As my visitors or I eat oranges or grapefruit or drink lemonade, I save the peels. Rather than throw the peels in the trash, I cut the peels with the pith attached into strips, and I place the peels onto my dehydrator racks. Some peels I use fresh for making a vinegar cleaning solution. Some peels I de-pith, dehydrate, and then powder in my blender to turn into seasonings or body scrubs.
Some I just cut or tear into small pieces for firestarter use. Either way I don’t like to put too many of these peels in my compost pile, and one can only use so much lemon pepper, citrus oil cleaner, or make so many orange or grapefruit powder body products. Once they are dehydrated, the citrus peels are sorted by type and put in mason jars [2]. When I add a few handfuls of citrus peels into my firestarter mixture, the citrus oils burn hot, and they smell great.
- Cardboard egg cartons and shredded paper. When I made small firestarters, I used the egg carton cups but usually I like to make my larger ones now. They take a little longer and need more of the coffee grounds, but I find they don’t make such a mess on my hearth when I use them. I also don’t need as much wax for keeping them together. I usually tear the soft paper into little bits and pieces and toss them into my dehydrated coffee grounds can and give it a stir.
- Natural fiber dryer lint, if you have a clothes dryer. I hang all my clothes and don’t own a dryer, but if you do be sure to save some dryer lint to stir into your mixture. Of course, you want fibers that will burn rather than just melt (like plastic/nylon melt); collecting lint from cotton towels, denim, and socks or from wool, linen, and silk items is what you want.
- Hazel nut, almond, pecan, or walnut shells. I have a granddaughter who is allergic to nuts, so we do have to be careful where and when we crack them. I have personally never met a nut I didn’t like, and I buy them in the shell when I can. The woody nature of their shells makes them a good filler and they have residual oils in them. I save the shells for my firestarters in empty mason jars too, and when a quart jar is full I know it is past time to make a batch of firestarters.
- Cottonballs. My eldest granddaughter is fifteen and thinks this is a hoot. I don’t paint my nails as often as I used to, but when my granddaughter comes over she knows we will save hers and the two I use daily to apply my witch hazel toner. I pull the fibers apart while the acetone or witch hazel is still wet, and then I flatten them out to dry. When they are dry I save them in the box with the used coffee filters and use them as wicks in the firestarters or toss them right into the mixture if it seems heavy on the coffee grounds. It becomes binder fuel of some sort.
- Scraps of canning paraffin, candles, or scented wax melt scraps, bacon or sausage grease, corn syrup, or old cooking oil. These all can be used as a binder fuel. I don’t keep corn syrup in the house unless I am making divinity, and I don’t have an ethanol plant nearby but I hear that it burns well. I know it is sticky enough that it would work as a binder too. I personally don’t use my bacon or sausage grease. I really like to make biscuits and gravy on a regular basis and would hate to run short. I usually just save and use my old cooking oil, candle scraps, and used up scented wax melts.
I have found that because I use coffee grounds, nut shells, and broken up citrus peels in my paper packets I don’t have to use as much binder. Scented wax melts lose their smell after a while, and I usually stir the quarter cup or so of the de-scented melts into the used coffee grounds can while it is still liquid. I keep candle and canning paraffin scraps in my used coffee filter box too. I keep my used cooking oil in the fridge but don’t deep fry a lot, so it never goes rancid. I probably use 1 to 1 ½ cups of binder fuel overall per batch.
- Twine or yarn. I like to crochet and always seem to have a few small balls or bits of odd-colored wool or cotton yarn in my basket. I also save bits of string or garden twine I have left over and keep these in my used coffee filter box. I like them to be at least eight inches long.
 [3]
[3]As a single person, I find myself making a batch of these firestarters every month or month and a half or so. Sometimes my two coffee cans and jar of nut shells fill up faster than others. I will sometimes mix the nut shells and paper filler into the dehydrated coffee grounds can as I go and and give it a quick stir when I get a little extra de-scented wax. This happens more in the winter time, as I always have a dish melting on the woodstove to scent the air.
Directions
 [4]
[4]There is no hard and fast recipe, but I usually have a little more coffee grounds than other filler. Either way, when my coffee cans are getting full of my dry mixture, the nut shell jars are full, and the coffee grounds may have to start making their way onto the compost pile or to the base of the azaela or rose bushes, I start my manufacturing process.
I put the contents of one 2-lb coffee can (with its coffee grounds, nut shells, descented wax, and paper cellulose mixture) on the stove in my deep, heavy pot and turn it on low to medium-low heat. I stir it a few times with my heavy wooden spoon as it is warming up and keep an eye on it. It shouldn’t ever be smoking hot, and I never leave the kitchen when I am cooking up a batch. As an aside, I have found over the years that if my smoke detector goes off or I need to open a window in January, I really should have turned down the burner before that happened.
If I can hold my hand about two inches over the mixture and only count to ten, it is just about right to begin adding and melting the wax scraps without scorching everything else. I do dice it up and slowly add more wax scraps and melt them it into the mixture. I also add in some of my used cooking oil to moisten it up, if it seems a little dry to me after I run out of wax scraps. I wait until the wax is melted and most of the oil is soaked in until I add the dried citrus peels.
You can tell the mixture of the oil/wax and other stuff is right when it is shiny but not sloppy wet and all the wax chunks are melted. To test for doneness and consistency, I take a heaping teaspoonful, turn it upside down on a plate, and press it down firmly. When the mixture cools down a little, still it holds its shape, the nut shells and citrus peels stay in place, and not too many coffee grounds fall off when I jiggle the plate, it is ready to go into my paper cups.
My regular-sized muffin tins work great to make these. Between stirs and waiting to get the filler/binder mixture warmed up and wax chunks melted in, I put two of the used coffee filters or one of the cut paper shapes into each of the muffin tin cups.
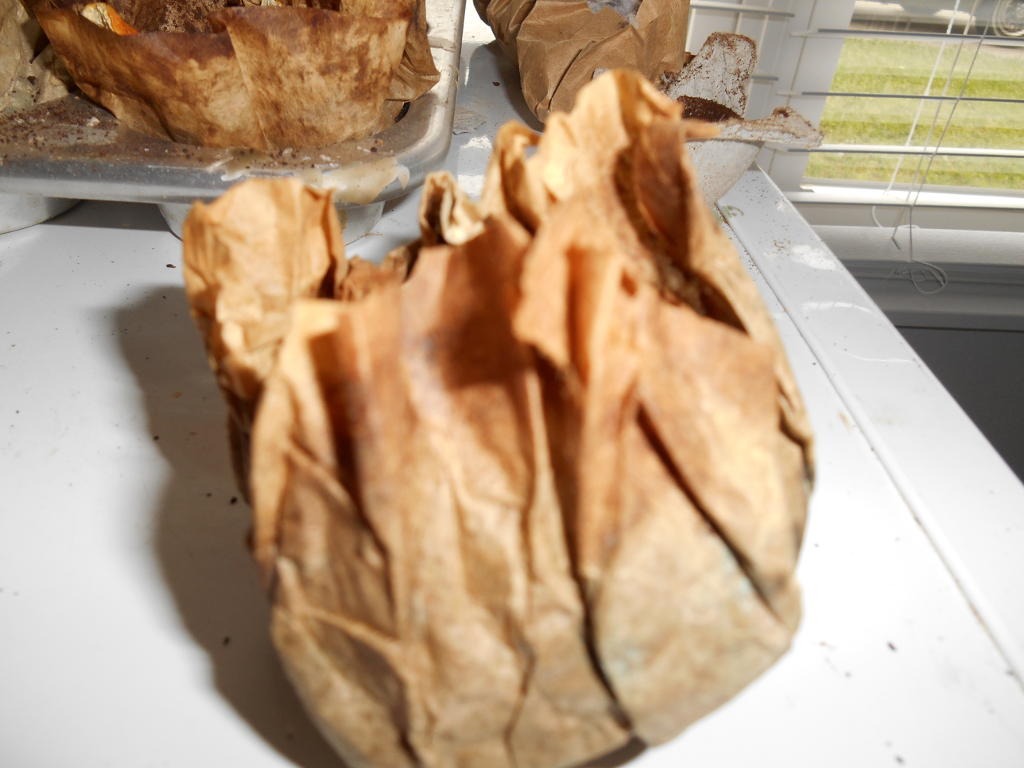
The thinner coffee filters conform to the shape of the muffin tin cups easier than the paper bags do, but my four cup ones are shorter than the eigbt cup ones and make shorter wicks. If you wet the paper bag shapes first, crumple them up, and wring out the water, they conform to the inside of the muffin tin cups and will dry into the shape of the tin. They have to dry a little longer than the coffee filter ones but are stronger and hold together better. If you use the ones your grandkids colored on, be sure to put the colored side facing out towards the metal of the cup, so the paper can absorb the moisture, wax, and oils.
 [5]
[5]I put a spoonfuls of the heated filler mixture into each paper lined muffin tin cup and pat it down with the back of the spoon. The coffee filter ones are a little shorter so I stop short. However, on the paper ones, I usually fill them up flat with the top of the metal cup. I push a stretched out cotton ball into the mixture with a chopstick or wooden spoon handle and let an inch or two stick up from the of the pressed down mixture. I let them cool and harden up for an hour or more.
 [6]
[6]When they are cool, I twist up the tops, and using a double thickness of yarn or a multiple wrapping of twine I make little bundles. If I do the twisting while the paper is still wet and don’t fill them too full, sometimes I don’t even have to tie them off.
The paper left at the top makes a great wick. If I haven’t flattened out the top while I was stacking them, I will usually fan out the paper above the twisted tie and light the starter in a few spots. The wax/oil binder that soaked into the paper engulfs the entire starter faster and ignites the oils remaining in the citrus peels and coffee grounds. If I had to use a firestriker instead of my favorite wooden matches, some finely shredded paper, bark, wood shavings, or more cotton balls could be added to the cup formed by the top twist to help catch the sparks.
 [7]
[7]My 2-gallon, galvanized pail holds about two dozen fire starters, if the tops are flattened down and tucked over the starter. My minimal efforts keep that bucket by the wood stove full all year round and through the winter. We even have a few left over for bonfires, camping trips, and to share with the neighbors. The extras I make during late spring and summer are stored in clear plastic shoeboxes in the pantry.
A side benefit I have discovered after I began to use these starters is that I don’t have to split quite as much kindling each year to get the bigger pieces burning into coals. The more coals I get, the bigger pieces of wood I can burn faster and the less often I have to feed the fire. My house stays warm and cozy, and I have even more time to share the stories my grandparents told me with my grandchildren.